You notice something off with your plant. A brown patch on a leaf, a crispy edge, a pale splotch that wasn’t there last week. Your first move is probably to search the symptom and find one answer. The problem is that leaf damage identification doesn’t work that way: a brown spot can mean thrips, sunburn, fertilizer salt buildup, overwatering, or damage from handling at the nursery. Treating the wrong cause does nothing, and sometimes makes things worse.
The good news is that most leaf damage falls into recognizable patterns. Once you know what to look for beyond just the color, you can usually narrow down the cause in a few minutes of careful observation.
Identification Snapshot
Use this as a first-pass visual check before you start treating anything:
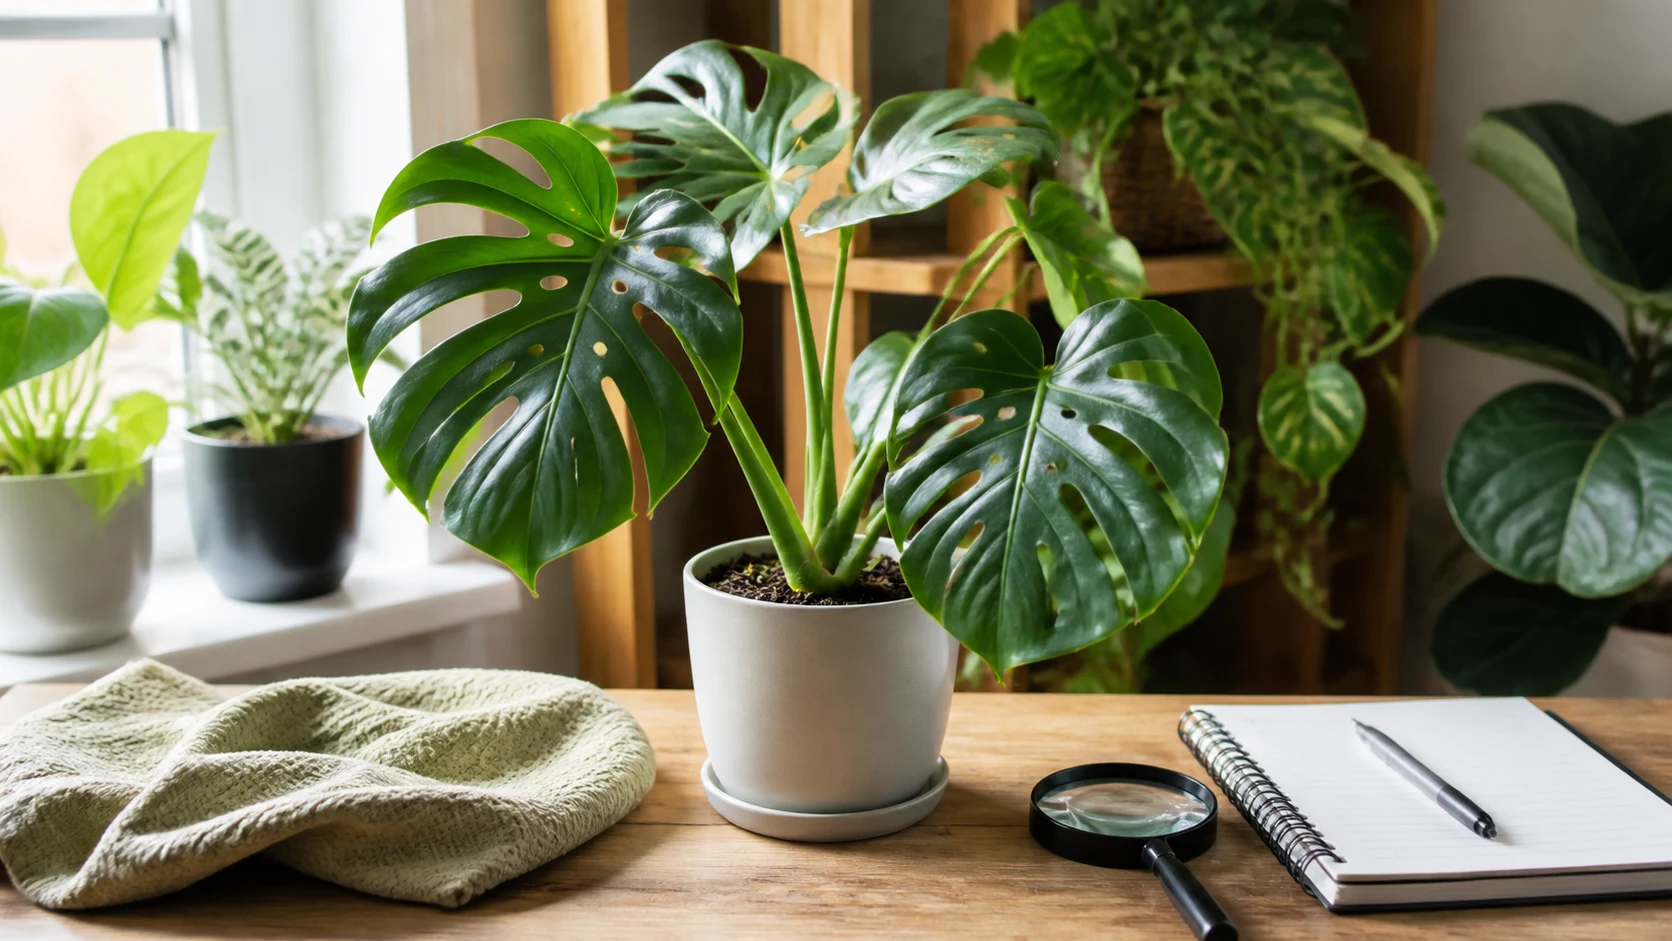
A magnifier and clean reference notes help turn scattered leaf marks into a careful first-pass inspection.
| If you see… | It often points to… | First safe move |
|---|---|---|
| Silvery scarring plus tiny black specks | Thrips or another active pest issue | Isolate, inspect new growth, then use the thrips treatment guide |
| Crispy brown tips or margins on older leaves | Dryness, low humidity, heat exposure, or fertilizer salts | Use the brown tips and spots guide; for spider plant, use the species-specific guide |
| Bleached or papery pale patches on the window-facing side | Sun scorch or sudden light change | Move to indirect light and compare the sunburn guide |
| Soft yellow leaves with limp texture | Overwatering or root stress | Check drainage and the root zone; pothos owners can use the pothos yellow leaves decision tree |
| Wet dark lesions or mushy tissue | Rot, bacterial or fungal trouble | Isolate and route through the plant disease identifier or root rot guide |
| Clean holes or tears with no spread | Natural openings or old mechanical damage | Compare natural, pest, disease, and physical causes in the holes in leaves guide |
This quick snapshot matters because old damage and active damage are not the same problem. A brown edge that has not changed in three weeks is history. Damage that shows up on clean leaves this week is an active signal.
If webbing, frass, sticky residue, or live insects accompany the damage, switch to the houseplant pest identification hub before choosing a treatment.
Not sure what plant you are caring for?
Open KnowYourPlant, snap a photo, and get the plant name plus care notes matched to the species in front of you.
Identify your plantWhat Most Care Guides Miss
Most plant care pages treat leaf damage by color. Brown? Probably watering. Yellow? Overwatering. Pale? Low light. The problem is that color alone is genuinely unreliable as a diagnostic tool, and this is where most people waste time.
According to the UC IPM Pest Notes on Houseplant Problems, a single symptom like brown or scorched leaf tips can be caused by overwatering, excessive soil dryness, fertilizer salt accumulation, low humidity, chilling injury, chemical spray residue, pest activity, or infection. The list is long because the visible result, dead leaf tissue, looks similar regardless of what killed it.
The common misdiagnosis is seeing brown edges and immediately watering more, when the actual cause was fertilizer salt buildup or a heating vent nearby. Adding water does not fix either of those, and it can make both worse. If you are not fully sure which plant group you are troubleshooting, start with the succulent identification guide or another plant ID step before changing treatment, because aloe, haworthia, echeveria, and non-succulent lookalikes can react very differently to the same advice.
The practical first check: Look at the pattern, not just the color. Where on the leaf is the damage? What shape is it? Is it dry and papery or soft and wet? Is it on old leaves or new ones? Is it spreading or stable? Those five questions tell you more than color alone ever will.
Want a care schedule you do not have to remember?
KnowYourPlant sends watering, feeding, repotting, and seasonal reminders based on the plants you actually own.
Get care remindersStart With the Pattern, Not the Color
A useful frame: leaf damage shows you where the stress is coming from. Edges and tips usually signal a watering or environmental problem. Patches in the middle of the leaf often suggest pests or disease. Bleached areas point to light intensity. Soft, spreading yellowing usually starts at the root level before it becomes visible on leaves.
That’s the diagnostic skeleton. Everything else is detail.
The other thing worth knowing before you start is that old damage and active damage are not the same problem. A brown edge that’s been sitting there unchanged for three weeks is a record of past stress. Damage that appears on leaves that were clean last week is happening right now. One needs monitoring, the other needs attention.
Save this plant plan before you forget the details.
Keep the plant, diagnosis notes, reminders, and care changes in KnowYourPlant so the next decision is based on your actual plant history.
Open KnowYourPlantLookalikes and Confused-With Cases
A lot of plant owners end up stuck between two similar-looking possibilities. These are the most common mix-ups.
| You might think it is… | But it is often confused with… | What separates them |
|---|---|---|
| Thrips | Sunburn | Thrips usually leave rough silvering plus black specks and often hit new growth; sunburn makes papery pale patches after a light change |
| Thrips | Mechanical scarring | Pest damage keeps appearing on clean tissue; old scuffs and transit damage stay put |
| Overwatering | Underwatering | Overwatering usually gives soft yellowing and slow root decline; underwatering tends to feel dry, thin, and crispy |
| Leaf spot disease | Spray injury or fertilizer splash | Disease tends to spread or form multiple lesions; spray injury often matches where product hit the leaf |
| Root trouble | Low humidity | Root trouble usually affects whole-leaf turgor and older leaves first; low humidity usually starts with margins and tips |
If two explanations still seem possible, wait for one more round of evidence before treating aggressively. Stable marks point toward old damage or environment. Fresh spread points toward an active problem.
Leaf Damage Identification Chart
Crispy Brown Edges and Tips
The leaf margin is turning dry and papery, either at the very tip or along the sides, while the rest of the leaf looks normal. The damage isn’t spreading further into the leaf tissue.
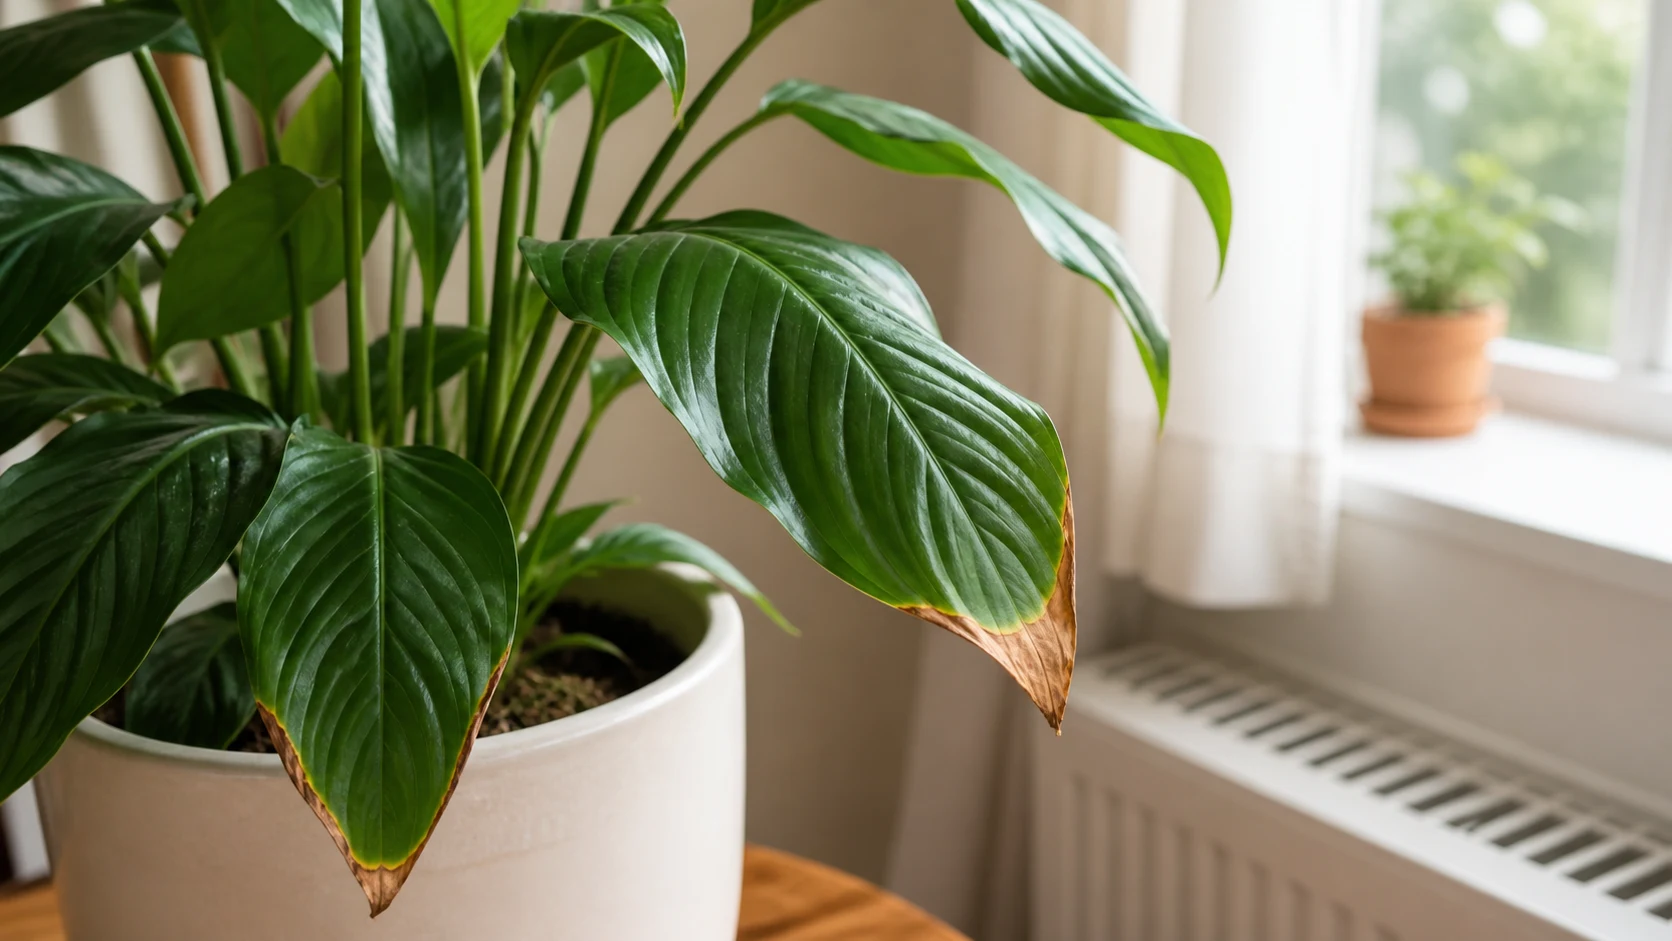
Dry, papery peace-lily tips beside a radiator point to environmental stress rather than spreading leaf disease.
Utah State University Extension describes this pattern as a response to environmental stress: drought stress, intense sunlight, heat, wind, or nutrient irregularities can all cause necrotic margins. For indoor plants, the most common culprits are low humidity, drying out too much between waterings, sitting too close to a heating vent, or fertilizer salt buildup from repeated fertilizing without flushing the soil.
First check: Feel the soil a few centimeters down. Check for air vents or radiators nearby. If you fertilize regularly, consider whether the soil has been flushed recently. This type of damage doesn’t recover, but it stops spreading once you fix the underlying cause.
See also: Why Plant Leaves Are Turning Brown for a full breakdown by plant type.
Bleached, Pale, or Papery Patches
A section of the leaf looks washed out, almost colorless or silver-white, with a papery dry texture. The edges of the affected area are often irregular rather than a clean margin.
Sudden intense light exposure is the most common cause for indoor plants. A plant moved from a lower-light spot to a bright south-facing window, or placed where afternoon sun hits directly, can scorch within hours. According to Utah State University Extension, this is a classic leaf scorch response: the cells exposed to high light intensity die rapidly, leaving behind bleached, collapsed tissue.
The key question: Did the plant recently move, or did the season change so a window that was indirect is now getting direct afternoon sun? If yes, this is likely sunburn. If the plant hasn’t moved and wasn’t near strong light, keep reading, because a similar-looking silvery shimmer can be pest damage and the distinction matters.
See also: Plant Sunburn Symptoms and Fix for which plants are most vulnerable and how to reposition them safely.
Silvery Marks With Tiny Dark Specks
Irregular silvery or off-white patches with a faint shimmer, sometimes paired with tiny black dots on the leaf surface. The texture feels slightly rough or scarred. This pattern looks similar to sunburn bleaching at a glance, but the dark specks are the diagnostic difference.
This is the classic thrips presentation. Colorado State University Extension describes thrips as minute insects usually recognized by light, irregular silvery leaf areas and tiny dark excrement spots. The Royal Horticultural Society confirms the same pattern: silvery-white discoloration paired with black fecal spots, with distorted growth often appearing on developing leaf tissue because thrips concentrate on young, tender leaves.
The inspection sequence: Flip the leaf over and examine the underside carefully. Check the newest leaves and growing tip. Look for very small, thin insects, about 1 mm long, yellowish or dark. If you see dark specks without visible insects, that doesn’t rule out thrips. Colorado State University Extension notes that management is difficult precisely because eggs are inserted directly into plant tissue and some larval stages occur in the soil, so adults are often the last thing you spot. Check again in a few days. If damage is spreading to clean leaves, especially new growth, treat for thrips.
If you’re not sure what you’re dealing with, the inspection technique for tiny pest identification covered in How to Get Rid of Spider Mites transfers directly to thrips checks.
Soft Yellow Leaves
The leaf is yellowing and feels soft or limp rather than dry and crispy. This is often the most misread pattern because both overwatering and underwatering can produce yellowing, and the treatments are opposite.
A useful split: yellowing that starts at the bottom of the plant and moves upward is a strong overwatering or root health signal. The soil is likely staying wet too long between waterings, roots aren’t getting enough oxygen, or drainage is insufficient. The plant is dropping older leaves because they’re not supported by a struggling root system.
Yellowing that’s more scattered, affecting leaves that recently looked healthy across different parts of the plant, with soil that feels consistently dry, points more toward underwatering or environmental stress.
For a full decision tree on this symptom, Why Are Plant Leaves Turning Yellow covers the most common causes with context checks for each.
Wet, Dark, or Mushy Lesions
Dark, water-soaked-looking patches that may feel soft when pressed. These can appear on the stem near the soil line too, not just on the leaf surface.
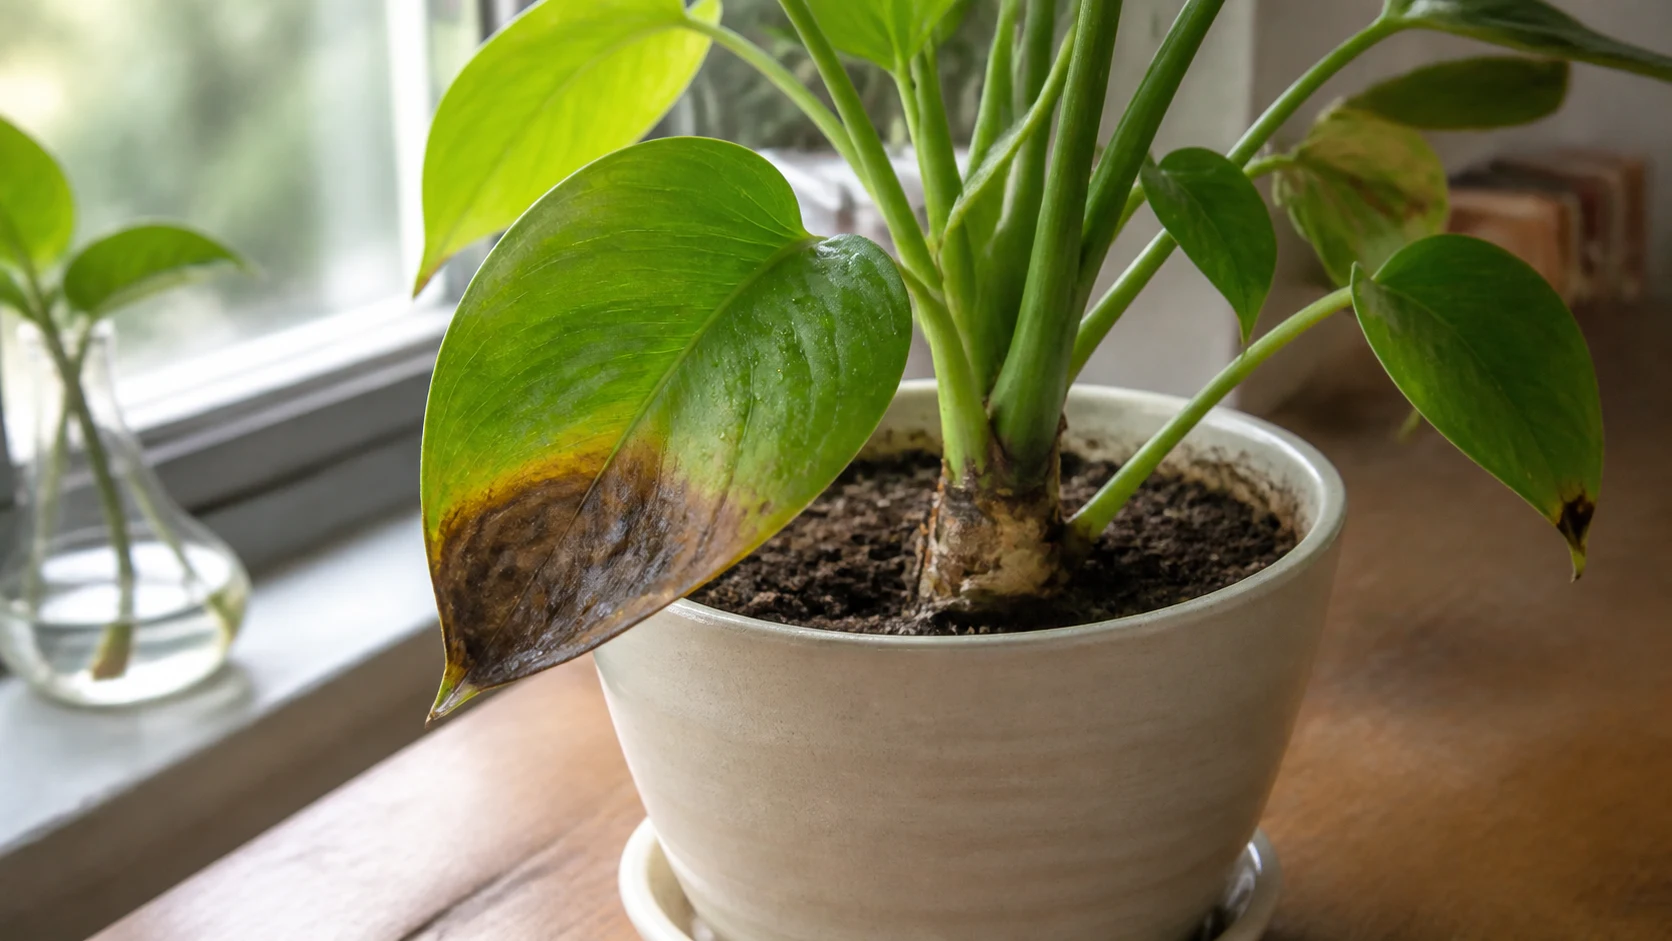
A water-soaked leaf patch paired with darkening at the stem base is a reason to inspect the root zone promptly.
This is the pattern that warrants the most urgency. Bacterial or fungal infections can spread rapidly, and if the stem base is involved, root rot may already be present. Gently press the affected tissue: if it’s mushy rather than just discolored, the cells have already collapsed. Check the stem at soil level. If it’s soft, dark, or smells off, you’re likely dealing with root rot in addition to the leaf lesion.
This is different from normal yellowing because the tissue looks actively rotted rather than pale or dry. Root Rot Treatment Guide covers the steps for assessing how far damage has progressed and what’s worth saving.
Holes and Tears
Clean-edged holes in the middle of leaves, without surrounding discoloration or spreading marks, are often mechanical. Handling during transit, bumping against furniture, or contact with a sharp object can leave holes that look alarming but mean nothing ongoing.
The distinguishing factor is that mechanical holes don’t spread, don’t have discolored borders, and appear without any other symptom pattern. If holes are ragged, paired with fine webbing or silvery marks, or appear on a plant that was previously clean, that changes the picture. The plant-with-holes-in-leaves guide compares natural openings, old scars, shot-hole lesions, and active feeding side by side.
Distorted or Stunted New Growth
New leaves come out twisted, smaller than expected, pale, or fail to unfurl properly. This is one of the more serious patterns because it means whatever is affecting the plant is active right now, not a record of past stress.
The Royal Horticultural Society notes that thrips can cause distorted growth on developing tissues, and that some thrips species can transmit plant viruses, which would produce persistent distortion across multiple leaf generations. Aphids cause a similar distortion pattern. Severe humidity swings can also cause abnormal unfurling, particularly in plants like calathea or monstera where new leaves emerge rolled.
If several new leaves in a row look wrong, inspect the growing tip under good light and check for insects before adjusting care.
Damage Comparison at a Glance
| Pattern | Texture | Location | Spreading? | First Check |
|---|---|---|---|---|
| Crispy brown edges | Dry, papery | Margins and tips | Stable once cause fixed | Humidity, vents, soil salts |
| Bleached pale patches | Papery, dry | Middle or anywhere sun hits | Stable | Recent light change or season shift |
| Silvery + black specks | Rough, scarred | Anywhere, often new growth | Active | Flip leaf, check dark specks, inspect new growth |
| Soft yellow | Limp, soft | Bottom-up or scattered | May spread | Soil moisture depth, root health |
| Wet dark lesion | Mushy | Anywhere, watch stem base | Active | Stem firmness, smell, drainage |
| Holes and tears | Clean edges | Middle of leaf | Stable | Handling, transit, mechanical cause |
| Distorted new growth | Twisted, small | New leaves only | Active | Growing tip inspection for pests |
Decision Tree: Isolate, Inspect, Adjust, or Wait
- Is the damage spreading onto clean leaves or new growth? If yes, treat this as active and move to inspection.
- Do you see black specks, webbing, sticky residue, or visible insects? If yes, isolate now and check nearby plants.
- Is the tissue wet or mushy? If yes, inspect the stem base and roots before you water again.
- Did the plant recently move into stronger sun or near heat? If yes, correct placement before changing anything else.
- Is the mark old and stable with no new symptoms after a week? If yes, monitor. Cosmetic damage does not need treatment.
What Real Plant Owners Keep Confusing
In r/plantclinic discussions, the repeated confusion is not just “What is this?” It is “Please tell me this is watering and not thrips.” People repeatedly post brown spots, tiny holes, pale patches, or black dots after a new purchase, repot, or light change and struggle to tell whether they are looking at pests, sunburn, or old handling damage.
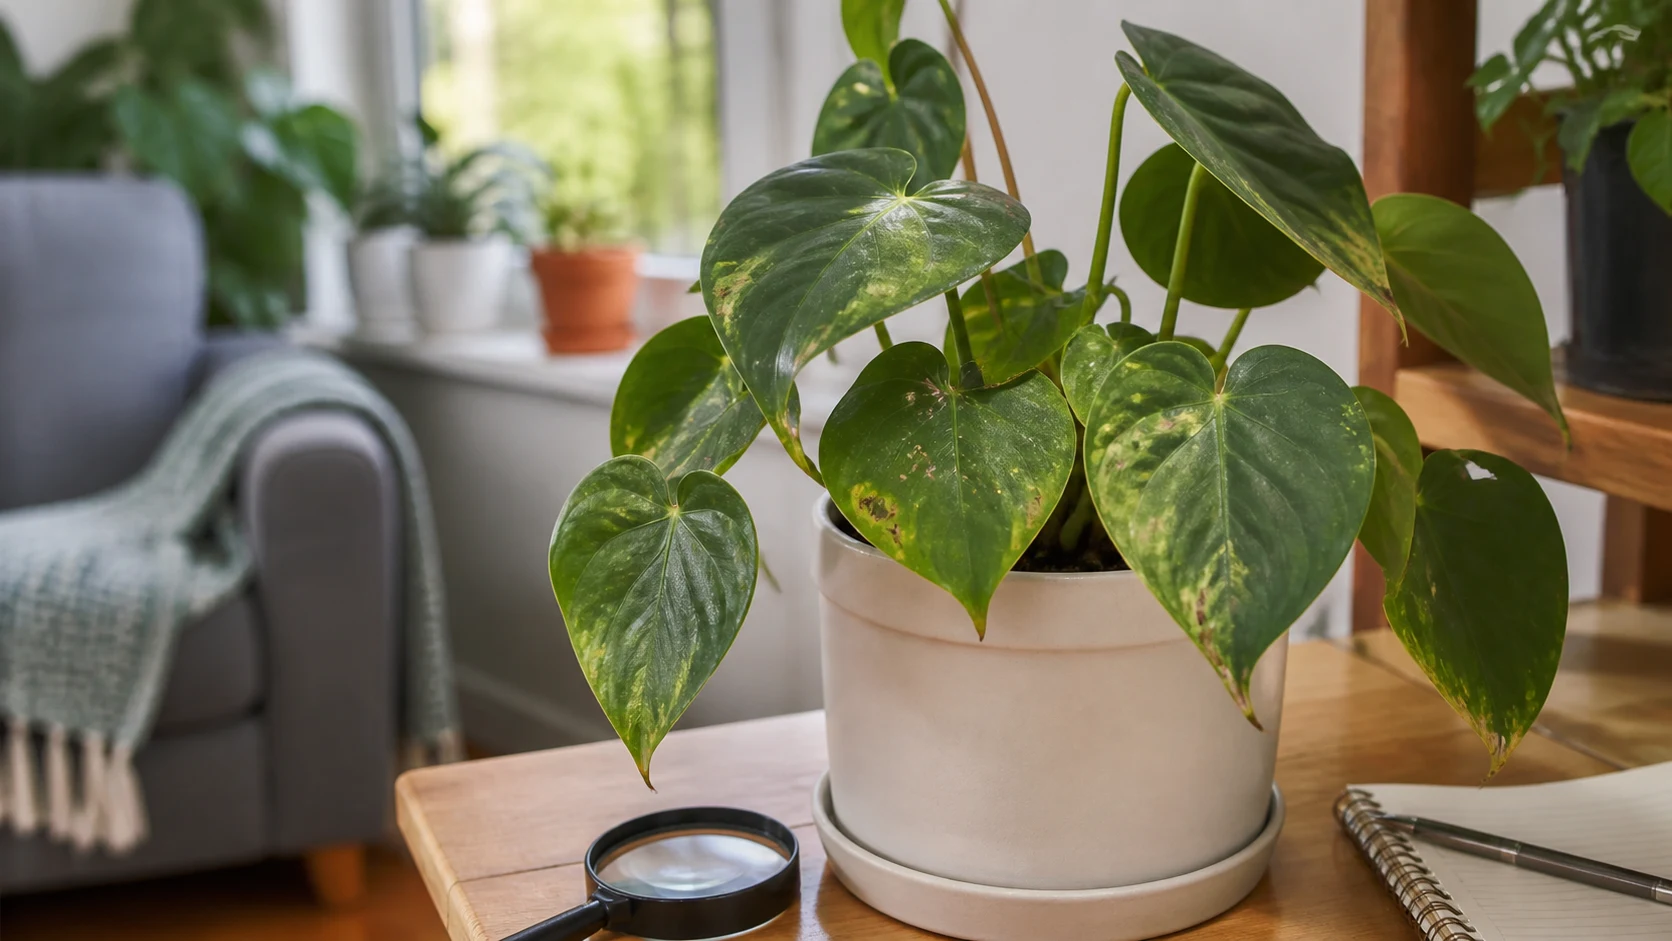
Mixed mottling, small scars, and brown marks are easier to compare when you inspect the whole plant instead of guessing from one color.
The recurring patterns from those threads are useful:
- black specks create outsized anxiety because owners hear they can mean thrips even when they cannot find adult insects
- recent repotting or a brighter window often makes people blame the wrong thing first
- many owners hope the answer is watering because pest treatment feels heavier and more disruptive than a care correction
- old scars and active spread get conflated, which is why plants are often overtreated
Treat this section as qualitative signal, not proof. The value is that it shows where people most often misread otherwise good plant-care advice.
Expert note: Extension guidance is most useful when you use it as a filter, not a label. UC IPM helps rule in or rule out whole buckets of causes, while Colorado State University Extension and the Royal Horticultural Society help you distinguish classic thrips patterns from lookalikes. That is why the safest first move is observation plus isolation thresholds, not immediate spraying.
Old Damage vs. Active Damage
This is the most practically useful distinction to make, and most articles skip it entirely.
Old damage stays stable. It doesn’t change shape, doesn’t spread to new areas, and the rest of the plant looks fine. A brown edge that’s been there for three weeks and hasn’t grown is cosmetic. The plant has already moved past it.
Active damage spreads. It appears on leaves that were clean last week. It shows up on new growth. Multiple leaves are affected in rapid succession. The pattern changes when you check again after a few days.
If the damage is old and stable, you can monitor without treating. Removing the marked leaves doesn’t help the plant: the leaf is still doing photosynthetic work, and the brown edge doesn’t bother it. If the damage is new and spreading, something needs attention.
One practical approach is to mark the edge of a damaged area with a small piece of tape or a light pencil mark on the pot, then check again in five to seven days. If the mark hasn’t moved and no new leaves are affected, you’re dealing with history, not an emergency.
When to Isolate the Plant
Move the plant away from your other plants when you see any of these:
- damage actively appearing on new growth that was clean before
- live insects or dark specks, possible thrips excrement, visible on the leaf surface
- webbing on stems or undersides, often spider mites
- sticky residue on leaves or nearby surfaces, often aphids, scale, or mealybugs
- several nearby plants showing the same pattern around the same time
You do not need to isolate for old, stable marks or for crispy tips that haven’t changed in weeks. Isolation is about protecting your other plants while you confirm whether something is actively spreading, not about quarantining every imperfect leaf.
Care Cards for the First Safe Response
Care card: crispy tips and margins
- Check moisture deeper than the surface before watering.
- Flush accumulated fertilizer salts if feeding has been frequent.
- Move the plant away from heaters, AC blasts, or intense dry air.
Care card: pale or bleached patches
- Shift to bright indirect light.
- Do not cut the leaf just because it looks ugly.
- Watch whether new leaves stay clean in the new location.
Care card: silvery damage with black specks
- Isolate first.
- Inspect undersides, petioles, and the newest leaves.
- Recheck in a few days before assuming the problem is solved.
Care card: soft yellowing or limp leaves
- Pause watering until you know how wet the root zone actually is.
- Check drainage and pot size.
- If the soil stays soggy, inspect roots before adding fertilizer.
Care card: wet lesions or mushy tissue
- Remove obviously collapsing tissue with clean tools.
- Improve airflow and keep water off the leaves.
- Inspect the crown, stem base, and roots right away.
Plant ID + Plant Doctor
Not sure what your plant needs?
Snap a photo in KnowYourPlant to identify the plant, check yellow leaves, spots, wilting, or pests, and get a calm next step before the problem spreads.
Common Problems Behind Leaf Damage
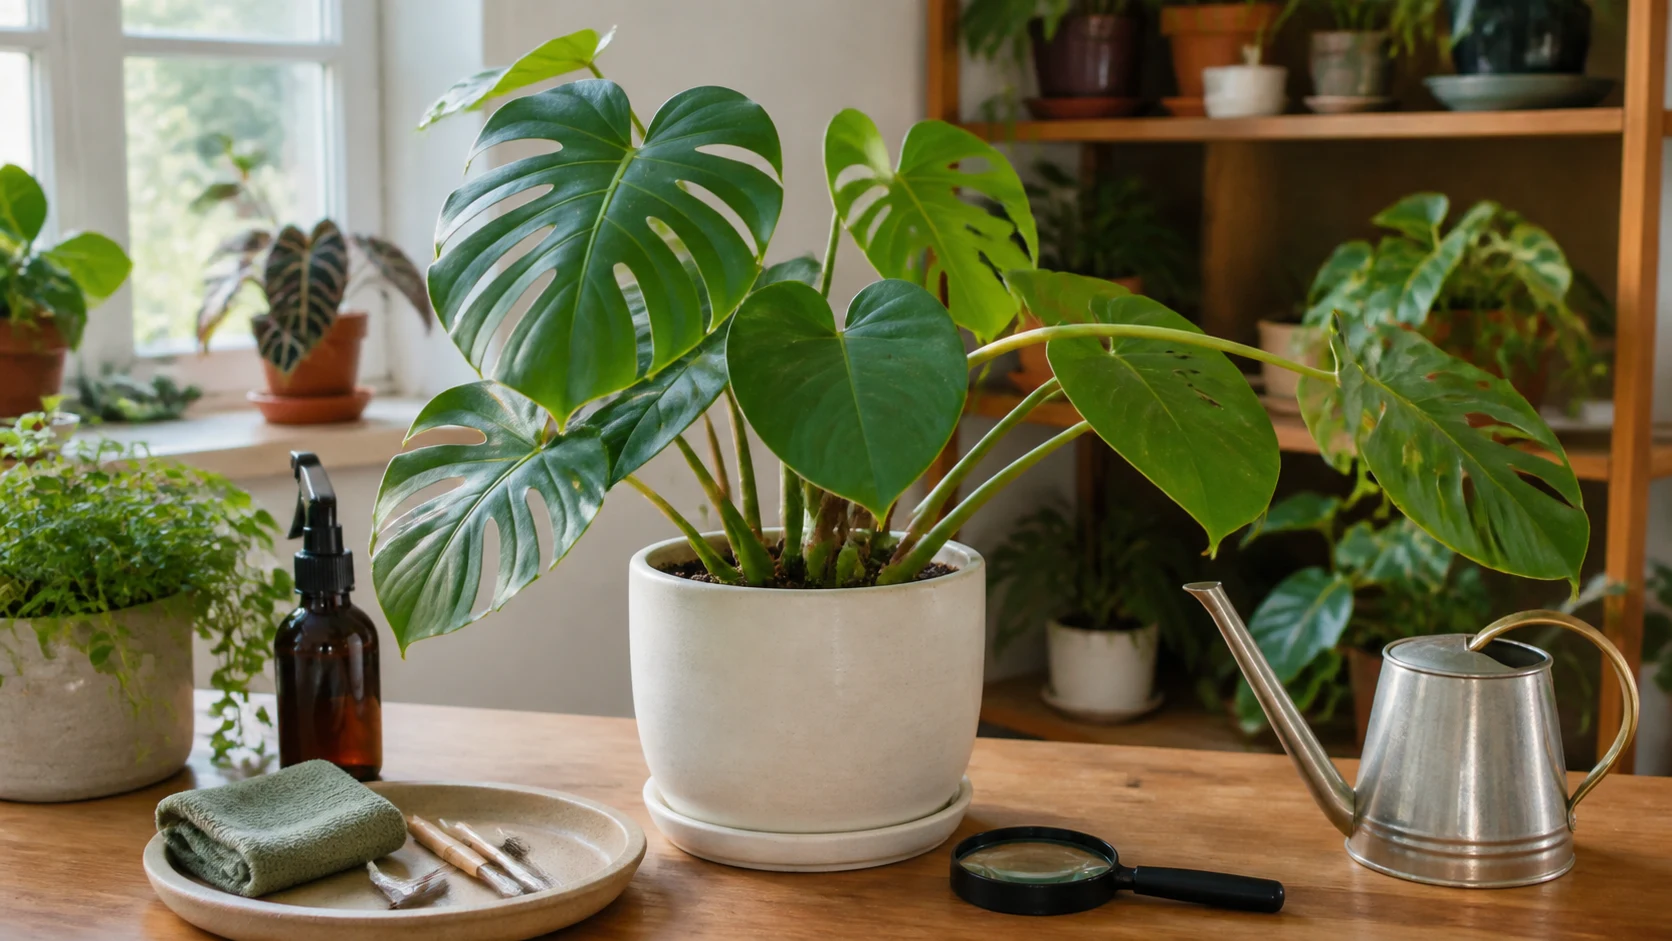
Comparing fresh scars, yellow-brown spotting, and healthy tissue helps narrow the problem before choosing a response.
| Common problem | Clue pattern | First safe action |
|---|---|---|
| Thrips | Silvered scarring, black specks, damaged new growth | Isolate and inspect repeatedly |
| Spider mites | Fine stippling or bronzing plus webbing | Isolate and inspect undersides |
| Sun scorch | Pale papery patch after light shift | Move out of direct sun |
| Fertilizer salt buildup | Brown tips with recent feeding history | Flush soil and slow feeding |
| Overwatering or root stress | Soft yellow leaves, soggy mix, slow drying | Check drainage and roots |
| Dry air or underwatering | Crispy edges, dry mix, fast soil drying | Reset watering rhythm and humidity |
| Bacterial or fungal trouble | Wet or mushy lesions, spread over time | Isolate and remove collapsing tissue |
| Mechanical damage | Clean tears or holes with no spread | Monitor only |
Common Mistakes When Reading Leaf Damage
Treating every brown spot the same way. A brown edge from low humidity and a brown mushy lesion from bacterial infection need completely different responses. The texture and location matter as much as the color.
Watering more when leaves look stressed. More water is not a universal fix. If the damage is from overwatering, fertilizer salts, or root rot, adding water makes it worse. Check the soil and root health before adjusting water.
Removing all the damaged leaves immediately. Leaves with old, stable damage are still contributing to the plant’s energy. Remove them only when they’re fully dead or when they show actively spreading wet lesions.
Panicking about thrips without confirming. Silvery marks cause a lot of anxiety because thrips are genuinely hard to treat. But light bleaching from sun exposure and mechanical scarring from handling can look nearly identical. Confirm the black specks and check new growth before starting a treatment protocol.
Treating one plant without checking the others. If one plant has thrips or spider mites, check everything nearby, not just the plants that are touching. Thrips especially can spread through air movement.
Giving up on a plant because of cosmetic damage. A leaf with a crispy edge or a pale patch is still a functioning leaf. Plants with stable old damage on a few leaves are not in crisis. Focus on whether new growth looks healthy, not on whether every existing leaf looks perfect.
Pet Safety Note
Leaf damage itself does not tell you whether a plant is pet-safe. A chewed leaf can be mechanical damage, not a toxicity clue. If you are treating for pests, keep cats and dogs away from sprays, wipes, sticky traps, and recently treated foliage until labels say the plant is safe to re-enter. If a pet has chewed an unknown plant, identify the plant first, then check the plant’s toxicity separately from the damage pattern.
A Note on Seasonal Timing
Summer and early autumn tend to bring the most pest pressure indoors, particularly thrips and spider mites, partly because they hitchhike on plants that spent time outside. A plant that looked healthy on the patio can introduce pests when brought back inside in September. This is also when humidity drops in air-conditioned rooms, which stresses plants and makes them more susceptible to both pests and environmental damage.
If you’re troubleshooting in late summer or early autumn and the damage looks recent and spreading, pests are worth ruling out first even if the pattern isn’t perfectly clear yet. Conversely, if you’re troubleshooting in winter and the damage is crispy tips on plants near radiators, the cause is almost certainly environmental rather than biological.
Real User FAQ
How do I tell if brown spots are from pests or something else?
Look at the texture and location, not just the color. Pest damage from thrips leaves a rough, silvery, or scarred texture paired with tiny black specks, excrement. It tends to concentrate on new leaves and the underside of leaves. Environmental brown spots from sunburn or fertilizer salts tend to appear at the edges and tips, with a dry, papery texture and a clean boundary. If you press the spot and it feels mushy, that’s a different category altogether: likely disease or rot.
Should I cut off damaged leaves?
Only if the leaf is fully dead or if the damage is actively wet and spreading, like lesions or rot. Old, stable brown edges or crispy tips do not need to come off. The leaf is still doing photosynthetic work, and removing it doesn’t help the plant recover. If a leaf is more than two-thirds damaged and looks like it’s dying regardless, removing it makes sense.
What does thrips damage look like on indoor plants?
Thrips leave irregular silvery or pale patches with a faintly rough or scarred texture, paired with tiny black dots. Colorado State University Extension describes this as light irregular silvery leaf areas and tiny dark excrement spots. The damage often concentrates on new leaves and the growing tip because thrips prefer tender tissue. Flip the leaf and look for small, thin insects about 1 mm long. If you don’t see adults, you may still have thrips because eggs are laid inside leaf tissue and some life stages occur in the soil.
My plant has holes in the leaves. Is it pests?
Not necessarily. Clean-edged holes without surrounding discoloration are usually mechanical: handling damage from the nursery, transit, or contact with furniture. Pest-related holes tend to have a more ragged edge, may be paired with silvery marks or webbing, and usually come with other symptoms. If the holes are new and spreading and other leaves are developing marks, inspect for pests. If the holes are old and stable on otherwise healthy leaves, it’s likely not an active problem.
Can overwatering cause brown spots or patches?
Yes, but the texture is different from environmental brown tips. Overwatering damage, or more precisely root health damage from waterlogged soil, tends to show up as soft, yellow, or limp leaves rather than crispy brown edges. If the soil is consistently wet and the leaves are soft and yellowing, especially from the bottom of the plant upward, root health is worth checking. Root Rot Treatment Guide covers what to look for when you unpot.
What does sunburn look like on houseplants?
A bleached, pale, or whitish patch with a papery dry texture. The boundary is usually irregular rather than a clean line. It most commonly appears on the part of the leaf that was closest to the window or in the path of direct sun. It does not spread: once the light is corrected, the bleached area stays but no new damage appears. Plant Sunburn Symptoms and Fix covers which plants are most vulnerable and how to move them safely.
How do I know if my plant needs to be isolated?
Isolate when you see damage actively appearing on new growth, visible insects or black specks on the leaf surface, webbing on stems or undersides, sticky residue on leaves, or when multiple nearby plants are showing the same pattern simultaneously. Stable old marks, brown tips that haven’t changed in weeks, or holes from handling do not require isolation.
My plant has both yellow leaves and brown tips. What does that mean?
Multiple symptoms at once often point to a care imbalance that’s been building for a while rather than a single acute cause. Yellow soft leaves paired with brown tips can happen when a plant is both overwatered, causing root stress and yellowing, and sitting in low humidity, causing tip browning. Check root health first by lifting the plant and checking soil moisture several inches down, then address humidity and airflow. How Often to Water Indoor Plants can help you reset your watering rhythm.
Methodology and Freshness
This guide was refreshed in June 2026 using a live review of current search results for leaf damage identification and related queries, plus recurring confusion patterns surfaced in public r/plantclinic discussions. Those community posts were used as qualitative signal only. Diagnostic claims were checked against UC IPM, Colorado State University Extension, the Royal Horticultural Society, and Utah State University Extension. The goal was not to guess a single cause from color alone, but to build a safer first-pass workflow for indoor plant owners.
A current digital review, clean notes, and direct inspection keep leaf-damage guidance grounded in evidence rather than color alone.
Sources reviewed in June 2026: UC IPM Pest Notes, Houseplant Problems; Colorado State University Extension, Managing Houseplant Pests; Royal Horticultural Society, Thrips; Utah State University Extension, Leaf Scorch. The identification-chart heading and search presentation were updated in September 2026 by the KnowYourPlant editorial team.