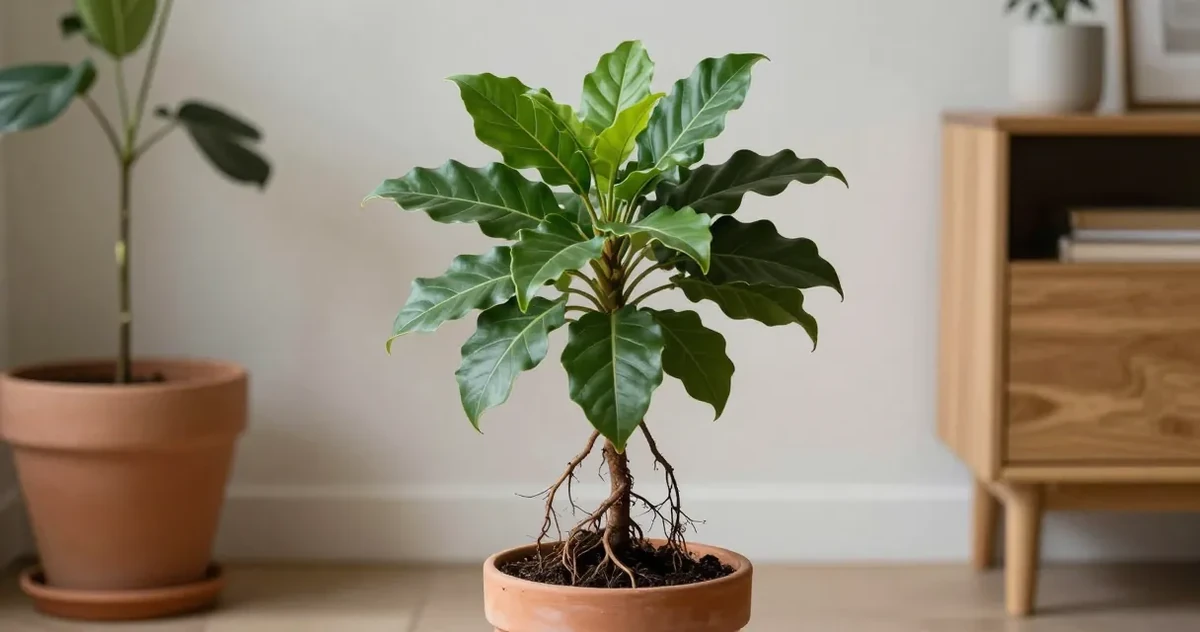
The plant looks like it’s wilting. You check the soil and it’s damp. You water it anyway because it looks thirsty, and a few days later it looks worse. You Google “yellow leaves” and “drooping plant” and get a hundred different answers. Eventually someone mentions root rot and now you’re not sure if your plant is dying or if you just need to back off the watering.
This is the exact loop root rot pulls you into. It mimics underwatering so convincingly that most people make it worse before they realize what’s actually happening.
The good news: root rot is one of the more fixable plant problems when you catch it in time. This guide covers what it actually looks like, how to confirm it without guessing, and exactly how to treat it, including the honest answer about fungicide and why it’s usually the wrong thing to reach for first. If rot is only one possibility among leaf spots, mildew, and repeating wilt, start with the broader houseplant diseases guide to separate infectious disease from environmental stress.
What Most Guides Miss
Most root rot guides tell you the cause before they force you to verify the pattern.
That is why people keep making the same mistake. A wilted plant in wet soil looks thirsty, so they water again before checking whether the roots can still move moisture at all.
This guide treats root rot as a diagnosis problem first. Before you change the pot, add peroxide, or blame fertilizer, confirm three things together: how wet the soil still is, whether the stem base is firm, and whether the roots smell clean or sour. That sequence catches the most common false move early.
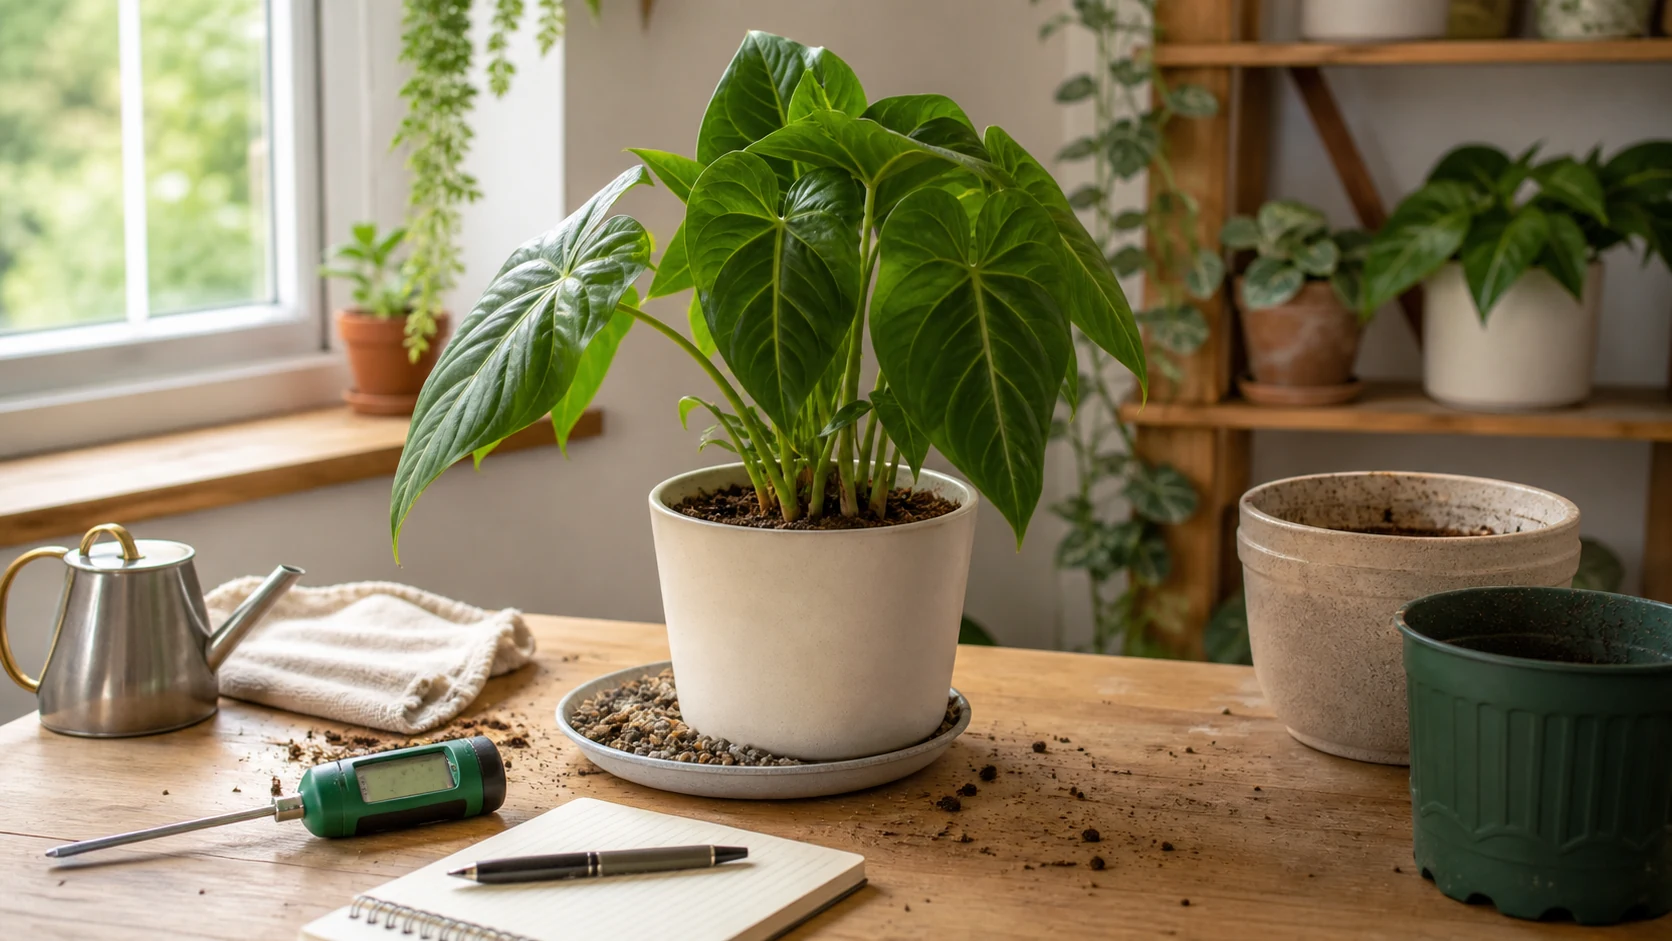
Checking and recording root-zone moisture before reaching for the watering can keeps a convincing wilt from triggering the wrong response.
What To Check Before You Change Care
The most common misdiagnosis is treating a drooping plant in wet soil like an underwatered plant. Generic advice like “just water less” or “repot right away” is incomplete because root rot and thirst can look almost identical above the soil.
Before you do anything else, check these three things together:
- Is the soil still wet a couple of inches down?
- Does the stem at soil level feel firm or soft?
- If you slide the plant out, do the roots smell clean or sour?
That quick sequence tells you much more than the leaves alone. A wilted plant in wet soil is not asking for more water. She is asking you to check whether the roots can still use the water already there.
Symptom Diagnosis Card
Start with the pattern, not the first fix you remember. For houseplant root rot, the wrong treatment can make the plant worse because water, light, pests, and root stress can produce similar-looking decline.
| What you see | Check first | Next move |
|---|---|---|
| Mushy brown roots and sour smell | Active root rot | Trim rot, clean pot, repot into fresh airy mix |
| Wet soil but drooping leaves | Roots cannot move water | Stop watering and inspect root health |
| Dry soil plus dead roots | Drought-damaged roots later rotting after watering | Remove dead roots and restart with smaller, airy pot |
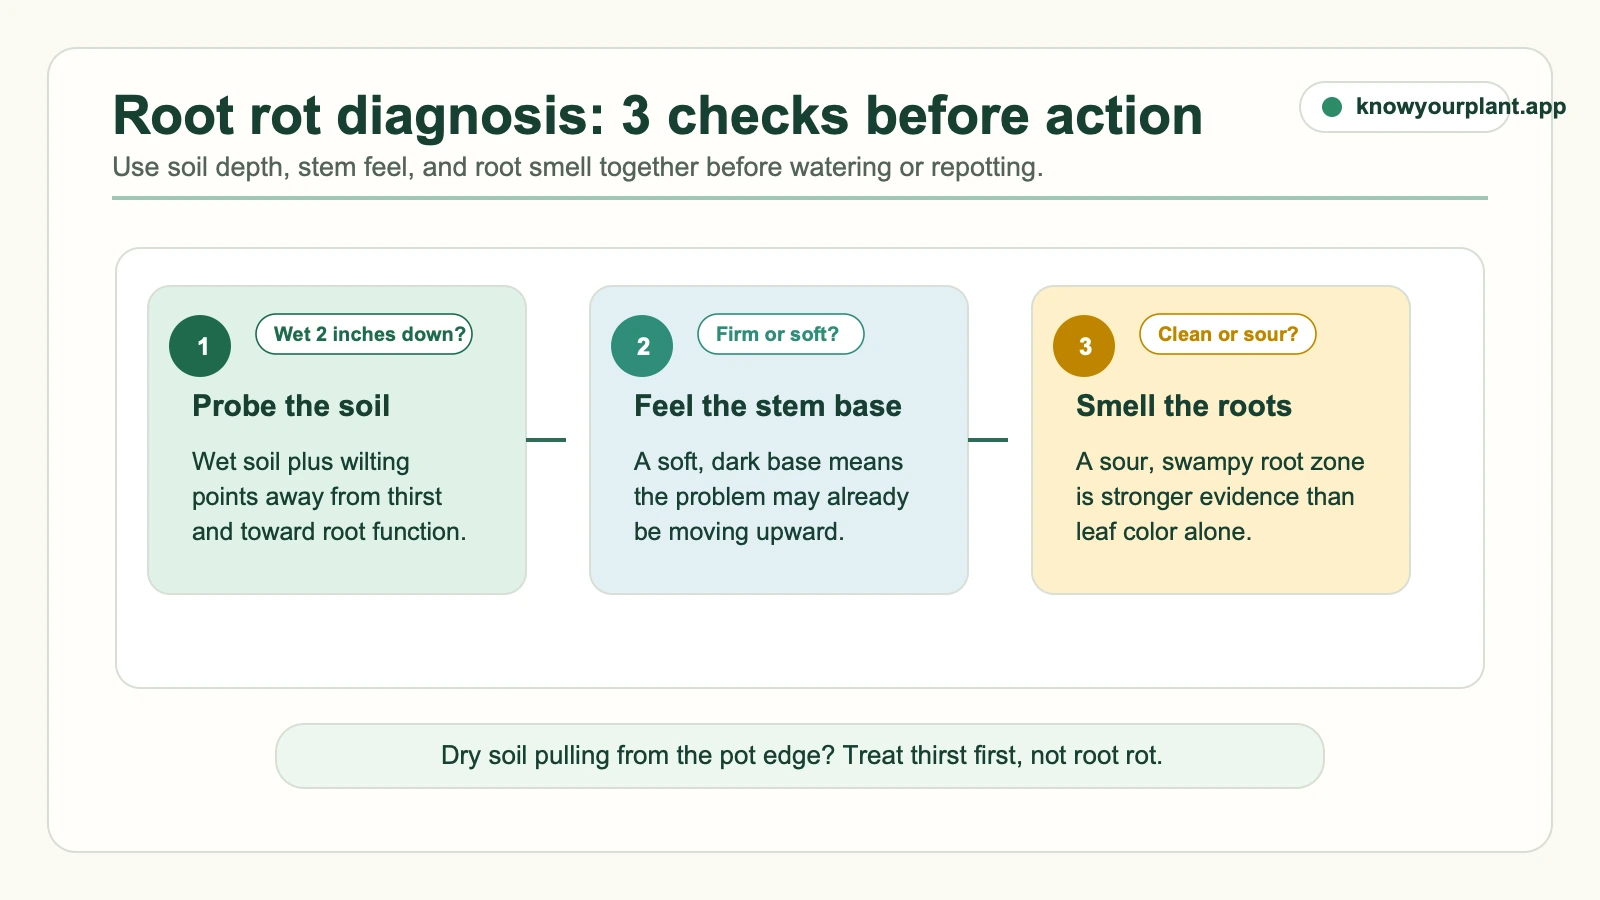
Check soil, stem, and smell together before choosing between waiting, watering, or unpotting for a root inspection.
Decision Tree
- Check whether the newest growth, oldest leaves, soil surface, root zone, or leaf undersides changed first.
- If the soil or roots are involved, fix drainage and watering rhythm before adding fertilizer or sprays.
- If pests are visible, isolate the plant and treat the pest life cycle, not just the visible damage.
- If the problem followed a move, repot, heat wave, grow light change, or winter heating, treat it as stress until the evidence says otherwise.
- Make one change, then observe for 7 to 14 days unless the plant has active rot or a spreading pest infestation.
Common Mistakes
- Watering again because leaves look thirsty while the root zone is already wet.
- Treating every brown or yellow mark as a nutrient deficiency.
- Spraying before checking leaf undersides, soil moisture, roots, and nearby plants.
- Repotting into a much larger pot, which can keep the root zone wet longer.
- Expecting damaged leaves to turn green again; recovery usually shows in new growth.
Seasonal Note
In winter or in air-conditioned rooms, growth slows and soil stays wet longer. In summer, brighter windows and faster drying can make the same care routine behave differently. Re-check light, watering interval, and humidity whenever the season or room conditions change.
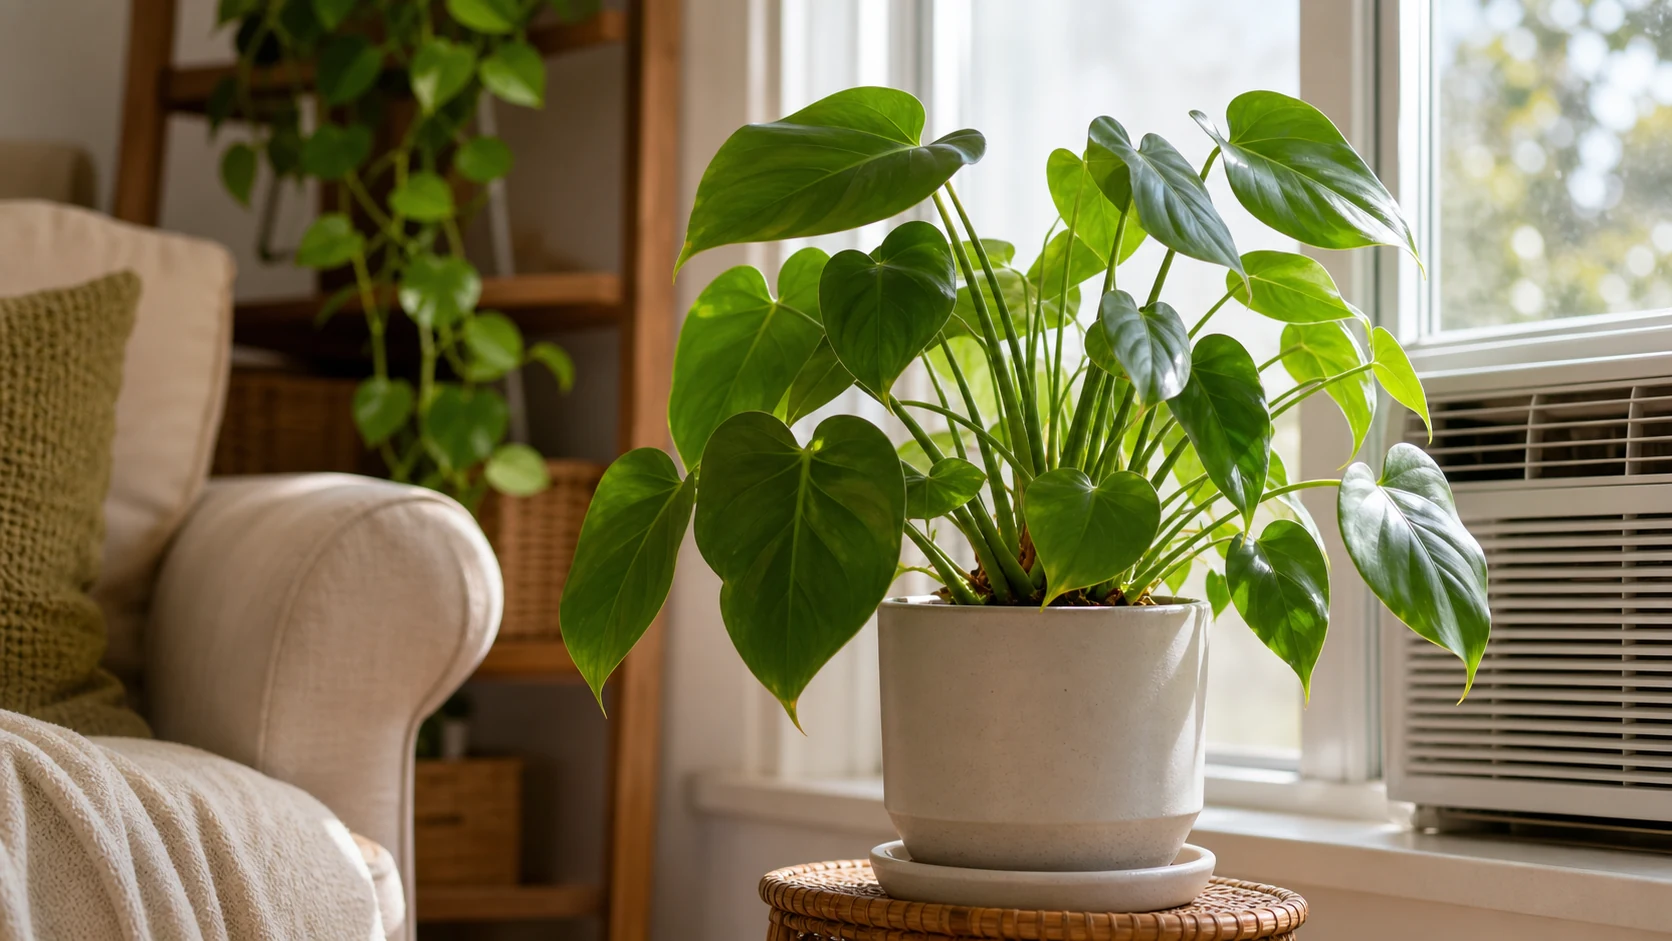
A houseplant beside a window air conditioner shows why cooler room conditions call for a slower watering rhythm.
Freshness Note
Last reviewed against the current remediation source layer in May 2026. Re-check extension guidance and your plant’s actual growing conditions if you are reading this much later, because seasonal context and indoor setup can change what the right next step looks like.
Expert Note: Source Layer
The practical checks above are grounded in extension and safety sources, then cross-checked against qualitative plant-owner confusion patterns from forums:
- University of Maryland Extension root rots of indoor plants
- Colorado State University Extension managing houseplant pests and cultural controls
- Ask Extension fiddle leaf fig drainage/root rot answer
Methodology Note
This remediation section was built from the Research Pack for root-rot-treatment-guide. Social/forum patterns are used only as qualitative signals about confusion and decision points. Treatment and safety claims are anchored to extension or poison-control style sources where available.
Social Listening: What Plant Owners Keep Getting Stuck On
The Research Pack surfaced three repeat worries that most generic root rot articles skip:
- people confuse overwatering symptoms with underwatering because damaged roots cannot move water even when the soil is still wet,
- people start wondering whether the problem is bigger than one watering mistake when several plants seem off at once,
- and people worry about spread through reused soil or pots, especially after one plant crashes quickly.
That is why this guide keeps pushing you back to the same first check: soil moisture plus root condition plus smell. It is also why the treatment section covers pot cleaning, soil replacement, and when to be cautious about nearby plants instead of treating root rot like a one-step watering correction.
Editorial Scope and Accountability
Author: KnowYourPlant editorial team
Editor: KnowYourPlant editorial desk
Last updated: May 2026
Review status: Editorial review pending final publish check
Scope limit: This guide is for diagnosing and treating root rot in common houseplants. It does not replace species-specific emergency care, lab testing, or veterinary advice for pets that may have chewed the plant or contaminated soil.
What Is Root Rot?
Root rot is the breakdown of a plant’s root system, almost always triggered by roots sitting in waterlogged soil for too long. When soil stays saturated, oxygen gets pushed out. Roots begin to suffocate. Fungal pathogens, primarily water molds from the Pythium and Phytophthora families, move into the dying tissue and accelerate the damage.
The simplest way to understand it: root rot is what happens when roots slowly drown.
Healthy roots absorb water and nutrients and send them up to the leaves. Rotting roots can’t do any of that. So even when there’s moisture in the soil, a plant with root rot is effectively dying of thirst. There’s plenty of water present, but nothing functional to take it in.
NC State University Extension lists overwatering as the single leading cause of houseplant death, and notes that anaerobic (oxygen-depleted) conditions in saturated soil can begin to damage root tissue within 24 to 48 hours of waterlogging. University of Florida IFAS research on container plant pathogens identifies Pythium and Phytophthora species as the primary culprits in houseplant root rot. These are water molds, not true fungi, and they thrive specifically in saturated, poorly aerated soil. They don’t need neglect or bad care to get established. They just need wet soil and time.
Is It Really Root Rot? Check This Before You Unpot
Before you pull the plant out of its pot, spend two minutes on a quick check. Root rot is common, but it’s easy to confuse with other problems that have different solutions.
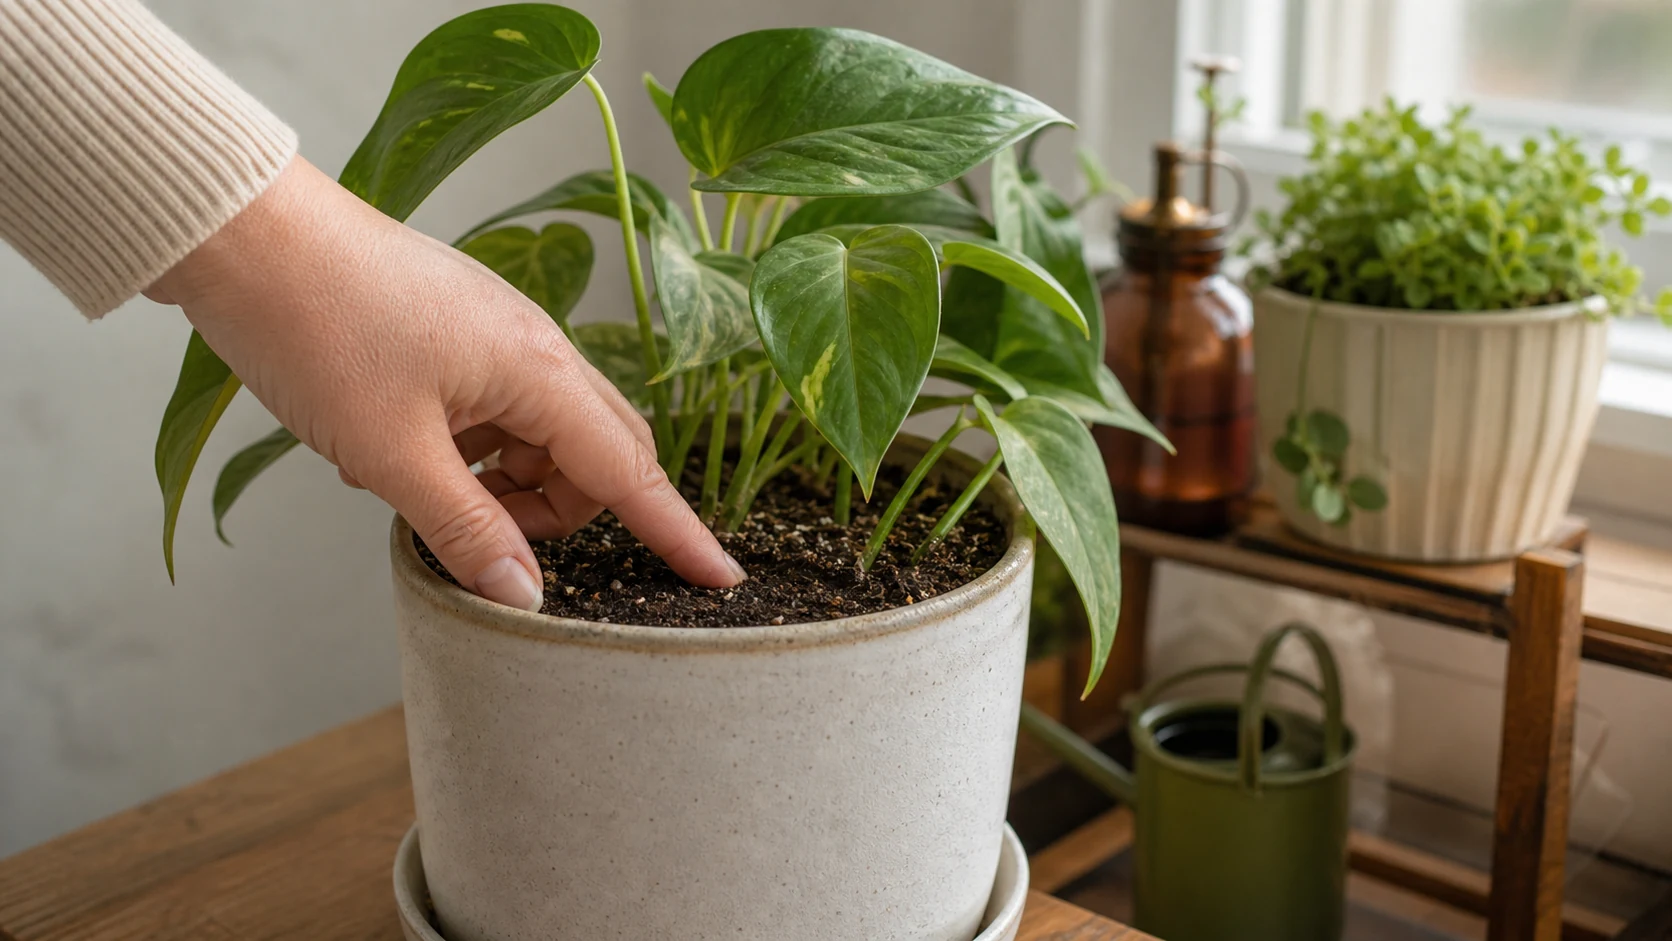
Pressing into the upper soil before unpotting helps distinguish a dry plant from one that is wilting while its root zone stays wet.
Press your finger into the top two inches of soil. If the soil is dry and pulling away from the pot edges, the problem is almost certainly underwatering, not root rot. Water thoroughly, wait a few days, and see if the plant recovers. Underwatering causes wilting and yellowing too, but the soil tells you which one you’re dealing with.
If the soil is still wet or damp, and the plant is wilting or dropping leaves, root rot becomes the likely explanation. A plant that is wilting despite moist soil is a plant whose roots are no longer working.
Check the stem at soil level. Run your fingers down to where the stem meets the soil. A healthy stem feels firm all the way down. If the base of the stem is soft, slightly discolored, or mushy, the rot has already moved upward into the stem tissue, which changes the treatment plan and reduces the odds of recovery.
Consider how long the soil has been wet. After a normal watering, the top inch or two should dry out within a few days under average indoor conditions. If the soil has been consistently wet for a week or more without much change, something is wrong, either the drainage is compromised, the pot is too large, or the roots aren’t taking up water anymore.
What Root Rot Looks Like Above the Soil
The plant is usually showing several signals before anything needs to be confirmed by unpotting.
Yellowing Leaves
When roots stop delivering nutrients, the leaves are the first place it shows. Yellowing typically starts at the lower, older leaves and works its way up. It’s easy to dismiss as a general “something’s off” moment, but yellowing from the bottom up, in a plant sitting in consistently wet soil, is a meaningful pattern.
Wilting That Doesn’t Improve After Watering
This is the one that trips people up most. The plant looks droopy and limp. You water it. The wilting doesn’t go away, or gets slightly worse. If the soil is already damp when you press a finger in, wilting is not a sign of thirst. It’s a sign the roots may not be functioning.
Soft or Discolored Stem at the Base
A stem that’s going soft right where it meets the soil, especially if it looks dark or slightly translucent, means the rot has moved above the root zone. This is a more serious situation, but still worth assessing before writing the plant off entirely.
Soil That Stays Wet for Too Long
After watering, the top inch or two of soil should feel drier within a few days. If it stays wet consistently, either the drainage isn’t working, the pot is much larger than the root system, or the roots are no longer absorbing moisture, which is the root rot scenario.
What Root Rot Looks Like in the Roots
The only way to confirm root rot is to unpot the plant and look. If you’re seeing two or more of the above signs, it’s worth doing rather than waiting.
Healthy roots are:
- White or very light tan
- Firm when touched, with some give but no mushiness
- Intact, not collapsing when handled
Rotting roots are:
- Brown or black
- Soft, mushy, sometimes almost liquefied at the tips
- They pull apart or collapse when you touch them
- They smell: sour, swampy, like wet soil sealed in a bag too long
That smell is one of the most reliable indicators. If you unpot a plant and the root zone smells off, that’s meaningful information even before you’ve looked closely at the individual roots.
One thing to watch for before you start cutting: not all brown roots are dead. Some roots naturally turn tan or light brown as they age, and the outer root sheath can look darker without the inner tissue being damaged. The test is firmness. If a brown root feels firm and doesn’t collapse when you press it, it may still be functional. If it’s soft, mushy, or slips when you press it, cut it.
If you find a mix of healthy white roots and some brown, mushy ones, there’s a good chance the plant can be saved. If almost everything is black, soft, and falling apart, recovery is harder but not always impossible, especially if the stem above soil level is still firm.
Root Rot Treatment: Step by Step
Step 1: Unpot the Plant
Gently remove the plant from its container. For plastic pots, squeeze the sides to loosen the root ball. For ceramic or terracotta, run a clean knife along the inside edge. Shake or gently rinse off as much of the old soil as you can without tearing healthy roots. Getting a clear view of the root system matters here. You can’t make good decisions about what to cut if the roots are still packed in old soil.
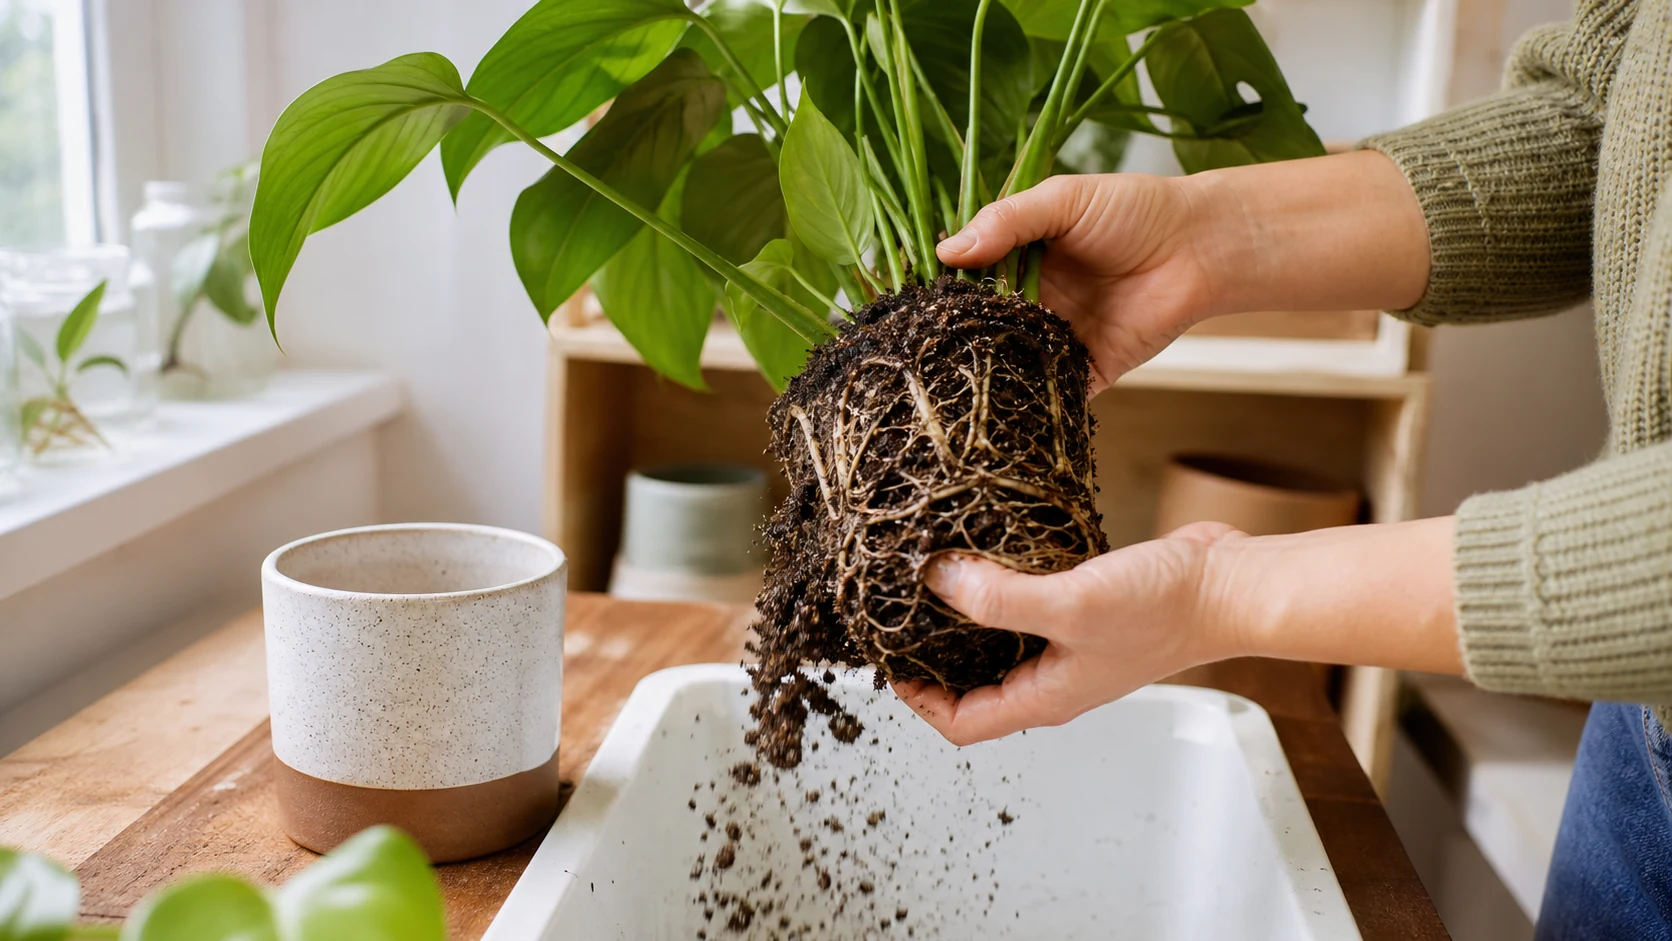
Supporting the root ball over a tray exposes the roots for inspection while loose old soil falls away.
Step 2: Trim the Rotted Roots
Use clean, sharp scissors or pruning shears. Wipe the blades with rubbing alcohol before you start, and again between cuts if you’ve been trimming heavily diseased tissue. Cut off everything that is brown, black, or mushy, cutting back to healthy white or light tan tissue. If a root is mostly brown with a healthy-looking tip, remove it anyway. You want to leave only roots you’re confident about.
Let the trimmed roots air-dry for 20 to 30 minutes before repotting. Some growers dust cut root ends with cinnamon, which has mild antifungal properties. You can also apply a diluted hydrogen peroxide solution as a rinse. Hydrogen peroxide at the right dilution can help neutralize residual pathogens in the root zone without harming healthy tissue.
Step 3: Repot Into Fresh, Dry Soil
Do not reuse the old potting mix. It carries the same waterlogged conditions and potentially the same pathogens that caused the rot. If you’re reusing the same pot, wash it with soap and hot water first. Cracked or scratched plastic pots can harbor spores. If yours is in poor shape, replace it.
For most tropical houseplants, a mix of standard potting soil and a significant amount of perlite, roughly one part perlite to two parts soil, gives roots more oxygen and dries out faster between waterings. Orchid bark is another good addition: it creates air pockets and keeps the mix from compacting. The goal is a soil that holds enough moisture to support the plant but drains quickly enough that roots never sit in saturated conditions for long.
Linda Chalker-Scott, extension horticulturist at Washington State University, recommends coarse, well-aerated growing media for container plants and cautions that finely textured mixes, especially peat-heavy ones, tend to compact over time, reduce drainage, and recreate exactly the conditions where root rot takes hold.
Terracotta pots are a strong choice for plants recovering from root rot. The porous walls allow some moisture to evaporate from the sides, reducing how long the soil stays saturated after each watering. If your plant has had root rot more than once in plastic or glazed ceramic, switching to terracotta is a simple, structural fix worth trying.
For a step-by-step walkthrough of the repotting process itself, this guide on how to repot plants covers the mechanics in detail.
Step 4: Hold Off on Watering
After repotting into fresh dry soil, wait a few days before watering, or until the top inch or two has dried out. This gives the trimmed roots time to stabilize without being immediately submerged again. It feels counterintuitive if the plant still looks droopy, but roots need a brief recovery window before you ask them to work at full capacity.
Step 5: Move to Bright Indirect Light
Avoid direct sun while the plant recovers. A stressed root system can’t keep up with the water demand that direct sun creates. Bright, indirect light gives the plant enough energy to push out new roots without adding heat stress. If your natural light is limited, a grow light on a moderate setting works well during the recovery phase. This guide to grow lights for indoor plants covers setup options that don’t require a lot of space.
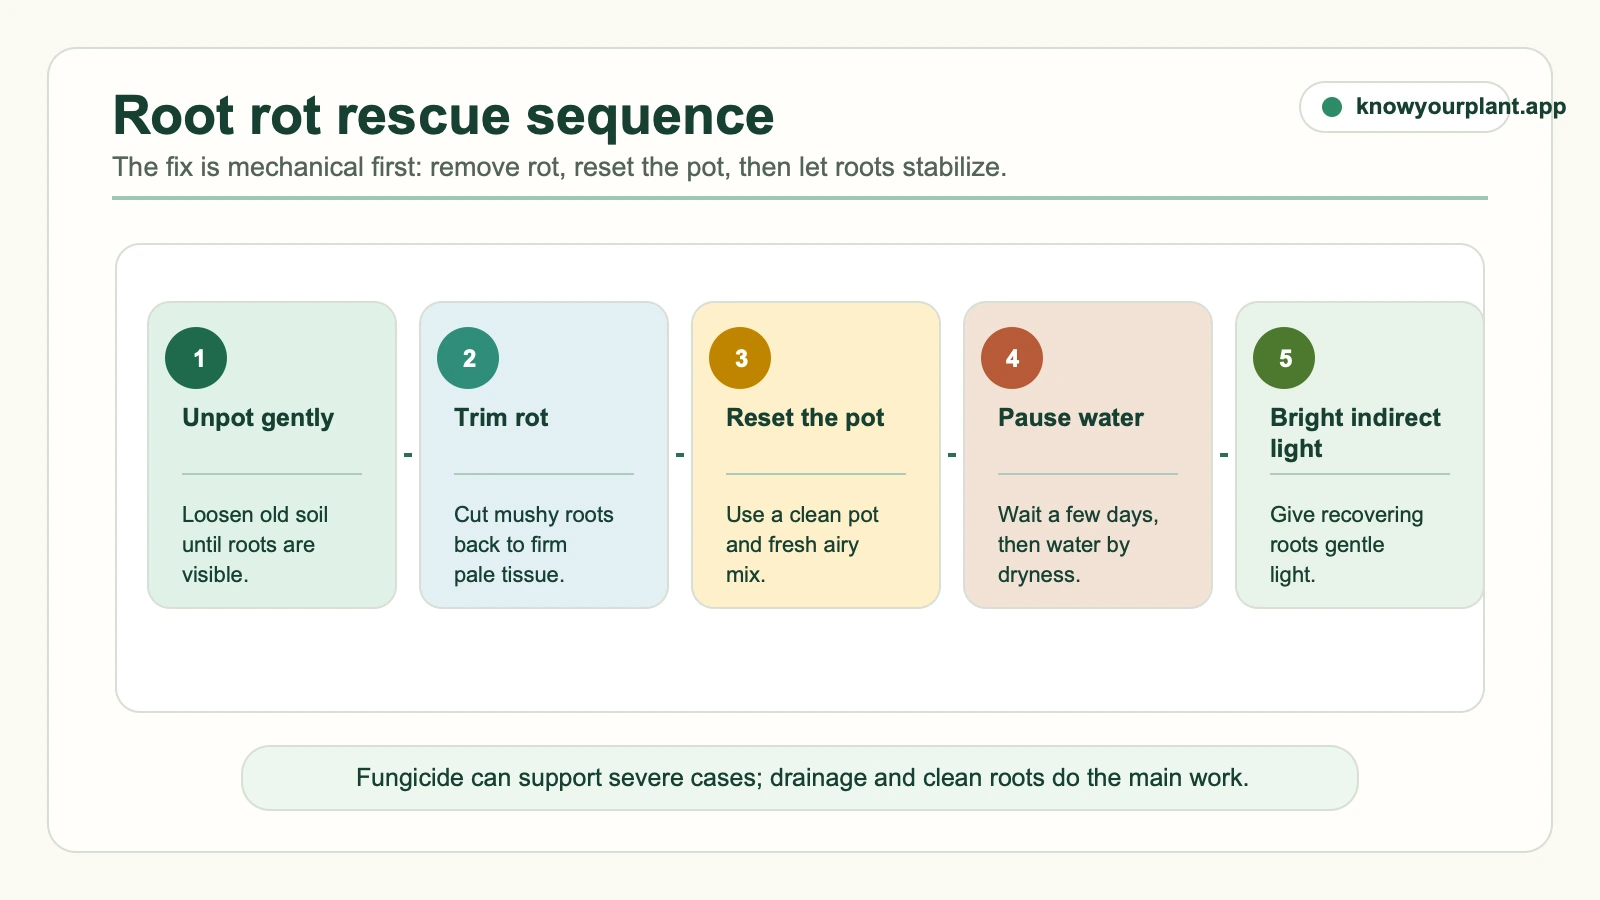
Treat root rot as a cleanup and recovery sequence: remove failed tissue, reset the potting conditions, then let the roots rebuild.
The Truth About Fungicide
This comes up often when people research root rot treatment, so it deserves a direct answer: fungicide is rarely the right first tool here, and in most home situations, it’s not what saves the plant.
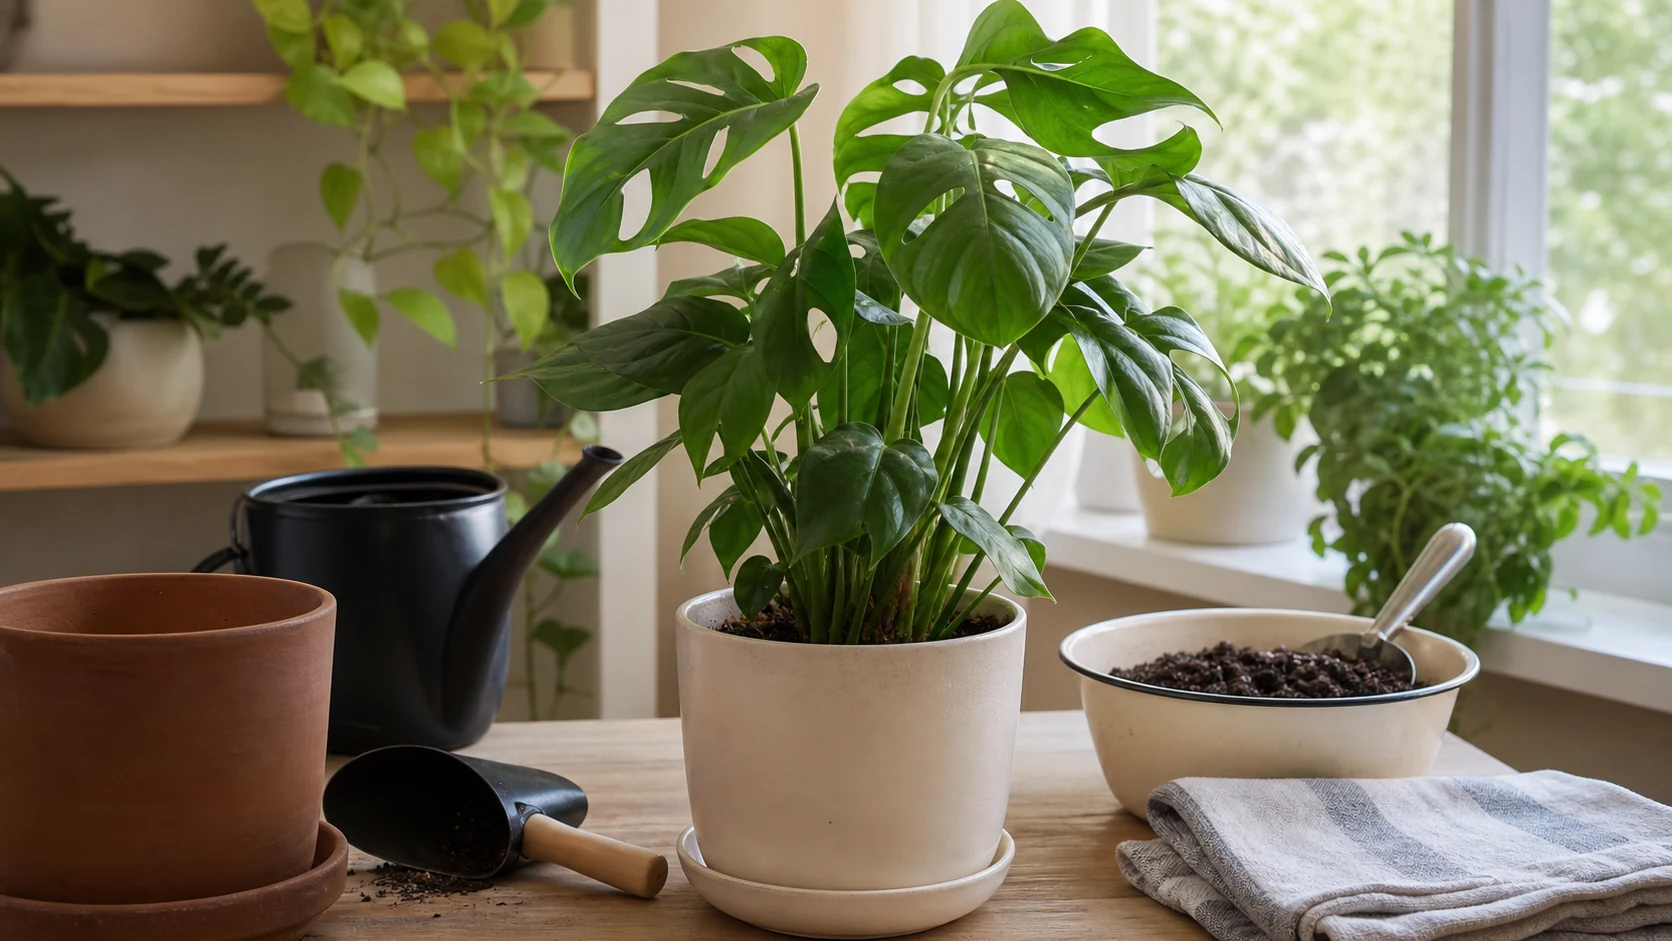
Fresh airy mix, a suitable pot, and a corrected watering routine address the conditions behind root rot more directly than a spray.
Root rot is fundamentally a structural problem. Waterlogged soil suffocated the roots, and pathogens moved into the dying tissue. Fungicide applied to soil that is still compacted, still draining poorly, and still being watered the same way as before will not reverse any of that. The underlying conditions that caused the rot are still there.
What actually saves a plant is removing the rotted tissue, getting the roots into fresh airy soil, and correcting the watering habit that caused the problem. Those three things address root rot at the source.
Fungicide may have a supporting role in severe cases, particularly with high-value plants where you want to reduce the chance of reinfection in fresh soil. Biological fungicides containing Trichoderma species are sometimes used by growers to help protect fresh root growth. But using fungicide as the main intervention, without trimming, repotting, and changing drainage conditions, tends not to work.
The cinnamon-on-cut-roots step mentioned above is a mild preventive measure, and hydrogen peroxide as a root rinse is a reasonable addition. Neither replaces the mechanical work of removing damaged roots and creating better conditions.
Will My Plant Survive?
This is the question people are actually asking, and it deserves a real answer.
Signs recovery is likely:
- You found some healthy white roots after trimming
- The stem is still firm all the way from the base up
- The plant is losing leaves but not actively collapsing
- New growth appears within 4 to 6 weeks after repotting
Signs the odds are lower:
- Almost the entire root system was black and mushy, with very little healthy tissue remaining
- The stem is soft for several inches above soil level
- No new growth after 6 to 8 weeks of stable conditions
- Leaves continue dropping with no sign of recovery
Even in borderline cases, it’s worth attempting rescue rather than discarding immediately. A plant that lost most of its roots can sometimes push out a new root system if the stem is healthy and conditions are right. It takes longer, sometimes two to three months, before you see clear evidence of recovery.
Darryl Cheng, author of The New Plant Parent, emphasizes that after treatment, the job is to create stable conditions and let the plant do the work. Good indirect light, correct watering based on the soil, and no unnecessary interventions. Plants don’t recover faster because you check on them more frequently. They recover faster when conditions are right and consistent.
If stem rot has progressed and you’re unsure whether the plant will pull through, consider taking cuttings from any healthy stems before the situation worsens. Healthy stem cuttings can be propagated in water or fresh soil, giving you a backup even if the original plant doesn’t make it.
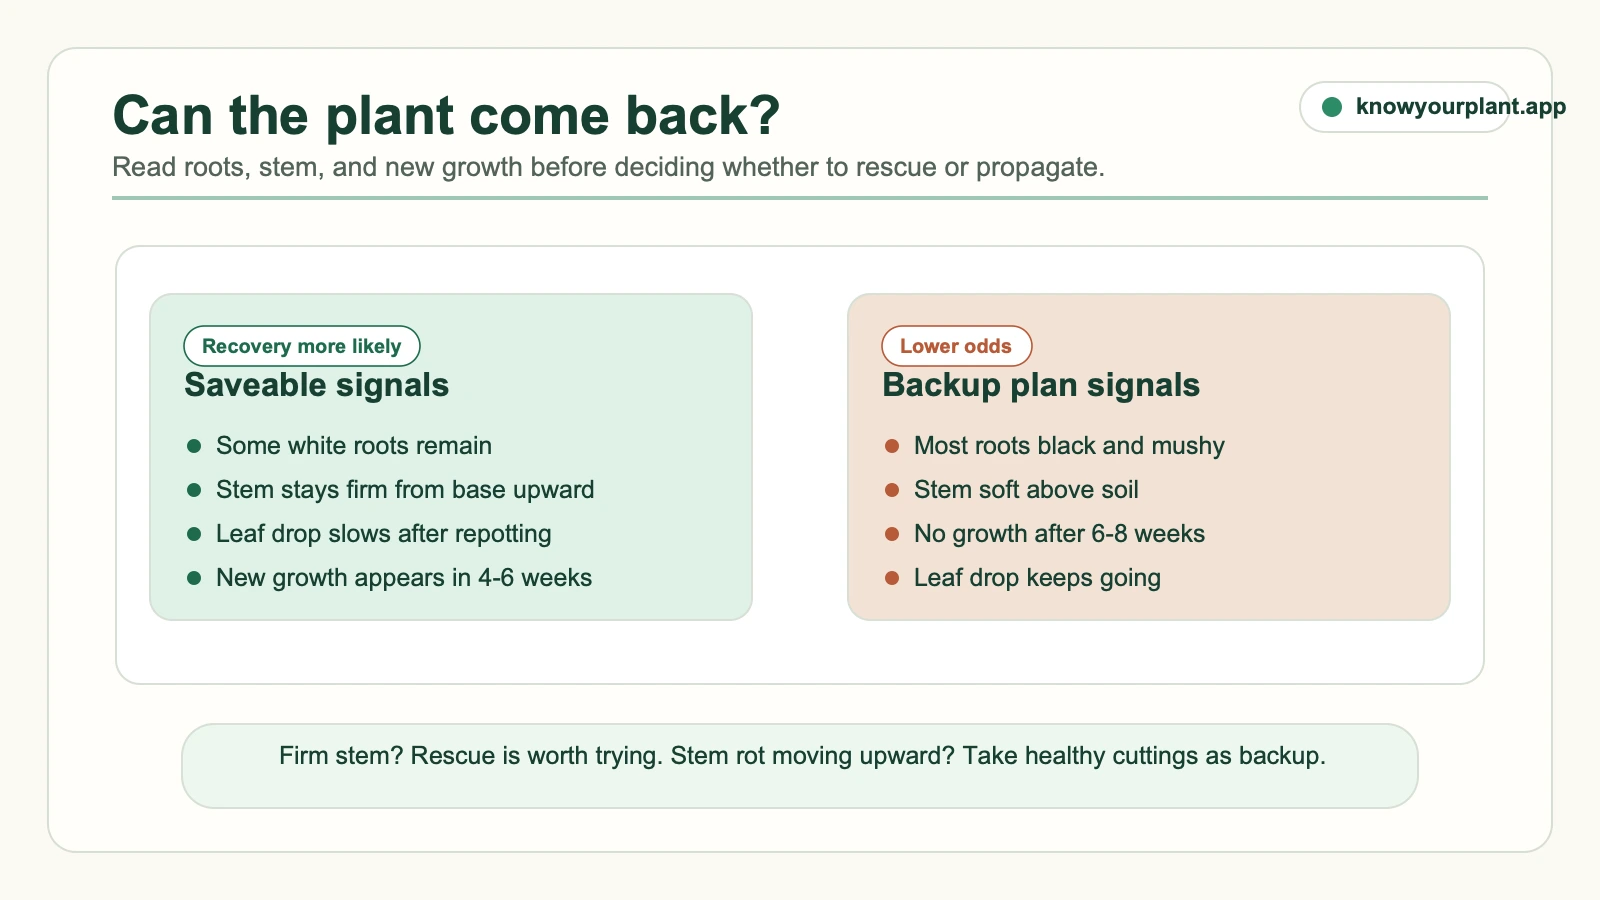
Use new growth and remaining firm tissue to judge recovery; old yellow leaves are already damaged and usually will not turn green again.
When Root Rot Is Most Likely to Strike
There’s a seasonal pattern to root rot that most care guides skip over, and it’s worth knowing.
Autumn and early winter are the highest-risk period for most houseplants. Here’s why: as light levels drop, plants slow their growth significantly. They’re producing fewer new leaves, drawing less water from the soil, and generally doing less. But most people’s watering habits don’t adjust at the same pace. They keep watering on the same schedule they used through summer, when the plant was actively growing and drying out the soil quickly.
The result is soil that stays wet much longer between waterings. Roots that are already slowing down sit in damp, poorly aerated conditions for days longer than they would have in July. That’s when Pythium and Phytophthora start moving in.
The fix is simple: in autumn, slow down watering. Let the soil dry out more completely before the next watering. The plant needs less, and it needs you to notice that it needs less. If you want a broader framework for reading dry-down speed by season, room, and pot type, this guide on how often to water indoor plants breaks that pattern down in detail.
Spring is the other risk window, but for the opposite reason. After a winter of slow growth, a plant suddenly gets more light and wants to grow. If the soil mix is old and compacted from a year in the same pot, it may not drain as well as it once did. A spring repot into fresh airy mix, before root rot has a chance to develop, is a sensible habit for plants that have been in the same pot for more than a year.
If you’re newer to keeping plants alive through these transitions, this indoor plant care guide for beginners covers the seasonal adjustment side in more detail.
Can Root Rot Spread to Other Plants?
This is one of the more anxious questions people ask, especially after one plant crashes quickly and the others nearby start looking suspicious too.
The practical answer is: not in the same simple way that pests spread, but contaminated soil, dirty pots, and shared wet conditions can absolutely set up the next problem.
Root rot itself usually starts because roots sat too wet for too long. But once a root zone is full of decaying tissue and water-mold pathogens, reusing that old mix or a poorly cleaned pot is not a good gamble. If several plants are declining at once, the bigger question is often whether they are sharing the same care pattern, old compacted mix, or low-light winter conditions, not whether one pot “infected” the room by itself.
What to do:
- do not reuse rotten old soil,
- wash reused pots with soap and hot water,
- keep shears and tools clean between sick and healthy plants,
- and check whether several plants have been staying wet too long for the season.
If only one plant is affected, that does not automatically mean the whole collection is doomed. It does mean your setup deserves a second look.
How to Prevent Root Rot
Once you’ve treated a plant for root rot, these habits make it unlikely to happen again.
Water based on the soil, not a schedule. Before watering, press a finger into the top couple of inches. If it still feels damp, give it another day or two. Root rot almost never happens from a single overwatering. It happens from repeated watering before the previous round has dried down. If you are still not sure whether you are looking at a chronic watering problem or an active rescue situation, compare the pattern with this overwatered plant signs checklist.
Match pot size to the plant. An oversized pot holds far more soil than the roots can absorb from, and that extra wet soil sits around the root zone too long. When repotting, go up one pot size at a time.
Use well-draining soil. Dense, compacting mixes hold too much moisture between waterings. A mix with added perlite or bark drains faster and gives roots the air pockets they need.
Make sure the pot actually drains. Water should flow freely out the bottom after each watering. If it puddles at the top or drains slowly, either the drainage hole is blocked or the soil has compacted. Fix that before the next watering rather than after.
Frequently Asked Questions
Can a plant recover from root rot?
Yes, if there are still healthy white roots left after you trim the rotted ones, the plant has a real chance. Plants that have lost the majority of their root system have a harder recovery, but some do pull through. The key is acting rather than waiting to see if things improve on their own, because the window between “still saveable” and “too far gone” closes faster than most people expect.
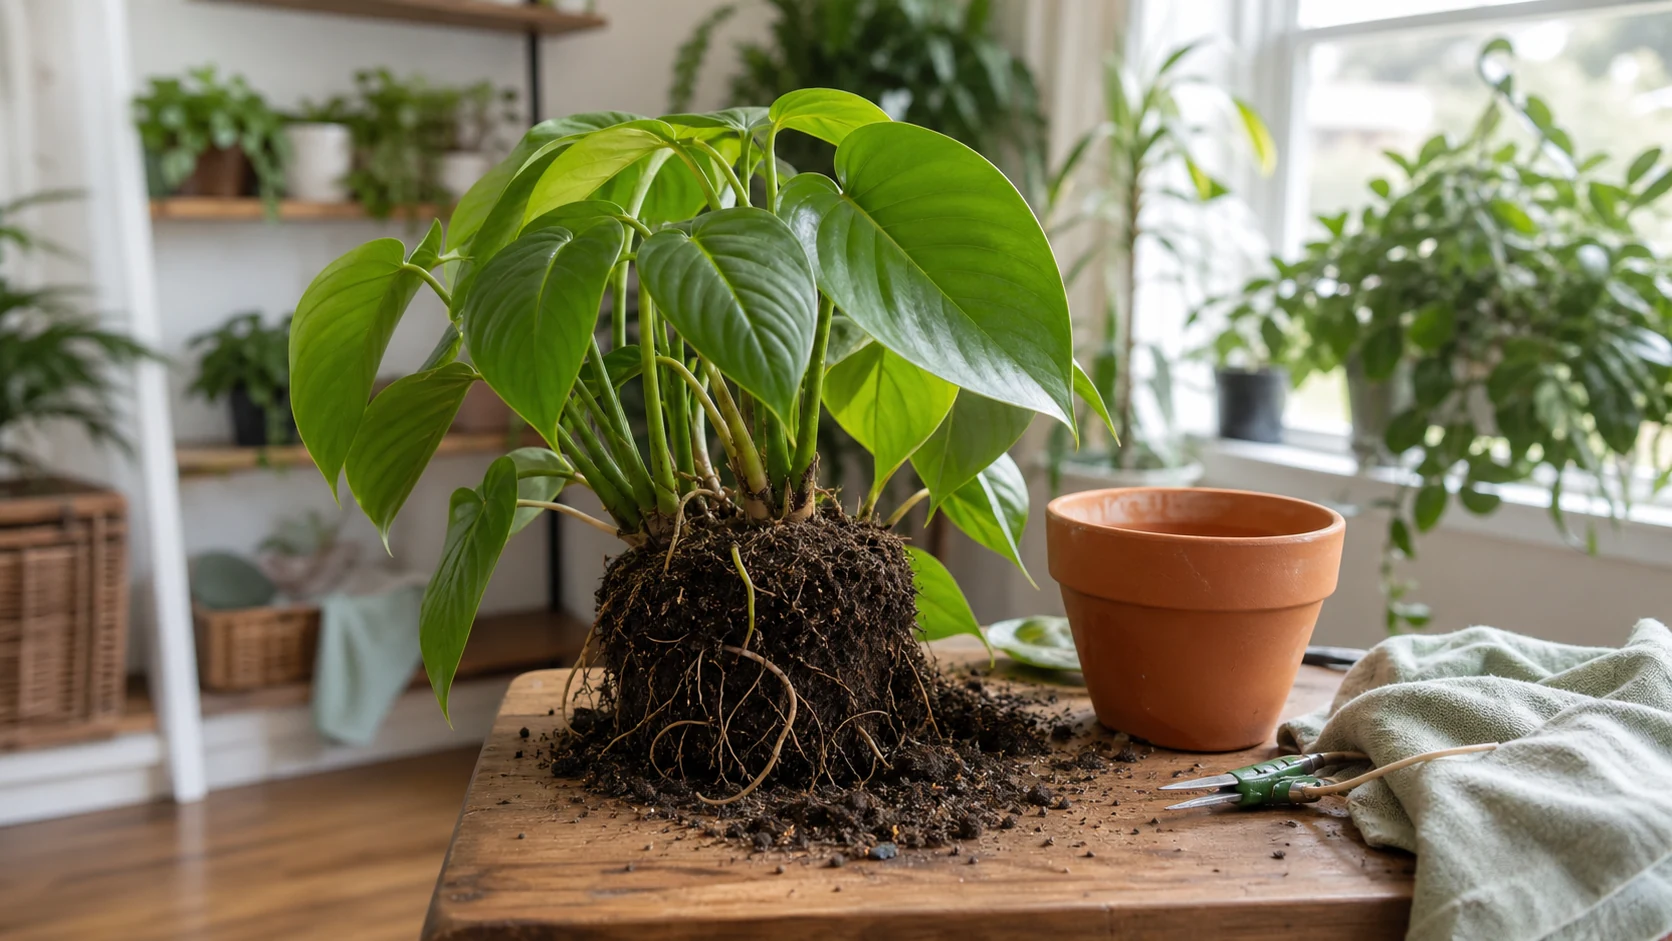
Firm stems and remaining light-colored roots are the practical signs that an unpotted plant still has a real chance to recover.
What does root rot smell like?
Rotting roots have a sour, swampy smell, similar to soil that’s been sealed in a bag too long, or standing water that has sat undisturbed for a while. If you unpot a plant and the root zone smells off, that’s a reliable confirmation even before you’ve closely examined individual roots.
How do I know if root rot has spread to the stem?
Press gently on the stem right at soil level. Healthy stems feel firm. If the stem is soft, squishy, or slightly discolored at the base, the rot has moved upward. You’ll need to cut back to firm, healthy tissue, and there’s less margin for error at that stage.
Should I use fungicide to treat root rot?
Fungicide is rarely the primary fix. The root cause is physical: waterlogged soil suffocated the roots and created conditions for pathogens to move in. Removing the rotted roots, repotting into fresh airy mix, and adjusting watering habits addresses the problem at its source. Fungicide can help reduce reinfection risk in severe cases, but it won’t regenerate damaged roots and it won’t fix drainage.
Can I use the same pot after root rot?
Yes, but wash it thoroughly with soap and hot water first. Fungal spores and water mold particles can persist in the pot and reinfect fresh soil. If the pot is plastic and scratched on the inside, consider replacing it.
Can root rot spread through reused soil or to nearby plants?
Do not reuse the old soil from a rotted plant. Clean reused pots well before using them again. Nearby plants are more at risk from shared wet conditions and similar care mistakes than from simple leaf-to-leaf spread, but if several plants are struggling at once, check the whole setup.
Why are my plant’s leaves still yellow after treatment?
Leaves that were already yellowing before treatment won’t reverse, the damage to those leaves is done. What you’re watching for is whether new yellowing stops. Give the plant several weeks after repotting before drawing conclusions about whether the treatment worked.
How do I tell root rot from underwatering?
Both cause wilting and yellowing, which is what makes root rot so easy to misdiagnose. The key difference is the soil. Underwatering means dry soil pulling away from the pot edges. Root rot means wet or damp soil when you check it. A wilting plant in moist soil points toward root rot, not thirst.
My plant has root rot but still has some healthy leaves. Should I take cuttings?
Yes, it’s worth doing, especially if stem rot has progressed. Healthy stem cuttings give you a backup even if the original plant doesn’t recover. Take cuttings from the firmest, healthiest-looking stems, let the cut end dry briefly, and start them in a clean container with fresh soil or water.
Root rot is one of the more disheartening things to find in a plant you’ve been genuinely trying to care for. But it’s also one of the more fixable problems, especially when you catch it before the whole root system is gone. The work is straightforward: trim what’s damaged, give the roots fresh airy conditions, and adjust the watering habits that created the problem in the first place. Most plants, given one healthy root and a clean start, will find their way back.
Download KnowYourPlant for personalized plant care reminders, watering schedules based on your plant and conditions, and diagnosis support when something looks off.