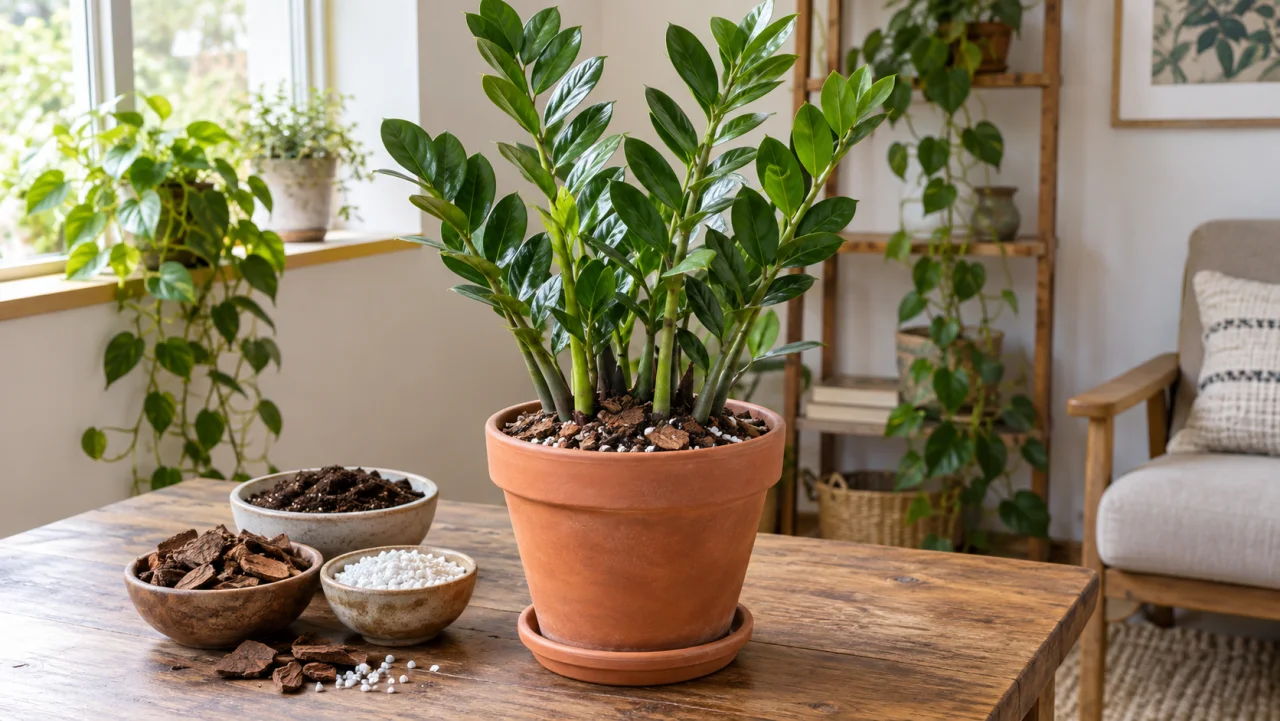
Most ZZ plant problems trace back to the same place: a root zone that stayed wet too long. Not too much water exactly, not too little – but a soil-and-pot system that never fully dried out between waterings. The plant kept looking fine on the surface while those thick, potato-shaped rhizomes quietly sat in moisture they never asked for.
If your ZZ plant is yellowing, growing slowly, or has a base that feels soft when you press it, the soil setup is usually where to start. This guide covers what ZZ plant roots actually need, what a good mix looks like, how pot choice changes everything, and how to read the signals that tell you the current setup is not working.
Byline: KnowYourPlant editorial team. Last updated: June 20, 2026.
What Most Soil Guides Miss
Most ZZ plant soil articles say to buy well-draining mix, add some perlite, and call it done. That advice is not wrong, but it misses the thing that actually trips people up: the problem is rarely the ingredient list. It is the system.
The same potting mix that works perfectly in a terracotta pot on a bright windowsill will stay dangerously wet in a plastic nursery pot set inside a decorative cover in a dim corner. The soil did not change. The system did.
Here is the common misdiagnosis: ZZ owners who notice yellowing or a mushy base often assume they are overwatering and start watering less. But the real issue is drainage failure, not watering frequency. The soil or pot setup is trapping moisture around the rhizomes regardless of how long you wait between waterings. Cutting back water while the root zone stays soggy just prolongs the problem.
The practical first check: lift the pot two weeks after watering. If it still feels heavy, the mix or container is holding too much moisture for your specific setup. That is the signal to change something, not to water less and hope for the best.
“ZZ plant should be potted in well-drained potting soil… wet feet are not tolerated.” – North Carolina State University Extension, Zamioculcas zamiifolia Plant Toolbox
Not sure what plant you are caring for?
Open KnowYourPlant, snap a photo, and get the plant name plus care notes matched to the species in front of you.
Identify your plantWhat ZZ Plant Owners Keep Getting Stuck On
Live owner questions around ZZ plant soil keep circling the same friction points:
- whether a ZZ plant should be treated like a plant that wants almost no water, when the real issue is usually soggy soil around the rhizomes rather than watering it at all
- whether yellowing means overwatering, underwatering, or harsh light, when those symptoms overlap until you check pot weight and dry-down speed
- whether a chunky repot mix is enough to solve the problem, even when the pot jump was too large or the plant is still sitting inside a water-catching cachepot
Those patterns matter because they point to the same decision logic. ZZ soil failures are usually not about finding a magical ingredient. They are about matching the mix, the container, and the room conditions so the rhizomes can dry between waterings without being pushed bone dry for weeks.
Want a care schedule you do not have to remember?
KnowYourPlant sends watering, feeding, repotting, and seasonal reminders based on the plants you actually own.
Get care remindersWhy ZZ Plant Soil Is Different From Standard Houseplant Mix
Most houseplants do reasonably well in a generic indoor potting mix. ZZ plants are not most houseplants.
What makes them different is those thick rhizomes that sit just below the soil surface. They store water and nutrients, which is why ZZ plants handle neglect so well. But that same storage capacity means the roots around the rhizomes are slow to signal distress. By the time you notice yellowing stems or a soft, squishy base, the rhizome has often been sitting in wet soil for weeks.
Iowa State University Extension makes this point clearly: “Problems develop when the potting soil stays constantly wet.” The emphasis is on constantly wet, not on how often you water. A ZZ plant watered thoroughly and then allowed to dry is fine. One sitting in a poorly draining medium, regardless of watering habits, is not.
The University of Florida IFAS extension notes that any well-drained peat- or bark-based potting soil works for ZZ plants, as long as the soil is allowed to dry between waterings and the plant never sits in water. The goal is not an ultra-mineral desert mix. It is a mix that drains completely and then stays dry.
Save this plant plan before you forget the details.
Keep the plant, diagnosis notes, reminders, and care changes in KnowYourPlant so the next decision is based on your actual plant history.
Open KnowYourPlantIdentification Snapshot: Which Plant This Soil Advice Fits
This guide is written for the common indoor green ZZ plant (Zamioculcas zamiifolia) and its close home-growing variants, including the dark-leaved Raven form. Use it with the most confidence when your plant has:
- upright stalks with glossy oval leaflets
- thick water-storing rhizomes just under the soil surface
- a standard nursery pot, cachepot, terracotta pot, or similar indoor container
- problems showing up as yellowing stems, soft rhizomes, stalled growth, or soil that stays heavy too long after watering
Lookalikes and Confused-With Cases
| Common care conversation | What gets mixed up | Why the soil advice changes |
|---|---|---|
| Green ZZ vs Raven ZZ | Owners sometimes assume the darker form needs a different soil recipe | The drainage logic is basically the same, but dark foliage can hide early yellowing signals |
| ZZ plant vs snake plant | Both get labeled as low-water plants and then treated interchangeably | Both like a dry-down, but ZZ rhizomes still need an airy potting mix rather than a one-size-fits-all succulent rule |
| ZZ plant vs cast iron plant | Both are sold as forgiving low-light foliage plants | Cast iron plants tolerate a more moisture-retentive mix than ZZ rhizomes usually do |
What Makes a Good ZZ Plant Potting Mix
A workable mix for most ZZ plants has two things: something to anchor roots and retain a little moisture, and something to open up the texture so water moves through and air gets in.
Standard indoor potting mix as the base. A quality all-purpose potting mix gives you organic matter, decent moisture retention, and root support. On its own it is usually too dense for ZZ plants, especially in plastic pots.
Drainage amendment to loosen the texture. Adding perlite is the most common approach. A ratio of roughly two parts potting mix to one part perlite gives you a noticeably lighter mix without going completely mineral. Coarse horticultural sand, pumice, or small orchid bark pieces all work similarly. The goal is visible texture change, not a specific recipe.
When a cactus mix makes sense. Cactus and succulent mixes are faster-draining out of the bag, which helps in a few situations: if your room is cool and humid, if you tend to water on a regular schedule rather than checking the soil first, or if the plant is in a glazed ceramic or plastic pot with limited airflow.
When you do not need to change anything. If the plant is growing steadily, the soil dries within one to two weeks after watering, and the pot feels light before you water again, the mix is working. Adding more perlite or switching to a cactus mix would just create a situation where the roots dry out too fast during active growth periods.
Ingredient Comparison: What Each Amendment Actually Does
| Ingredient | Drainage Speed | Moisture Retention | Beginner-Friendly | Best Used For |
|---|---|---|---|---|
| Standard potting mix | Moderate | Moderate-high | Yes | Base layer in terracotta or well-lit spots |
| Cactus/succulent mix | Fast | Low | Yes | Plastic pots, humid rooms, regular waterers |
| Perlite | Very fast | Very low | Yes | Amending any base mix, 1 part in 3 |
| Pumice | Very fast | Low | Moderate | Long-term amendment, won’t compress |
| Orchid bark (small) | Fast | Low-moderate | Moderate | Adding air pockets to dense mixes |
| Coco coir | Moderate | Moderate | Yes | Sustainable peat alternative in small amounts |
| Peat-heavy nursery soil | Slow when dry | High | No | Not recommended for home use long-term |
The one to avoid: peat-heavy nursery substrate, which is what most ZZ plants arrive in from the garden center. It is designed for greenhouse conditions with controlled irrigation. In a home setting it compacts over time, repels water when dry, and holds too much moisture when wet. If your ZZ came in a small plastic nursery pot with dense, dark, spongy soil, that is worth replacing at the next repot.
How Pot Choice Changes the Soil Equation
The same soil behaves differently depending on what you plant it in. This is one of the most overlooked factors when ZZ plant owners troubleshoot. For a closer look at how container material affects moisture dynamics, see the guide to terracotta pots for houseplants.
Terracotta pots wick moisture from the soil through the clay walls, which gives the rhizomes more protection against staying wet. A standard potting mix with a small amount of perlite is usually enough in terracotta.
Plastic nursery pots hold moisture longer because water can only leave through the drainage holes. The same soil that works well in terracotta can stay wet too long in plastic, especially in a dimly lit room. If your ZZ is in a plastic pot, lean toward more perlite in the mix or use a cactus-blend base.
Decorative cachepots and covers without drainage holes are where things go wrong fast. The plant sits inside its nursery pot, which sits inside a decorative container that catches water with no way out. Even a perfect soil mix cannot protect the roots if water pools at the bottom. Either leave a gap and empty the outer pot after watering, or pot directly into a container with drainage holes.
Self-watering pots keep the lower root zone consistently moist via a reservoir, which is the opposite of what ZZ rhizomes prefer. If you are curious whether a self-watering setup is worth it for other plants, the guide on self-watering pots covers where they work and where they backfire.
Care Cards: Match the Mix to the Setup in Front of You
Care Card 1: Nursery Soil in a Plastic Pot That Stays Heavy
- safest first move: keep the pot size modest and repot into a lighter mix with visible perlite or bark
- watch for: yellowing from the base, a pot that still feels heavy after two weeks, or sour-smelling soil
- avoid: assuming less frequent watering alone will fix a root zone that already stays wet too long
Care Card 2: Terracotta Pot in Bright Indirect Light
- safest first move: use a standard houseplant mix with a moderate drainage amendment rather than an ultra-dry cactus blend
- watch for: the pot becoming extremely light within a few days or wrinkled stems that suggest the mix is now drying too fast
- avoid: adding extra grit just because ZZ plants are marketed as drought tolerant
Care Card 3: Recent Repot Into a Pot Two Inches Too Large
- safest first move: check whether the outer soil is staying wet far longer than the old root ball can use it
- watch for: slow dry-down after repotting, stalled growth, or yellowing that started only after the pot upgrade
- avoid: blaming the ingredient list first when excess soil volume is the real problem
ZZ Soil Decision Tree: Which Fix Is Right for Your Setup
Use this to find the right next step without guessing. Start at the top and follow the branch that matches your situation.
Step 1: How heavy is the pot two weeks after a thorough watering?
- Still heavy: something is trapping moisture. Continue to Step 2.
- Feels light or noticeably lighter: drainage is working. No soil change needed.
Step 2: What type of container is the plant in?
- Decorative cachepot or pot with no drainage holes: this is the primary problem. Move the plant to a container with drainage before changing the mix. Everything else is secondary.
- Plastic nursery pot: move to Step 3.
- Terracotta or unglazed ceramic: move to Step 3.
Step 3: How much bigger is the current pot compared to the previous one?
- More than two inches wider in diameter: the pot is likely too large for the root ball. The outer soil stays wet long after the roots have absorbed what they need. Consider moving down a size at the next repot rather than changing the mix.
- One to two inches wider, or same size: pot size is reasonable. Move to Step 4.
Step 4: What is the light like in the room?
- Low light or no direct bright window: the soil dries slowly by default. Switch to a cactus blend or add more perlite (aim for roughly 1 part perlite to 2 parts potting mix).
- Moderate to bright indirect light: a standard potting mix with a moderate perlite addition (1 part perlite to 3 parts mix) is usually enough in terracotta. For plastic pots in the same light level, lean toward more perlite or a cactus base.
Step 5: How does the root zone look at the base or when you unpot?
- Roots are white or pale tan, rhizomes feel firm: the mix just needs amending. Repot into a better blend at the next natural repot window.
- Roots look brown or mushy, rhizomes feel soft: root rot is likely underway. Repot now into fresh, dry mix and treat the affected roots before returning the plant to its spot.
Symptom Matrix: Is It the Soil, the Pot, or Something Else?
| What You Notice | Pot Feels | Most Likely Cause | What to Check First |
|---|---|---|---|
| Yellow stems starting at the base | Heavy 2+ weeks after watering | Wet soil or drainage failure | Lift pot, check drainage holes |
| Soft or mushy base | Heavy or normal | Rhizome rot underway | Remove from pot, inspect rhizomes |
| Wrinkled or limp stems | Very light | Underwatering or mix too fast-draining | Water thoroughly, observe dry-down time |
| Slow dry-down after repotting | Still heavy at 3 weeks | Pot too large or mix too dense | Check that pot is only 1-2 inches wider than root ball |
| Yellowing upper stems, soil seems fine | Normal | Light stress or natural leaf drop | Check light level and seasonal conditions |
| Water runs straight through, no absorption | Light immediately | Soil has dried out and become hydrophobic | Bottom-water to rehydrate, then repot |
Yellowing on ZZ plants is often read as a simple watering problem, but what actually matters is distinguishing between a root zone that is too wet and one that has dried out unevenly. A heavy pot plus yellow stems points one direction. A light pot plus limp stems points another. The pot weight check is the fastest way to separate them. For more on reading ZZ yellowing signals, see ZZ plant yellow leaves: causes and fixes.
Common Problems This Soil Guide Helps You Prevent
- Yellow stems with a heavy pot: usually a drainage or wet-soil problem, not a sign that the plant needs even less water forever
- Soft rhizomes or a mushy base: a red-flag signal that the root zone stayed wet too long and repotting into fresh mix may be urgent
- Stalled growth after repotting: often caused by a pot that is too large or a mix that stayed dense around the old root ball
- Water running straight through dry soil: a sign that dense nursery media dried into a hydrophobic core and need a reset, not just a bigger drink
Common Mistakes With ZZ Plant Soil
- keeping the original peat-heavy nursery plug for too long in average home conditions
- assuming a low-water plant wants the driest possible soil recipe regardless of pot type or room light
- pairing a decent mix with a cachepot that quietly traps runoff at the bottom
- repotting into a much larger container, which makes the outer soil stay wet long after the roots have finished drinking
Pet Safety Note
ZZ plants are widely treated as household plants that should be kept out of reach of curious pets and children because the sap and tissues can be irritating if chewed. Soil choice does not change that basic handling rule. The practical takeaway is simple: keep loose potting amendments, runoff water, and chewed leaf pieces out of reach, and focus on a draining setup that does not leave stagnant water sitting where a pet can drink it.
When to Repot and What to Use
ZZ plants prefer to be slightly root-bound. They grow slowly and do not need frequent repotting. A good rule of thumb is to consider repotting when you see roots circling the bottom of the nursery pot, when the pot feels heavy for more than three weeks after a thorough watering, or when growth has stalled through a full growing season. If you are not sure whether your plant is ready to move up, the guide on when to repot plants covers the key timing signals.
When you do repot, go up only one pot size – two inches wider in diameter is the standard. A pot that is too large holds too much soil volume, which means the outer edges of the mix stay wet long after the roots have absorbed what they need.
Remove as much of the old nursery soil from around the rhizomes as you can without damaging the roots. Nursery substrate is often a very dense peat-based mix designed for greenhouse conditions, and it stays wet much longer than a home indoor environment can handle.
“Allow [ZZ plant] to dry nicely before watering again. Problems develop when the potting soil stays constantly wet.” – Iowa State University Extension and Outreach
Fresh mix with a good perlite amendment gives the rhizomes a clean start. After repotting, water lightly, place the plant in its usual spot, and wait longer than you normally would before the next watering – the root system needs time to settle before it can handle a heavy drink.
If rhizomes look soft, discolored, or smell off when you unpot, treat that as root rot. The root rot treatment guide walks through how to assess damage and what to remove before repotting into fresh mix.
Plant ID + Plant Doctor
Not sure what your plant needs?
Snap a photo in KnowYourPlant to identify the plant, check yellow leaves, spots, wilting, or pests, and get a calm next step before the problem spreads.
Real User FAQ
Can I use regular potting mix for a ZZ plant?
Yes, with one adjustment. Standard all-purpose potting mix is a fine base, but it is usually too dense to use straight out of the bag for ZZ plants, especially if the pot is plastic or the room is not particularly bright. Adding one part perlite for every two parts potting mix opens the texture enough that water moves through rather than pooling around the rhizomes. If the plant is in terracotta and in a reasonably lit spot, you can get away with less perlite. The key is that the mix dries within one to two weeks after a thorough watering.
How much perlite should I add to ZZ plant soil?
A ratio of about one part perlite to two or three parts potting mix is a good starting point for most indoor setups. If your room is cool and humid, or the plant is in a plastic pot without much airflow, lean toward the higher end – closer to one part perlite to two parts mix. If the plant is in a terracotta pot or near a bright window, one part perlite to three parts mix is usually enough. You will know the ratio is right when the pot feels noticeably lighter within a week after watering.
Is cactus mix good for ZZ plants?
Cactus mix can work well, particularly if you tend to water on a schedule rather than checking the soil each time, or if the plant is in a plastic pot in a low-light room. The downside is that it dries out faster, which means the plant has less buffer if you miss a watering or if the rhizomes are actively drawing on stored moisture during a growth period. A cactus mix is not wrong for ZZ plants – it just gives you less margin for error in the dry direction rather than the wet one. If the current mix is consistently staying too wet, a cactus-blend mix at the next repot is a reasonable change.
How often should I repot my ZZ plant?
Most ZZ plants are fine going two to four years between repots. They grow slowly and prefer to feel a little snug in their container. The signal to repot is visible roots circling the drainage holes, a pot that stays heavy longer than usual after watering, or growth that has stalled through a full spring and summer. If none of those are happening, leave it alone. Repotting too often disrupts the rhizomes and slows growth more than a slightly crowded pot would.
Why is my ZZ plant yellowing after I just repotted it?
A few yellowing leaves right after repotting is normal. The plant is adjusting to new soil and its roots need time to settle before they absorb water efficiently. The concern is if multiple stems are turning yellow and the pot feels heavy two or more weeks after the initial post-repot watering. That usually means the new pot is too large for the root ball, so the outer soil stays wet and the rhizomes are sitting in moisture they did not ask for. Check the pot size – it should only be one to two inches wider than the previous one.
What soil should I avoid for ZZ plants?
The main one to avoid is heavy, peat-based nursery substrate used on its own. It compacts over time, holds too much moisture for home conditions, and can become hydrophobic when it dries out – meaning water runs around the outside of the root ball instead of through it. Garden soil is also unsuitable indoors because it compacts, drains poorly, and can introduce pests. Mixes marketed for moisture-loving tropical plants, like those with added coconut moisture crystals or water-retention gels, are designed for plants that want consistent moisture. ZZ plants are not that plant.
Does pot drainage matter as much as soil choice?
Yes, and for ZZ plants it might matter more. A drainage hole is not optional. Without one, water collects at the bottom of the container and the rhizomes sit in it no matter how fast your soil drains. Even a well-amended perlite mix cannot save a ZZ plant in a pot with no drainage. If you love a particular decorative pot that has no holes, use it as a cachepot – keep the plant in a nursery pot with drainage that sits inside the decorative one, and pour out any water that collects inside after watering.
Can I tell from looking at the plant whether the soil needs to be changed?
Not always, and that is part of what makes ZZ plant soil failures hard to catch. The rhizomes store enough water and nutrients to keep the stems and leaves looking healthy for a surprisingly long time even when the root zone is compromised. The most reliable signals are the weight of the pot and how long it takes to dry down. Check the pot about two weeks after watering – if it still feels heavy, the soil-and-pot system is holding too much moisture for your conditions. By the time the stems start yellowing or the base feels soft, the issue has usually been building for a while. Regular pot-weight checks catch it earlier. For full care context including watering signals and seasonal shifts, see the ZZ plant care guide.
Evaluation Method and Freshness Note
This is an editorial soil guide, not a lab trial or sponsored product roundup. The advice here was built from live search review, recurring owner confusion patterns around yellowing, soggy rhizomes, and repotting choices, then checked against extension-style care guidance that consistently points back to drainage, dry-down, and avoiding prolonged wet soil.
Freshness note: Updated June 20, 2026. Care claims were checked against North Carolina State University Extension, Iowa State University Extension and Outreach, University of Florida IFAS evidence surfaced during research, and a UBC Botanical Garden expert forum discussion used as qualitative context.
Methodology: Search results and community discussions were used to understand how owners describe the problem. Factual care claims were anchored to named expert or extension sources. Community threads were treated as qualitative signal only, not controlled testing data.
Sources: North Carolina State University Extension, Zamioculcas zamiifolia Plant Toolbox; Iowa State University Extension and Outreach, ZZ plant care FAQ; University of Florida IFAS, Florida Foliage House Plant Care: ZZ Plant; UBC Botanical Garden Forums, Zamioculcas zamiifolia and the science about water.
Download KnowYourPlant for personalized plant care reminders, including when to check your ZZ plant’s soil and when to water based on your specific setup.