If you’ve ever come home to a wilted plant after a few days away, you’ve probably wondered whether self watering pots are actually worth it. The short answer is yes, but with some caveats worth knowing before you buy.
A self watering pot is a planter with a built-in water reservoir at the bottom, separated from the soil by a barrier. The plant draws moisture upward through a wick or soil column only when it needs it. Water on demand, from below, without you hovering with a watering can every two days.
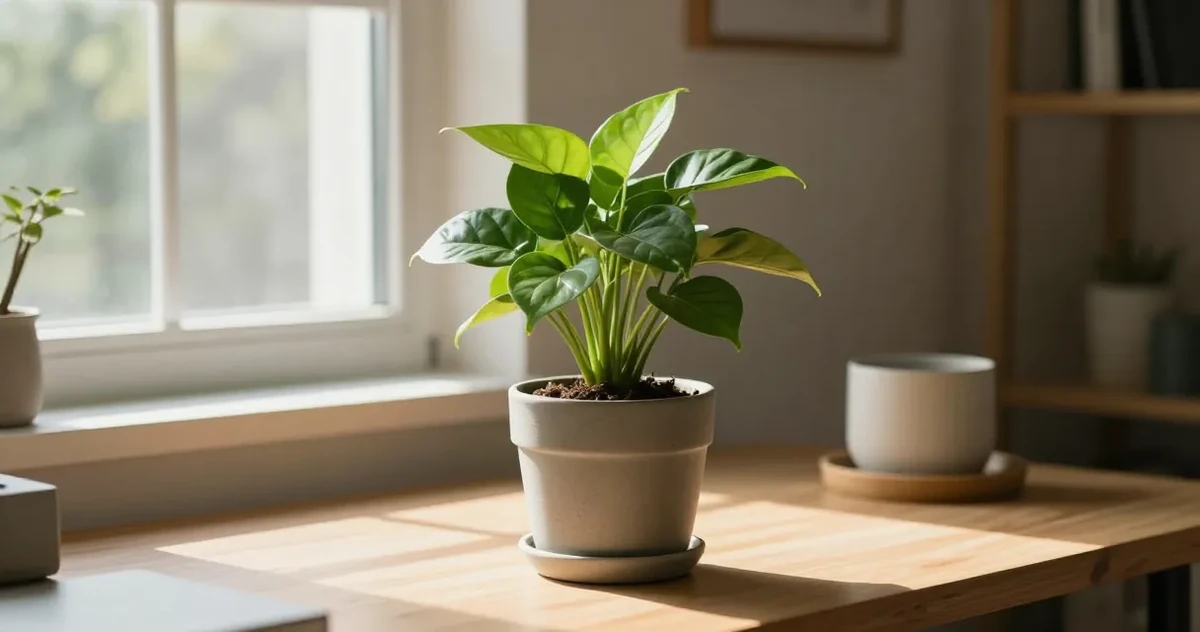
It’s a genuinely clever system. Once you understand how it works, you’ll know exactly which plants love it and which ones would rather you left them alone.
What Most Guides Miss About Self-Watering Pots
Most self-watering pot roundups focus on convenience. The real success factors are less glamorous:
- Plant type matters more than the planter. Moisture-loving tropicals often adapt well. Plants that want a real dry interval usually do not.
- Soil structure matters as much as the reservoir. Dense mixes stay swampy for too long, while chunkier mixes keep air around the roots.
- Refill timing still needs judgment. A water gauge is useful, but it does not replace checking the soil, root-zone smell, or how heavy the pot feels.
- A self-watering pot is not a cure for inconsistent care. It smooths out watering rhythm. It does not fix low light, root rot, or bad potting mix.
A good recommendation is not just attractive or low-maintenance. It matches the plant’s watering style and the grower’s habits.

A visible reservoir and gauge help, but pothos care still depends on airy soil and timely checks.
Operator Note: The Reservoir Does Not Replace Plant Checks
Treat the reservoir like a buffer, not an autopilot. The safest routine is still to watch the top inch of soil, check the pot weight, and pause refills if the mix smells sour or stays wet for too long. If you want a condition-first reset for those checks, our guide on how often to water indoor plants walks through the same soil-depth and pot-weight cues in more detail. Self-watering systems work best when they reduce guesswork, not when they remove observation.
How Self Watering Pots Actually Work
The magic is in the separation between soil and water. Most designs have two chambers:
- An upper growing chamber where your plant and soil live
- A lower reservoir that holds a supply of water
A small wick or soil bridge connects the two. As the top layer of soil dries out, capillary action pulls moisture upward from the reservoir. The roots get a steady, consistent supply without sitting in standing water, which is the thing that kills most indoor plants.
You fill the reservoir through a small port on the side or top, usually with a tube. When the reservoir is empty, a float or indicator tells you it’s time to refill. In between, you mostly leave it alone.
Research from Colorado State University Extension on sub-irrigated containers found that bottom-watering systems can reduce overall water use by 20 to 40 percent compared to conventional top watering, while maintaining equivalent plant health. The consistency of moisture delivery, rather than the volume, turns out to be what most plants actually want.
The key thing to understand is that this is bottom watering, not set-and-forget magic. The pot doesn’t know how thirsty your plant is; it just makes moisture available. For plants that like consistent soil moisture, that’s ideal. For plants that need a dry-out period, it’s the wrong tool entirely.

Use the setup map to keep the reservoir honest: water moves from below, but air, overflow, and root-zone checks still decide whether the plant stays healthy.
Decision Tree: Should This Plant Go in a Self-Watering Pot?
- Does the plant usually prefer evenly moist soil?
- Yes: keep going.
- No: use a standard pot with drainage instead.
- Are you using an airy mix with bark, perlite, coco chips, or another structure that keeps air in the root zone?
- Yes: keep going.
- No: repot before you rely on the reservoir.
- Will you let the reservoir run down and check the top soil before refilling?
- Yes: good candidate.
- No: expect chronic wetness and possible root stress.
- Is the plant a cactus, succulent, snake plant, ZZ plant, or another species that likes a dry interval?
- Yes: skip the reservoir system.
- No: the setup is more likely to work.
Expert note: University of Maryland Extension advises checking soil before watering instead of following a fixed schedule, and Ask Extension notes that some plants, including holiday cacti, prefer to dry thoroughly between waterings. Even with a reservoir, the plant’s normal watering preference still wins.

Run the four fit gates before moving a plant into a reservoir pot. If any gate fails, fix that condition before trusting the planter.
Which Plants Thrive in Self Watering Pots
Self watering planters work best for plants that prefer consistently moist (but not soggy) soil. Think:
- Herbs: basil, mint, and parsley drink steadily and hate drying out
- Vegetables: tomatoes, lettuce, and peppers on a balcony or kitchen counter
- Tropical foliage plants: pothos, peace lilies, calatheas, and ferns all appreciate steady moisture
- African violets: actually famous for loving bottom watering; their leaves rot when they get wet from above
Penn State Extension cites overwatering as the leading cause of houseplant failure, ahead of underwatering, pests, and poor light. The irony is that most overwatering isn’t from pouring too much; it’s from pouring too often, before the plant has had a chance to actually drink what’s already there. Self watering pots solve this by letting the plant set the pace.
Darryl Cheng, author of The New Plant Parent and founder of House Plant Journal, makes this point plainly: consistent moisture delivered from below encourages deeper root development than erratic top watering. Roots follow moisture downward, building a stronger anchor and better drought resilience over time.
Plants that do poorly in self watering pots are the ones that need a clear dry period between waterings. Succulents, cacti, snake plants, and ZZ plants store water in their leaves and roots. Give them a constant moisture source and you’ll rot them within months.
If you’re not sure whether your plant is a candidate, check whether overwatering is a common problem with it. If yes, skip the self watering pot.
Comparison Table: Good Candidates vs Poor Candidates for Self-Watering Pots
| Plant type | Usually a good fit? | Why | Watch out for |
|---|---|---|---|
| Pothos, peace lily, fern, calathea, many herbs | Usually yes | They prefer steady moisture and punish long dry spells quickly. | Dense soil can still keep roots too wet. |
| African violets and some leafy edibles | Often yes | Bottom watering keeps foliage drier and moisture more even. | Small reservoirs can empty faster than expected in bright light. |
| Monstera and philodendron in chunky mix | Sometimes | They can do well if the mix stays airy and you allow brief refill gaps. | Peat-heavy mixes turn the reservoir into a swamp. |
| Succulents, cacti, snake plants, ZZ plants | Usually no | They rely on dry intervals and store water in leaves or roots. | Constant access to moisture pushes them toward rot. |
| Holiday cactus and other plants that bloom better with drier rest periods | Usually no | The reservoir works against the dry-down pattern they use for seasonal cues. | Owners often mistake stalled growth for thirst and refill too early. |

Moisture-loving tropicals suit reservoir pots better than succulents and other plants that need a full dry interval.
Self Watering Pots for Indoor Plants: What to Look For
Not all self watering planters are built the same. A few things worth checking before you buy:
Reservoir size and refill frequency
A larger reservoir means less maintenance, but it also means more water sitting in a warm indoor space, which can become a mosquito or algae problem if you’re not careful. For most indoor plants, a reservoir that lasts one to two weeks is practical without becoming stagnant.
Overflow drainage
Good designs have an overflow hole just above the reservoir line. If you accidentally overfill, excess water escapes rather than drowning your roots. This is a small detail that matters a lot in practice.
Wick material and design
Some pots use a fabric wick, others rely on a column of soil that bridges the two chambers. Soil-column designs tend to work better long-term because wicks can degrade or stop wicking efficiently after a while.
Material
Plastic is lightweight and affordable. Terracotta regulates temperature naturally and feels honest on a windowsill, but the porous nature of unglazed terracotta affects how the reservoir behaves. Glazed ceramic in a self watering design gives you the best of both: good looks, moisture retention in the soil, and a sealed reservoir that actually functions as intended. If cost matters more than aesthetics, a well-made plastic option does the same job.
Self-Watering Pot Fit Scorecard
Scoring rubric: score each option from 1 to 5 on root-zone safety, refill forgiveness, setup simplicity, and long-term maintenance. Higher totals mean the setup is easier to manage indoors, not that it suits every plant.
| Setup | Root-zone safety | Refill forgiveness | Setup simplicity | Maintenance burden | Best for | Not for |
|---|---|---|---|---|---|---|
| Chunky mix + reservoir pot with overflow | 5 | 4 | 4 | 4 | Tropical foliage plants and growers who want steadier moisture | Owners who hate flushing or checking reservoirs |
| Fabric wick pot with standard potting mix | 2 | 2 | 4 | 2 | Short trips, herbs, quick experiments | Plants that hate wet feet or anyone who tends to overfill |
| Standard nursery pot with drainage | 5 | 3 | 5 | 4 | Drought-tolerant plants or growers who prefer manual control | People who routinely miss watering for a week or more |
Pros and Cons of Self-Watering Pots
Pros
- steadier moisture for thirsty tropicals, herbs, and African violets
- fewer emergency wilts during hot weather or short trips away
- easier to keep foliage dry on plants that dislike water on their leaves
Cons
- easy to keep roots too wet if the mix is dense or the reservoir never empties
- salt buildup and stagnant water need regular flushing and cleaning
- the setup can hide early overwatering until yellow leaves or sour soil appear

Clear reservoirs stabilize moisture for thirsty plants while making refill levels and cleaning needs easy to inspect.
Evaluation Method
This scorecard prioritizes four things that actually decide whether the system works indoors: root-zone safety, refill forgiveness, setup simplicity, and maintenance burden. The ratings are based on the failure modes documented in extension guidance and the repeated community patterns surfaced in the research pack, especially chronic wetness, dense soil, and overfilling.
Best Self Watering Planters Worth Considering
There are a handful of designs that consistently work well for indoor use:
Lechuza Classico
One of the most popular options in Europe and increasingly available elsewhere. The reservoir design is solid, the indicator rod is simple and reliable, and they come in sizes that work for everything from a small herb to a large monstera. The aesthetics are clean and uncluttered; they don’t scream “functional garden gadget.”
IKEA Chöchaj (formerly Kryddpeppar)
IKEA’s plant section has quietly become quite good. Their self watering pots offer a decent reservoir and a clear refill indicator at a price that makes sense for experimenting with the format for the first time.
Glowpear Urban Garden Pot
A good option for balcony herbs and vegetables. The rectangular design makes efficient use of narrow spaces, and the reservoir is generous enough to last through a warm summer week without refilling.
Wicking inserts for existing pots
If you already have pots you love, there are wicking inserts that convert a standard planter into a self watering setup. Not as seamless, but useful if you don’t want to repot everything you own.

A removable wick-and-reservoir insert can add self-watering function without replacing a favorite outer planter.
Social Listening: What Owners Keep Running Into
Public community discussions around self-watering pots keep circling the same three problems:
- growers leave the reservoir full all the time and the root zone never gets a breather
- the potting mix is too dense, so the setup stays wet instead of evenly moist
- people trust the gauge more than the plant and miss early signs of sour soil, stalled growth, or yellowing lower leaves
Those are useful qualitative signals, not hard statistics. They still line up closely with the troubleshooting patterns extension guidance warns about: check the soil, respect the plant’s dry-down preference, and do not treat a reservoir as permission to stop observing the roots.
DIY Self Watering Pots
You can build a functioning self watering pot from two plastic bottles, a fabric wick, and ten minutes. The principle is the same: upper chamber for soil and plant, lower chamber for water, wick connecting them.
A classic version:
- Take a large plastic bottle (2L works well) and cut it roughly in the middle
- Invert the top half into the bottom half
- Thread a strip of cotton fabric or shoelace through the bottle cap hole – this is your wick
- Fill the top half with potting mix and your plant
- Fill the bottom half with water
The wick draws water upward as the soil dries. You’ll need to refill the bottom chamber every week or so depending on plant size and ambient temperature.
A slightly more refined version uses two plastic storage containers, one nested inside the other with a small gap, and a soil column rather than a fabric wick. This works especially well for herbs on a kitchen counter.
DIY versions aren’t pretty, but they work. And they’re a good way to test whether self watering pots suit your habits before spending money on a proper planter.
Common Mistakes With Self-Watering Pots
- Keeping the reservoir topped up constantly: many plants do better when the lower chamber runs down before the next refill.
- Using heavy potting soil: peat-heavy mixes hold too much water in reservoir systems.
- Skipping top-watering flushes: salts build up faster in sub-irrigated pots.
- Putting every plant in the same setup: a peace lily and a snake plant do not want the same root-zone rhythm.
- Ignoring smell and texture: sour odor, algae film, or constantly cold wet soil are warnings to pause and reassess.
Seasonal Self-Watering Pot Calendar
One thing most guides don’t cover is how much your self watering pot’s behavior changes across the year. Your plant doesn’t drink at the same rate in January as it does in July. Treating the pot the same way year-round is one of the most common reasons people decide the system “isn’t working.”
Spring (March to May)
This is when self watering pots earn their reputation. Plants coming out of winter dormancy suddenly want consistent moisture to push new leaves, and the reservoir delivers that without you having to remember to water every few days.
Expect to refill every 7 to 10 days early in spring, then more frequently as temperatures rise. Check whether your indicator has dropped: warmer rooms and longer daylight hours both accelerate water uptake. Plants under grow lights on a timer tend to drink even faster than those relying on natural light alone.
Spring is also a good moment to drain and refresh the reservoir completely and flush the soil from the top before the growing season properly starts.
Summer (June to August)
Peak demand. Depending on your plant, pot size, and how warm your home gets, the reservoir may empty every 5 to 7 days. Check weekly at minimum, and consider twice-weekly checks during heat waves.
Keep the reservoir away from direct sun where possible. A clear or light-coloured pot sitting in a sunny window is more prone to algae than one tucked back on a shaded shelf. If you notice a green tinge in the water or on the reservoir walls, drain it, rinse it, and refill.
Summer is also when flushing the soil every four to six weeks matters most: fertilizer residue plus faster uptake means salts accumulate quicker than during cooler months.
")
Filtered summer light and a visible reservoir make frequent water-level and algae checks easier.
Autumn (September to November)
Growth slows, water demand drops. You’ll likely find the reservoir lasting 10 to 14 days now. Let it run lower before refilling; you don’t need to keep it topped up the way you did in summer.
This is also the time to ease off on fertilizing and to check whether any roots have grown down into the reservoir. Some plants, given consistent moisture all growing season, will send roots into the water chamber. That’s not automatically a problem, but heading into winter it’s worth knowing how dependent they’ve become on the lower chamber.
Winter (December to February)
Most houseplants slow considerably. A reservoir that emptied weekly in July might last three weeks or more now.
The risk in winter isn’t the reservoir running dry; it’s stagnant water. If the plant barely drinks and the reservoir stays full for weeks, drain and refresh it monthly rather than letting the same water sit. For plants that prefer drier conditions in winter, you can let the reservoir run empty and wait a few days before refilling, giving them a brief dry period that mirrors what they’d experience naturally.
If you made the mistake of putting a succulent or cactus in a self watering pot, winter is usually when the damage becomes obvious: soft stems, mushy roots, collapse from the base. Take the plant out, let it dry thoroughly, and repot into something with drainage and no reservoir.
The Salt Buildup Problem (And How to Fix It)
The most common mistake with self watering pots is treating them as truly automatic. They’re not, and there’s one issue that catches people off guard: salt accumulation.
If the mix still stays heavy, sour, or chronically wet even after you let the reservoir run down, compare those signals with our guide to overwatered plant signs and fixes before you refill again.
When water wicks upward and evaporates, minerals from tap water and fertilizer residue are left behind in the upper layers of soil. North Carolina State University Extension has documented that sub-irrigated containers are particularly prone to soluble salt buildup in the root zone, which can burn roots and inhibit nutrient uptake over time. You’ll notice it as a white crusty layer on the soil surface, or as browning leaf tips even when the plant seems well-watered.
The fix is simple: flush the soil from the top every four to six weeks. Pour plain water through the top of the pot, let it drain fully, then let the reservoir system take over again. This pushes accumulated salts down and out through the drainage hole, resetting the balance.
Beyond flushing, a few other reminders:
- Check the reservoir every one to two weeks; don’t assume it’s full
- Drain and rinse the reservoir completely every month or two to prevent stagnant water and algae
- Watch the plant for signs that moisture levels are off; yellow leaves from the bottom up usually mean too much, and crispy edges mean too little
Think of self watering pots less as self-watering and more as consistent watering. You’re removing the daily check-in, not the care relationship entirely.
Why Isn’t My Self-Watering Pot Doing Anything?
Sometimes you fill the reservoir, wait, and the plant still looks thirsty. The soil stays dry at the top, the leaves droop, and you start wondering if you bought a dud. Usually it’s one of five things.
1. The wick has lost contact
If the pot dried out completely at some point (reservoir empty, soil bone dry), the capillary action can break. The wick or soil bridge needs moisture in both chambers to pull water upward. Fill the reservoir, then water from the top once to re-wet the soil column. Give it 48 hours and check again. The connection usually re-establishes itself.
2. The soil has compacted
Old potting mix loses structure over time. Dense, compacted soil doesn’t wick well; water can’t travel upward through collapsed pores. If the pot hasn’t been refreshed in more than a year or two, gently loosen the top few centimetres with a chopstick. In more stubborn cases, it’s worth repotting into fresh mix entirely.
3. Salt buildup is blocking root function
Even if moisture is available in the reservoir, roots surrounded by high salt concentration can’t absorb water properly, a condition called osmotic stress. If you see a white crust on the soil surface and the plant looks stressed despite a full reservoir, flush from the top with plain water before assuming anything else is wrong.
4. The plant is in the wrong pot
If the base of the stem is soft, or leaves are yellowing from the bottom up, the problem may not be too little water but too much. The plant can’t tolerate constant moisture and is showing it. Move it to a regular pot with drainage and see if it recovers.
5. The reservoir has been empty longer than you think
Check the indicator. If there’s no water in the reservoir, the wicking system has nothing to pull from, and the soil will dry out regardless of how the pot is designed. Fill it and monitor over the next few days. Most plants bounce back quickly once the system is running again.
If you’ve worked through all five and nothing changes, check that the wick or soil bridge physically connects both chambers. In some cheaper designs, it can shift or separate during shipping.

Use the triage table before adding more water. Most problems need one root-zone check and one variable changed, not another refill.
Methodology Note
This guide was grounded in extension advice from the University of Maryland and Ask Extension, plus ASPCA pet-safety reference material, then sharpened with snippet-level community signals about refill habits, soil aeration, and overwatering failure modes. The social evidence here is useful pattern-matching, not proof of prevalence.
Freshness note: Reviewed and updated on 2026-06-16 using the research pack evidence captured on 2026-06-13.
Frequently Asked Questions
Are self watering pots good for all houseplants? No, and that’s worth saying plainly. They work well for moisture-loving plants like peace lilies, pothos, herbs, ferns, and most tropical foliage plants. They’re not suited for succulents, cacti, snake plants, ZZ plants, or any plant that needs to dry out between waterings. The consistent moisture supply that helps one group will rot the other.

Peace lilies, pothos, ferns, and herbs are strong candidates when reservoir levels are checked on the plant’s own rhythm.
How often do you need to refill a self watering pot? It depends on pot size, plant size, and how warm and dry your home is. For most indoor plants in a medium-sized self watering pot, expect to refill every one to two weeks in normal conditions. During summer or if heating is running, the reservoir may empty faster. During winter dormancy, it may last longer. Check it weekly until you know your plant’s rhythm.
Can self watering pots cause root rot? They can, if the reservoir is kept too full with a plant that needs to dry out between waterings. For plants that suit the format, the design actually reduces root rot risk by preventing waterlogged soil at the top of the pot. Moisture wicks upward only as needed, rather than sitting saturated from the surface down.
How do you prevent algae and mosquitoes in the reservoir? Keep the reservoir covered and away from direct sunlight, which promotes algae growth. Drain and rinse it every month or two rather than perpetually topping it up. If you’re concerned about mosquitoes, especially with outdoor self watering pots, a small BTI (Bacillus thuringiensis israelensis) dunk in the reservoir handles any larvae without harming your plant. If you have cats or dogs that drink from plant saucers, check our guide to cat-safe indoor plants before adding any treatments to the water.
Do you need to fertilize plants in self watering pots? Yes. The pot handles water delivery, not nutrition. Fertilize on your normal schedule for the plant type, but be aware that salt from fertilizer residue builds up faster in sub-irrigated pots than in conventionally watered ones. Flush the soil from the top every four to six weeks to prevent accumulation, and consider using a balanced liquid fertilizer at half-strength rather than full.
Is it worth making a DIY self watering pot instead of buying one? For testing whether you like the format, a DIY version from two plastic bottles or nested containers is genuinely fine. It works on the same capillary principle as a bought planter. Where commercial designs earn their cost is in durability, overflow drainage, and aesthetics. If you find you like the system and want it on your kitchen windowsill long-term, the upgrade to a Lechuza or similar is worth it. If you’re not sure, start with a two-bottle experiment first.
Can I use self watering pots with grow lights? Yes, and it’s a good combination. Plants under grow lights often have a higher water demand because additional light drives faster growth and more transpiration. A self watering reservoir can keep up with that demand more reliably than manual watering, especially if you’re running lights on a timer and your plant’s schedule doesn’t perfectly match your own.
For a busy week or a short trip away, a self watering pot is the difference between coming home to a healthy plant and coming home to a mess. Used with the right plants and a basic understanding of the system, they genuinely earn their keep.
Download KnowYourPlant for personalized plant care reminders: it tracks when to check your reservoir, when to flush, and when to fertilize based on your specific plant and pot setup.