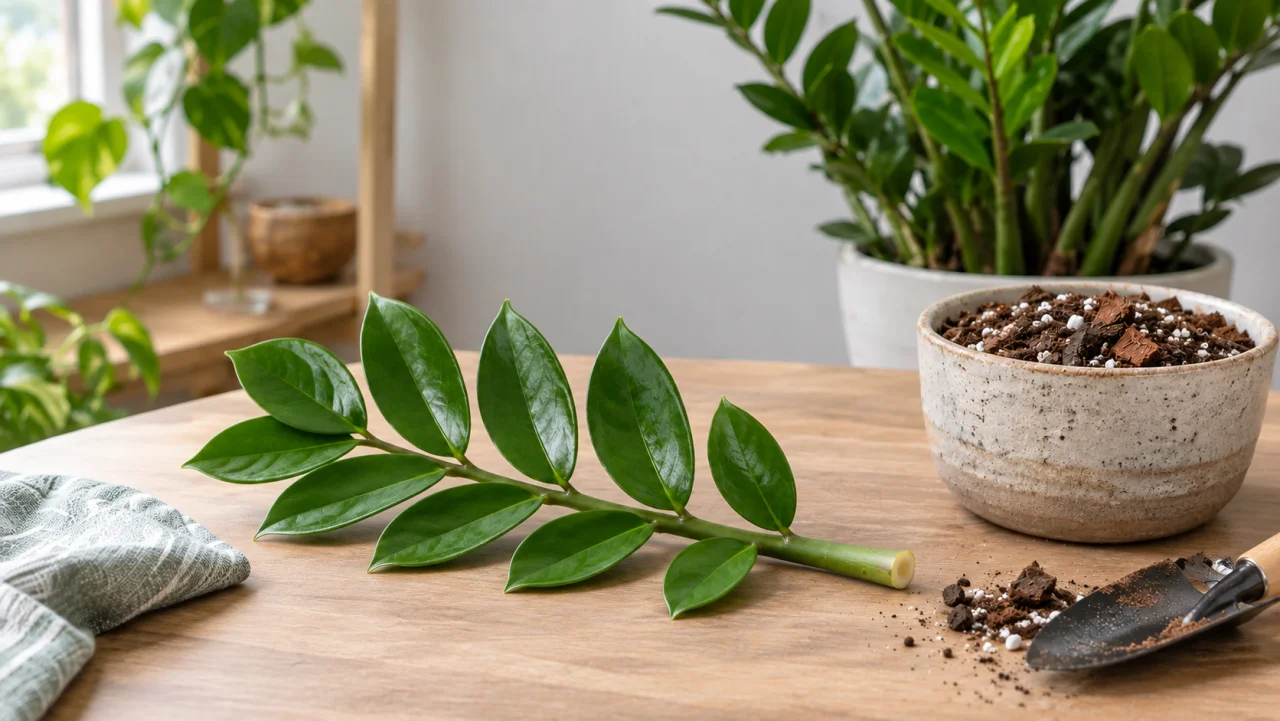
ZZ plant propagation works. It just works slowly, sometimes very slowly, and most guides skip over that part entirely.
If you have a ZZ cutting sitting in water right now wondering whether it should have rooted by now, or you have been staring at a leaf stuck into potting mix for two months and nothing has happened above the soil: that is normal. According to the University of Connecticut Home Garden Education Office, small rhizomes may begin forming in about a month under greenhouse conditions, but in a typical home setting the same process can take up to nine months before you see any visible progress above ground.
That gap between expectation and reality is where most ZZ propagation attempts get abandoned, or worse, overwatered to death in an attempt to speed things along.
This guide covers all three methods, division, stem cuttings, and individual leaves, exactly where to cut, how to choose between water rooting and a soilless mix, and what to do if the base of your cutting starts turning soft. One of those will matter to you today.
Identification Snapshot
- Fastest route: division, if the parent plant already has multiple rhizomes
- Best middle-ground option: stem cuttings, if you want a few new plants without the longest wait
- Slowest but highest-multiply option: single leaf cuttings
- Normal success sign: the cutting stays firm and starts resisting a gentle tug before you see any new shoot
- Early failure sign: the base turns soft, dark, or mushy instead of staying pale and firm
- Safest default setup: bright indirect light, airy medium, and less moisture than you think
Not sure what plant you are caring for?
Open KnowYourPlant, snap a photo, and get the plant name plus care notes matched to the species in front of you.
Identify your plantWhat Most Propagation Guides Miss
The most repeated advice in ZZ plant propagation articles is that it is easy and beginner-friendly. That is true for the cutting step. What they leave out is the part that actually trips people up.
The common misdiagnosis: A cutting that shows no growth above soil after four to eight weeks is assumed to be dead or failed. So the grower adds more water, moves it to a sunnier spot, or gives up and throws the cutting away.
Why generic advice is incomplete: ZZ plants build rhizomes underground before they push any visible growth upward. There is no leaf or shoot to signal progress. The cutting can be actively developing a root system while looking completely unchanged on the surface. The only visible progress is happening below the soil line.
The practical first check: Before giving up on a slow cutting, gently tug the base with two fingers. If there is resistance, any resistance at all, roots have formed. If the cutting slides out freely and the base looks clean and firm, it just has not rooted yet. If the base is soft, mushy, or darkening, that is rot and it needs immediate attention.
The tug test. That is it. That one check stops most premature abandonments.
Want a care schedule you do not have to remember?
KnowYourPlant sends watering, feeding, repotting, and seasonal reminders based on the plants you actually own.
Get care remindersWhich Method Is Right For You
Three approaches, and they solve different problems.
Division is the fastest path to a plant that looks like a plant. You split the rhizomes underground and repot each section with its existing root system. The new plant is already established. The limitation is that you need a mature, multi-stemmed ZZ to work with. Iowa State University Extension confirms that division is one of the two main propagation methods for ZZ plants. It is simple and reliable when the parent plant is large enough to split.
Stem cuttings hit a useful middle ground. You get more plants than division gives you, and the rooting timeline is shorter than with single leaves. A stem with several leaflets has more stored energy to draw from, which helps rhizome development happen faster underground.
Individual leaf cuttings give you the most new plants from one parent, which is worth it if you want to fill a shelf or give plants away. But each leaf needs to develop its own rhizome from scratch, so this is the slowest method. UConn notes that whole leaves can be removed and inserted into a moist soilless medium. The process works. It just tests your patience.
| Method | Speed | Plants from one parent | What you need |
|---|---|---|---|
| Division | Fastest | 2–4 sections | Mature, multi-stemmed plant |
| Stem cuttings | Medium | Several per plant | Healthy stem with leaflets |
| Leaf cuttings | Slowest | Many | Any healthy leaf |
A note on timelines: Division can produce visible new growth within a few weeks because the rhizome is already established. Stem cuttings typically show underground rhizome development within four to eight weeks, but the first shoot above soil may not appear for two to four months. Individual leaves are the slowest: UConn’s greenhouse data puts rhizome formation at around one month in ideal conditions, but indoor leaf cuttings commonly take six to nine months before any above-ground sign appears.
Save this plant plan before you forget the details.
Keep the plant, diagnosis notes, reminders, and care changes in KnowYourPlant so the next decision is based on your actual plant history.
Open KnowYourPlantZZ Plant Propagation Decision Tree
- Need the fastest result and already have a crowded pot? Choose division.
- Want a realistic balance between speed and getting several new plants? Choose stem cuttings.
- Want to multiply one plant as much as possible and do not mind waiting months? Choose single leaf cuttings.
- Already started in water and the base is still firm? Stay in water for now, but keep only the bottom inch or two submerged and transplant once roots reach one to two inches.
- Already started in water and the base is soft or darkening? Trim back to healthy tissue, let it callous, and restart in fresh airy medium.
Where to Cut a ZZ Plant
The cut location matters more than most guides admit, and it is different for each method.
For Stem Cuttings
Find a stem with at least two to three pairs of leaflets. Cut cleanly at the base of the stem where it meets the soil or the rhizome below. Use sharp, clean scissors or a knife. A ragged cut leaves more exposed surface for rot to take hold during the weeks the cutting sits in its rooting medium.
After cutting, set the stem aside on a clean surface for two to four hours. This short callusing window lets the cut surface dry slightly before it meets moisture. UConn specifically recommends allowing cuttings to callous for a few hours before insertion into the medium, and this step is worth following.
For Leaf Cuttings
Pull or cut each leaflet where it attaches to the stem. The small nub at the base of the leaf must stay intact. If that nub stays on the stem rather than coming with the leaf, the leaf cannot produce a rhizome. Once removed, let the base dry for a few hours before planting.
For Division
Unpot the whole plant. ZZ rhizomes, the chunky underground storage organs that look something like sweet potatoes, can often be separated by hand where they naturally pull apart at visible join points. If two sections are firmly fused, a clean knife cut is fine. Let any cut surfaces air-dry for a few hours, then repot each section into fresh well-draining mix.
For general guidance on when a ZZ plant is ready for this kind of root work, the process overlaps with knowing when to repot plants. A pot-bound, multi-stemmed ZZ is usually a strong candidate for division at the next repot.
What Real ZZ Owners Keep Asking
When we reviewed owner discussions around ZZ propagation, the same questions kept repeating. People were not mainly asking whether propagation was possible. They were asking whether a cutting should stay in water or move to soil, whether a jar setup was turning into accidental long-term water culture, and whether a yellowing or shriveling piece meant underwatering when the bigger problem was actually too much moisture around the base.
That lines up with the extension guidance too. NC State and Iowa State both stress that ZZ plants dislike staying wet, so the most useful propagation advice is not “just be patient.” It is patient and dry-side.
Water Rooting vs. Soilless Mix
This is the question most ZZ owners get stuck on, especially if they started in water and are now second-guessing the decision.
Water rooting lets you see what is happening. You can watch for root growth without disturbing the cutting. The downside is that water roots are structurally different from soil roots. When you transplant a water-rooted cutting, the roots have to adapt to a new environment and you will often see a pause in growth while that adjustment happens. There is also a higher rot risk if the water goes stagnant or if too much of the stem sits submerged. NC State Extension notes that ZZ plants do not tolerate wet feet, and a jar where the whole stem is submerged creates exactly that condition.
Soilless mix rooting, using perlite, a perlite-and-coco coir blend, or a very light potting mix, produces roots already adapted to a dry-side substrate. The roots you grow are the roots that stay. Transplanting into a permanent pot is much less disruptive. The tradeoff is that you cannot see anything happening underground, which makes the waiting harder.
For most people, a soilless mix is the lower-stress path. UF/IFAS notes that root rot may occur in poorly drained or compacted soil with excessive water for an extended period. A jar of standing water with no drainage is the highest-risk setup of all.
If you want to understand how water rooting compares across different plant types, the guide to propagating plants covers the tradeoffs in more detail.
If you already started in water: You do not have to switch. Keep only the base inch or two of the cutting submerged, change the water every three to four days, and keep the jar in bright indirect light. When roots are one to two inches long, move the cutting into a soilless mix before the roots get long enough to become brittle during the transfer.
Lookalikes and Confused-With Cases
| Situation | What it gets confused with | What usually separates it |
|---|---|---|
| Slow leaf or stem cutting | A dead cutting | A living ZZ cutting stays firm and often resists a gentle tug before it shows any new top growth |
| Water propagation | A permanent water-culture setup | Water is best treated as a rooting stage, not a forever home, because ZZ roots still need an airy transition later |
| Mild yellowing after transfer | Underwatering | In fresh propagations, yellowing is more often tied to root stress or staying too wet than to true drought |
| Division pieces that pause after repotting | Failed division | A short stall is normal while the split rhizomes re-establish in the new pot |
Propagation Care Cards
Light
Bright indirect light is the sweet spot. Direct sun dries cuttings too fast, while deep shade slows already-slow rhizome formation.
Moisture
Keep the medium barely damp, not evenly moist. For water propagation, refresh the water every three to four days and keep most of the stem above the water line.
Medium
Use something airy: perlite, a perlite-coco blend, or a very loose potting mix. Avoid dense, compacted mixes that stay wet around the base.
Potting Up
Once roots are established or a small rhizome has formed, move the new plant into a pot with drainage and then let the mix dry between waterings, just like you would with a mature ZZ.
Plant ID + Plant Doctor
Not sure what your plant needs?
Snap a photo in KnowYourPlant to identify the plant, check yellow leaves, spots, wilting, or pests, and get a calm next step before the problem spreads.
How to Avoid Rot
Rot is the primary reason ZZ propagation attempts fail. It starts at the base of the cutting and moves upward. The earlier you catch it, the better your odds of saving the cutting.
The core problem is always the same: ZZ plants evolved to store water in their rhizomes through long dry periods. Iowa State Extension confirms they prefer to be kept on the dry side and that watering too frequently leads to problems even in established plants. During propagation, with no roots yet to process moisture, that tendency intensifies dramatically.
Rot-avoidance checklist:
- Make a clean cut, not a torn or ragged one
- Let the cut callous for two to four hours before it meets moisture
- Use a rooting medium that drains freely: perlite, coco coir, or a very light mix
- Keep the medium barely damp, not wet
- If water rooting, submerge only the bottom inch or two of the stem
- Change water every three to four days if water rooting
- Keep the cutting in bright indirect light, not low light and not direct sun
- Do not fertilize until new growth appears above the soil
Signs of rot: The base of the stem or leaf turns soft, mushy, or darkens to brown or black. The tissue may have a faint sour smell. If you see this, remove the cutting immediately, trim off all affected tissue with clean scissors, let it callous again for a few hours, and reinsert into fresh dry medium. Catching rot at the base early still gives you a workable cutting. Waiting until rot has moved up the stem usually does not.
If you have dealt with overwatering in an established plant, the root-zone logic explained in the overwatered plant guide applies here too. The difference is that during propagation there are no roots yet to signal stress through leaf symptoms, so the only visible warning is at the cut site itself.
Common Problems
| Problem | Most likely cause | What to do next |
|---|---|---|
| Base turns mushy | Medium stayed too wet or too much of the cutting sat in water | Trim to healthy tissue, let it callous again, and restart in fresh airy medium |
| Cutting looks unchanged for months | Normal rhizome-building delay | Do the gentle tug test before assuming failure |
| Leaf wrinkles badly after planting | Leaf cutting dried too hard before it formed a rhizome | Move to steadier bright light and lightly reset the medium instead of soaking it |
| Yellowing after potting up | Root stress or overwatering | Check drainage first and let the mix dry more between waterings |
Common Mistakes During ZZ Propagation
- Using a heavy potting mix that stays wet around the cut base
- Keeping the whole lower stem underwater instead of just the cut end
- Tugging a cutting out repeatedly to check progress
- Fertilizing before the cutting has produced any real new growth
- Throwing away a firm cutting just because it has not pushed a shoot yet
What Happens After Roots Form
The first above-ground sign of progress is a small nub or shoot emerging from the soil. That is the moment the cutting has built its own rhizome and is ready to be treated like a normal plant.
At that point, move it into a permanent pot with a well-draining mix. NC State Extension recommends well-drained potting soil and letting the plant dry out between waterings. The same approach that protects established ZZ plants protects newly rooted ones.
New growth after that first shoot tends to be slow at first. The rhizome is small, and most of the plant’s energy goes into expanding the root system before pushing leaves. Expect one to two new stems in the first growing season, not a full-sized plant. That pace picks up once the rhizome grows larger in the second year. Resist the urge to fertilize right away. Wait until the plant has pushed two or three new leaves before adding any nutrients.
For everything that comes after propagation, the ZZ plant care guide covers light, watering, soil, and long-term maintenance.
If the new plant starts developing yellow leaves during or after the transition to a permanent pot, the ZZ plant yellow leaves guide covers the two most common culprits at this stage: overwatering and light adjustment.
Seasonal Propagation Timing
ZZ plants are slow growers year-round, but timing your propagation attempt does make a difference.
Spring and early summer are the best windows. The plant is in active growth, stored energy in the rhizomes is higher, and warmer ambient temperatures speed up rhizome formation in the cutting. If you can take a stem cutting in April or May, do it.
Late summer works, but progress slows as days shorten heading into autumn.
Autumn and winter are not impossible, but the combination of shorter days, cooler temperatures, and a plant that is naturally slowing down means rooting takes longer and the risk of a cutting sitting inert while slowly rotting increases. If you need to divide a pot-bound plant in winter for space reasons, go ahead. But if you have a choice, wait.
Seasonal note: If you have to propagate in winter, reduce the urge to compensate with extra water. Lower light and cooler temperatures already slow the cutting down. More moisture does not fix that, it just raises rot risk.
Pet Safety Note
ZZ plants are mildly toxic. The ASPCA lists ZZ plant as toxic to cats and dogs, with symptoms including oral irritation, vomiting, and drooling. During propagation you may have leaves, stems, or open jars of cuttings in accessible spots at floor or table level. Keep them out of reach of pets while the cutting is in progress.
Real User FAQ
How long does ZZ plant propagation take?
It depends on the method. Division is the fastest: a divided rhizome with roots already attached can push new growth within a few weeks. Stem cuttings typically show the first signs of rhizome development underground within four to eight weeks, but visible above-ground growth may take two to four months. Individual leaf cuttings are the slowest: UConn notes that while rhizomes may begin forming in about a month under greenhouse conditions, indoor leaf cuttings can take up to nine months before a new shoot appears. The tug test, a gentle pull at the base, is the only reliable way to check progress without uprooting the cutting.
Where exactly do I cut a ZZ plant stem?
Cut at the base of the stem where it meets the soil line or a rhizome. Use clean, sharp scissors or a knife. The cut should be clean and smooth, not torn or crushed. After cutting, let the stem rest on a clean surface for two to four hours before placing it in any rooting medium.
Should I root a ZZ cutting in water or soil?
Both work. Water rooting lets you watch for root development, but the roots formed in water need to adapt when you transplant to soil, which causes a temporary growth pause. A soilless mix, perlite, coco coir, or a very light potting mix, produces roots already suited to the substrate the plant will live in long-term. For most people, soilless rooting is the lower-risk approach because it removes the transplanting adjustment and reduces the chance of stagnant-water rot.
How do I know if my ZZ cutting has rotted?
Check the base. Rot shows as softness, mushiness, or darkening to brown or black at the point where the cutting meets the medium. There may also be a faint sour smell. If caught early, just at the base, you can trim off the affected tissue with clean scissors, let it re-callous for a few hours, and try again in fresh medium. If rot has moved up the stem, the cutting is usually beyond saving.
Why is nothing happening above the soil with my ZZ cutting?
This is normal. ZZ cuttings build rhizomes underground before pushing any visible growth upward. A cutting can be actively developing its root system while looking completely unchanged on the surface for weeks or months. Use the tug test: hold the cutting near the base and give a gentle pull. Resistance means roots have formed. No resistance and a firm, clean base means it has not rooted yet but is fine. No resistance and a soft base means rot.
Can I propagate a ZZ plant from a single leaf?
Yes. Remove the entire leaflet where it attaches to the stem, keeping the small nub at the base intact. Let it callous for a few hours, then insert it base-down into damp perlite or a light soilless mix. Keep the medium barely moist and wait. A single leaf will eventually produce a rhizome and then a new shoot, but this is the slowest method. Expect many months before visible progress indoors.
How do I propagate a ZZ plant by division?
Unpot the parent plant and look for natural separation points between rhizomes. Gently pull apart sections that divide naturally. If they are firmly attached, a clean knife cut is fine. Let any cut surfaces air-dry for two to four hours, then repot each section into a pot with fresh well-draining mix. Water lightly and give the plant a week to settle before resuming a normal watering schedule. This is the fastest method to a plant that already looks established.
When should I move a ZZ cutting from water to soil?
When water roots are roughly one to two inches long. At that length they are visible enough to confirm rooting but short enough to handle without breaking. Move into a soilless mix rather than a heavy potting soil, and keep the medium barely moist for the first few weeks while the roots adjust to their new environment. Waiting until roots are very long makes transplanting more disruptive and increases the chance of root damage during the move.
Methodology
This guide was checked against extension and university plant-care sources for propagation method, moisture handling, and realistic rooting timelines. We also reviewed accessible owner discussions to see where real ZZ growers get stuck, especially around water versus soil propagation, slow progress that looks like failure, and rot-related symptom confusion. Those discussions shaped the troubleshooting sections here, but they were treated as qualitative signal, not proof.
Sources: University of Connecticut Home Garden Education Office (ZZ Plant, homegarden.cahnr.uconn.edu); Iowa State University Extension and Outreach (The ZZ Plant); NC State Extension Gardener Plant Toolbox (Zamioculcas zamiifolia); UF/IFAS Ask IFAS, Florida Foliage House Plant Care: ZZ Plant; ASPCA Toxic and Non-Toxic Plants List. Research current as of June 2026.