Orchid care is not complicated. It is just different from everything else you have grown.
You brought home an orchid in full bloom, watered it because you were trying to be helpful, then watched the last flower drop. Now you are staring at curling leaves, yellow edges, or a bare green stem and wondering if it is alive, dying, or just being an orchid. If the plant is otherwise healthy and the bloom cycle just ended, the orchid after-flowering guide gives the immediate spike, light, and rebloom steps.
Most people either water orchids to death trying to be attentive, or abandon them in a corner assuming they’ve given up. The truth is somewhere much more manageable: orchids want less from you than you think, but they want it consistently.
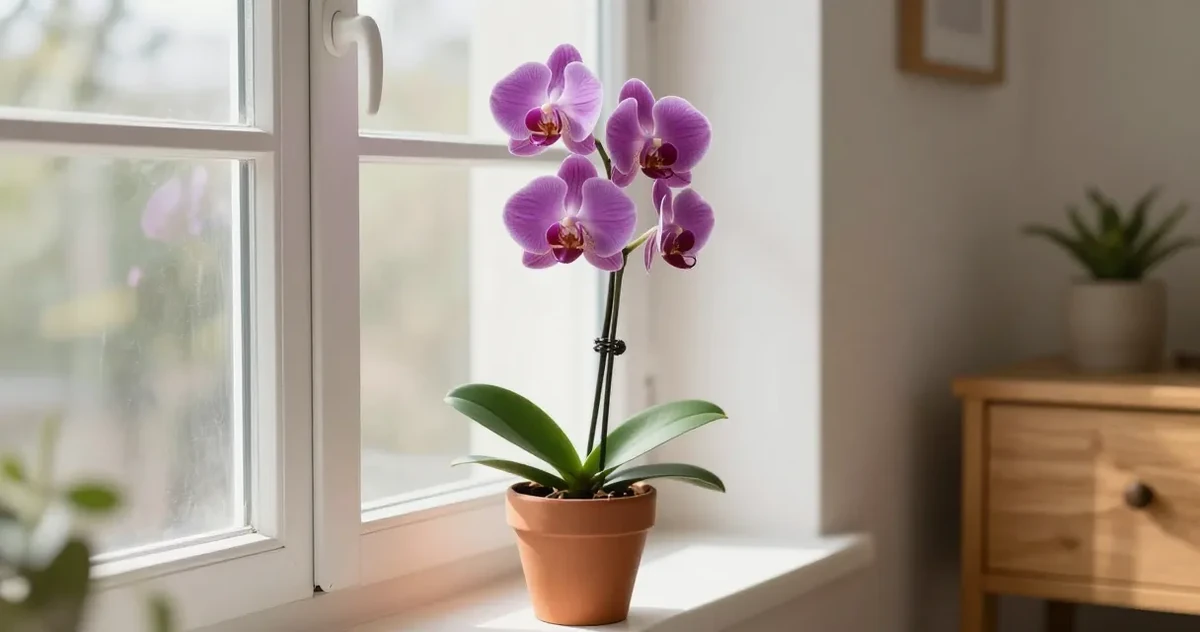
This guide is for Phalaenopsis orchids, the ones with arching sprays of flat, moth-like flowers you find at grocery stores and garden centers. They are the most forgiving orchid for everyday indoor plant owners, and they really can bloom again if you get the basics right.
Identification Snapshot
| Check | What a beginner usually sees |
|---|---|
| Flower shape | Flat, rounded, moth-like blooms on an arching spike |
| Leaves | Broad smooth leaves growing from a central crown, not many small leaves along a cane |
| Roots | Thick silver-green roots, often visible through a clear pot or curling over the rim |
| Potting medium | Bark or chunky orchid mix, never regular potting soil |
| Best beginner match | A common Phalaenopsis from a grocery store or garden center, not every plant sold simply as “orchid” |
If the bark is breaking down, staying wet, or packed around declining roots, use the orchid soil guide before choosing a replacement mix.

Broad crown leaves, moth-like blooms, chunky bark, and visible silver-green roots identify a beginner-friendly Phalaenopsis.
Lookalikes and Confused-With Orchids
| Plant | Why beginners mix it up | What changes care |
|---|---|---|
| Dendrobium orchids | They are also sold in bloom with a generic “orchid” label. | Many need brighter light and a different rest cycle than Phalaenopsis. |
| Oncidium orchids | Store tags often flatten many orchid types into one category. | They usually like a different moisture rhythm and spike shape. |
| Cattleya orchids | The flowers are showy enough that beginners assume the care must be the same. | They often want brighter light and a different growth habit than the beginner-friendly grocery-store orchid. |
What Most Care Guides Miss
Most guides about orchid describe the ideal care routine. Real homes are messier: light changes by season, pots dry at different speeds, and the same symptom can mean different things depending on where it appears.
Before changing care, check the plant in this order:
- Light: is the plant growing toward the window, fading, or scorching?
- Root zone: is the pot drying predictably, or staying wet in the middle?
- Leaf pattern: did the oldest leaves, newest leaves, tips, or stems change first?
- Recent change: new pot, new location, fertilizer, cold draft, heat vent, or pest exposure.
This keeps you from fixing the wrong problem. One clear adjustment is usually safer than a full care reset.
Quick Care Fit Check
Before you buy one, or before you change care for the one you already have, check whether an orchid fits your room and routine.
- Good fit: You have bright indirect light, such as an east window or a south window with a sheer curtain.
- Good fit: You can check the roots once a week and water at the sink when they turn silver-grey.
- Bad fit unless you change the setup: The pot has no drainage, the orchid is in regular potting soil, or the room is dark all day.
- Bad fit for your habits: You prefer plants that want daily watering. Orchids do better with patient checks than frequent attention.
Your quick plan: today, check the roots and drainage. This week, watch the leaves for yellowing, curling, wrinkling, or brown tips. This season, adjust watering and temperature so the plant has a reason to grow or rebloom.

A bright window, visible roots, chunky bark, and a draining clear pot make an orchid routine easier to judge before care changes.

Use the setup fit check before changing the care routine. Most beginner orchid problems start with the room, pot, medium, or drainage rather than a missing trick.
Care Cards
| Care card | What to aim for | Beginner mistake to avoid |
|---|---|---|
| Light | Bright indirect light near an east window or filtered south light | Treating a dim corner as “good enough” and then trying to fix slow growth with more water |
| Water | Water only when the roots turn silver-grey and the bark has dried enough to breathe | Watering on a fixed schedule while the middle of the pot is still damp |
| Pot and mix | Clear pot with drainage and chunky orchid bark | Leaving the plant in a decorative sleeve or regular potting soil |
| After bloom | Keep the same care rhythm while the plant rebuilds energy | Panic-watering, panic-repotting, or throwing the orchid away after the flowers fall |
Pet Safety and Household Safety
If pets or small kids can reach the plant, keep the orchid, bark, moss, support clips, and fertilizer out of chewing range. The plant itself is usually a lower-drama houseplant than many tropicals, but the setup around it can still upset a stomach or create a choking problem.
How Often to Water an Orchid
This is where most people go wrong, and it’s not their fault. Orchids look like they should be watered often: they’re tropical, they’re dramatic. But the roots need to dry out between waterings, and most people keep them too wet.
According to the American Orchid Society, overwatering is the single most common cause of orchid death. That surprises people, but it makes sense once you understand where Phalaenopsis come from: in nature, they grow attached to tree trunks and branches, where rain arrives fast and drains away completely. There’s no soil to hold moisture. Their roots expect dry periods.
The rule of thumb: Water once every 7 to 10 days in summer, every 10 to 14 days in winter. But forget the calendar. Look at the roots instead.
Orchids sold in clear plastic pots are packaged that way for a reason: so you can see the roots. When the roots are plump and green, the plant has enough water. When they turn silvery-grey and slightly wrinkled, it is time.
How to water properly: Take the pot to the sink and run room-temperature water through the bark for about 30 seconds. Let it drain completely. Never let an orchid sit in a saucer of standing water. That’s a slow path to root rot.

Green roots show this clear-potted Phalaenopsis has just been watered; let the bark drain and wait for roots to turn silvery before watering again.
The popular advice to use ice cubes? Usually skip it unless you know the setup can handle it. Our orchid ice cube watering guide explains when that shortcut is harmless for a grocery-store Phalaenopsis and when it quietly causes trouble. Lukewarm water is still the safer default.

Let root color and pot weight decide the next move. Calendar timing is only a reminder to check, not permission to water a damp orchid.
Light: Where Your Orchid Actually Wants to Live
Orchids want bright light, but not direct afternoon sun. A south-facing window with sheer curtains, or an east-facing window with morning light: those are the sweet spots.
Signs it is getting too much sun: the leaves turn yellowish or get a reddish tinge, and in bad cases you’ll see bleached patches where the sun hit directly. Move it back or add a sheer curtain.
Signs it is not getting enough light: the leaves are a deep, dark green (healthy-looking, actually wrong) and it refuses to bloom. Orchids bloom more readily when they get bright light without harsh sun. Deep green means the plant is comfortable but not flowering. If your room stays dim most of the day, this grow lights guide for indoor plants walks through what kind of supplemental light actually helps.
Healthy Phalaenopsis leaves are a medium green, slightly glossy. Not dark, not yellow. Think “fresh spinach” not “dark kale.”
Humidity: The Part Most Guides Skip
Most orchid care guides don’t mention humidity, and it’s one of the reasons people struggle through winter. Phalaenopsis are native to tropical and subtropical Asia, where humidity is naturally high. Indoors in winter, especially with central heating running, the air gets uncomfortably dry for them.
They do best at 50-70% relative humidity. You don’t need a tropical greenhouse, just a bit of awareness. If you are not sure whether your room is actually too dry, this guide to humidity for houseplants helps you check the overnight drop, vents, and other causes before you buy equipment.
The simplest approach: set the pot on a shallow tray filled with pebbles and a little water. As the water evaporates, it raises the local humidity around the plant without wetting the roots. Keep the pot sitting above the waterline. It sounds like a minor thing, but if your orchid is in a heated room and the leaves look slightly wrinkled even after watering, low humidity is often the culprit.
A humidifier near a cluster of tropical plants works well too. Orchids, peace lilies, and ferns all appreciate similar humidity levels, so grouping them benefits everyone. (More on peace lily care indoors.)
One thing to avoid: misting directly on the leaves. It feels helpful but doesn’t meaningfully raise humidity, and water sitting in the leaf joints overnight can encourage rot.
If you’re building out a plant corner with multiple tropicals, grouping plants that share similar humidity needs makes care easier across the board. Our guide to air-purifying plants covers a range of tropical plants, many of them do well alongside orchids for exactly this reason.
The Right Pot and Soil Matter More Than You Think
Regular potting soil will kill an orchid. It needs airflow around the roots: that’s the whole point of bark mix. In nature, Phalaenopsis roots cling to tree bark. They breathe. Packing them in dense, moisture-retaining compost suffocates them.
Use orchid bark mix, not regular potting soil. Any garden center should carry it labeled as “orchid mix” or “epiphyte mix.”
On pots: clear plastic is ideal because it lets you watch the roots. Terracotta is porous and dries out faster, which lowers overwatering risk, but you lose the root visibility. If you’re new to orchids, clear plastic until you’ve got the watering timing down. Once you can read the roots confidently, terracotta is worth considering. (Our terracotta pots guide covers the pros and cons for different plant types.)

A clear pot keeps root color visible, while terracotta dries faster; both work best with coarse bark that leaves air around Phalaenopsis roots.
Pot size matters too. Orchids like to be slightly snug. A too-large pot keeps the bark wet too long and the roots rot. Repot only when the roots are visibly escaping the pot or when the bark has broken down to mush, usually every 2 years.
Fertilizing: Less Is More
During the growing season (spring through summer), fertilize once a month with a balanced orchid fertilizer, diluted to half strength. The phrase growers use is “weakly, weekly”: you can also fertilize at quarter strength every time you water. Either works.
A visual check for correct dilution: after mixing liquid fertilizer into your watering can, it should look almost clear, like very faint tea. If it has noticeable color, dilute further. Concentrated fertilizer burns orchid roots fast.
In autumn and winter, stop fertilizing. The plant is resting.
Don’t fertilize a newly purchased orchid for at least two months. Nursery growers fertilize heavily before sale; adding more will burn the roots.
After Blooming: Don’t Give Up on It
When the flowers drop, most people throw the plant away. That’s the saddest part of this story, because it is not done.
After the last flower falls, look at the spike (the long green stem that held the flowers). You have two options:
Option 1: Cut the spike down to the base. The plant puts energy into root and leaf growth, and eventually sends up a new spike. This takes longer (6 to 12 months) but tends to produce a healthier, stronger-blooming plant.
Option 2: Cut the spike just above a node (one of the little brown bumps on the stem). Sometimes, not always, a side branch will emerge from that node and bloom again within a few months. Worth trying on a healthy plant.
Either way, keep caring for it the same. It is not dead. It is just resting.
Getting an Orchid to Rebloom
The trigger for reblooming is a temperature drop at night. Phalaenopsis need a difference of about 10°F (5-6°C) between day and night temperatures for 4 to 6 weeks to initiate a new flower spike. Iowa State highlights the same pattern in its rebloom guidance: more light, light feeding during active growth, and a noticeable drop in nighttime temperature do more than random fertilizer changes or extra watering.
In autumn, when indoor temperatures start to drop slightly at night, move the orchid to a cooler spot near a window. Not drafty, just cool. Nighttime temps around 55-60°F (13-16°C) for 4 to 6 weeks is often enough.

An autumn window can provide the bright days and cooler nights that encourage a rested Phalaenopsis to start its next bloom cycle.
You’ll know it’s working when a small green nub appears at the base of the plant, between the leaves or near the roots. That’s the new spike. Point it toward the light and leave it alone.
When it blooms, a healthy Phalaenopsis spike can hold flowers for 2 to 4 months, one of the longest bloom durations of any common houseplant.

Reblooming is a sequence, not a panic fix: rebuild energy, provide bright indirect light, use cool nights for several weeks, then protect the new spike.
Orchid Care Through the Seasons
Orchids follow the same seasonal rhythm even indoors, and adjusting your care to match it makes a real difference.
Spring (March to May): This is when the plant wakes up. Start fertilizing again after a winter break, and increase watering frequency slightly as the days lengthen. If you see a new leaf emerging, that’s a good sign. New roots are common in spring too: look for bright green tips on silver-grey root strands.
Summer (June to August): The most active growing season. Water every 7 to 10 days, fertilize monthly, and watch that it is not getting scorched by strong afternoon sun. Air conditioning can drop humidity quickly, so keep the pebble tray going in summer as well.
Autumn (September to November): The most important season for reblooming. As indoor temperatures drop slightly at night, move it somewhere cooler near a window. Stop fertilizing. This is the temperature differential the plant needs to initiate a new flower spike. Watch for a small green nub appearing between the leaves.
Winter (December to February): Reduce watering to every 10 to 14 days. No fertilizing. If it is in a heated room, keep the pebble tray going. Position it near the light but away from cold glass; cold drafts coming through a window frame can damage the leaves.
Common Problems and What They Mean
Yellow leaves (lower leaves only): Normal. Orchids shed older leaves as they grow. One leaf yellowing and dropping from the bottom is just the plant’s cycle.
Yellow leaves (all over): Too much direct light, or sitting in water. Check both. If you need a fuller troubleshooting breakdown, see our orchid leaves turning yellow guide.
Curling leaves: Usually uneven watering, dry air, or heat stress. Check the roots first. If they are silver and dry, water thoroughly. If they are green and the room is hot or dry, move the orchid out of direct sun and raise humidity.
Brown tips: Usually low humidity, fertilizer burn, or old damage. Flush the bark with plain room-temperature water, pause fertilizer for a month, and keep the pot above a pebble tray if the air is dry.
Wrinkled, limp leaves: Underwatering, or root rot (damaged roots can’t take up water even when moisture is present). Check the roots: healthy roots are firm and green or silver, rotted roots are brown and mushy.
No new leaves, no growth: Normal in winter. If it persists into spring with good light and regular watering, the orchid likely needs repotting into fresh bark.
Sticky residue on leaves or stem: Check for scale insects, small brown bumps that look like part of the plant. Wipe off with a damp cloth and a little diluted rubbing alcohol.
If symptoms overlap, do not guess from one leaf. Check roots, light, humidity, and the pot before adding more water.
Orchid Care at a Glance
| What | Details |
|---|---|
| Light | Bright indirect; east or south window with sheer curtain |
| Water | Every 7-14 days, when roots turn silver-grey |
| Humidity | 50-70%; pebble tray or humidifier in dry/heated seasons |
| Soil | Orchid bark mix only, never regular potting soil |
| Fertilize | Half-strength orchid fertilizer monthly (spring/summer only) |
| Temperature | 65-80°F day; 55-60°F nights for 4-6 weeks to trigger blooming |
| Repot | Every 2 years, or when roots visibly escape the pot |

Filtered light, visible roots in chunky bark, a pebble tray, and simple watering and repotting tools bring the core Phalaenopsis routine together.
Real User FAQ: Orchid Care for Beginners
These are the questions first-time orchid owners ask when the blooms drop, the roots look strange, or the plant seems to stop doing anything for months.
How often should I water my orchid?
Every 7 to 10 days in summer, every 10 to 14 days in winter, but the roots tell you more reliably than any schedule. Silver-grey and slightly wrinkled means it is time. Green and plump means the orchid has enough water.
Why won’t my orchid rebloom?
Most likely it has not had the temperature drop it needs. Move it near a window in autumn where nights cool to around 55-60°F (13-16°C) for 4 to 6 weeks. That cool-night differential is the trigger. Also check the light: if the leaves are a deep, dark green, it may not be getting enough light to initiate a bloom spike.
Should I cut the spike after the flowers fall?
You have two options: cut it to the base (produces a stronger new spike in 6-12 months) or cut above a node (may produce a shorter side bloom sooner). If the plant looks at all stressed or the roots look pale and sparse, cut to the base and let it recover properly.
How do I know if my orchid has root rot?
Remove the pot and look at the roots. Healthy roots are firm, green when wet, silver-grey when dry. Rotted roots are brown, mushy, and may smell a little off. If you find them, trim the bad ones with clean scissors, let the roots air dry for a few hours, then repot in fresh bark.
Can orchids grow in regular potting soil?
No. Regular potting soil stays too wet and blocks the airflow that Phalaenopsis roots need. Always use orchid bark mix or a coarse epiphyte mix. This is the one non-negotiable in orchid care.
Are those roots or a new flower spike?
Roots usually look round with a silvery surface and a green tip. A new flower spike looks flatter, greener, and grows upward from between the leaves rather than snaking over the edge of the pot. If you are unsure, wait and watch for a week instead of cutting anything.
My flowers dropped. Is the whole plant dying?
Usually no. A Phalaenopsis often blooms, rests, and then slowly builds energy for the next spike. If the leaves stay reasonably firm and the roots still look healthy, treat flower loss as the end of a bloom cycle, not proof that the orchid is dying.
Methodology Note
This guide uses university extension and American Orchid Society care guidance for the factual baseline, then uses real beginner questions from public gardening forums to decide which confusing moments deserve clearer explanations. Those community questions are useful for spotting common mistakes, not for replacing species-specific care sources.
Orchids have a reputation for being difficult, but most of that comes from watering them like regular houseplants. Give your orchid bark, good light, a bit of humidity, and the patience to let it dry out between waterings, and it can reward you with flowers that last for months.
The silence between blooms is not failure. It is just the part of the cycle that happens before the flowers come back. To keep the routine out of your head, save your orchid in KnowYourPlant and follow reminders for watering, feeding, repotting, and reblooming season.