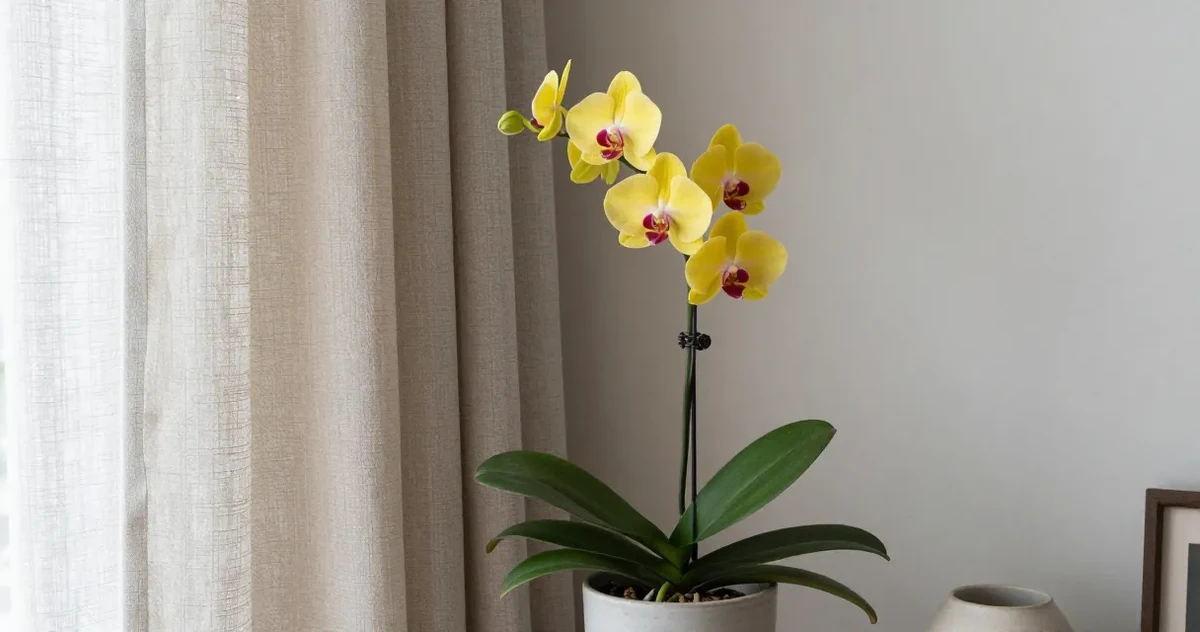
Orchid Leaves Turning Yellow: 8 Causes and Solutions
You noticed it this morning: one of your orchid’s leaves has gone from deep green to a soft, unsettling yellow. Now you’re second-guessing everything – the watering schedule, the spot on the windowsill, the fertilizer you used last month. Orchid leaves turning yellow is one of the most common worries orchid owners bring up, and the good news is that most of the time, it’s fixable – or not even a problem at all.
Here’s a useful way to think about it: yellow orchid leaves are a signal, not a verdict. The leaf is telling you something changed. Your job is to figure out what. If you need the baseline routine first, start with our orchid care guide for beginners, then come back here to troubleshoot the yellowing.
If you only have two minutes, start here:
- One yellow bottom leaf, firm green leaves above it: wait. This is usually normal aging.
- Several yellow, soft leaves plus a heavy pot: stop watering for now and check the roots.
- Wrinkled yellow leaves plus dry, silvery roots: soak the pot for 15 minutes, then drain it well.
- Yellow-green or bleached patches near a sunny window: move the orchid out of direct sun.
- Brown tips after feeding: flush the pot with plain water and pause fertilizer.
For watering, most moth orchids in bark need water about every 7 to 10 days in warm months and less often in winter. Do not water by the calendar alone. Water when the pot feels light and the roots look silvery; wait if the pot still feels heavy, the bark is damp, or there is condensation inside a clear pot. If you want a deeper breakdown of what changes that rhythm, our orchid ice cube watering guide explains when convenience watering works and when it quietly causes trouble.
Climate context for yellowing Phalaenopsis leaves
A yellow leaf is a symptom, not a climate measurement. This Phalaenopsis amabilis profile supplies species context while the diagnosis still depends on which leaf changed, root condition, light, and recent watering.
The ranges below are the middle 50% (p25–p75), not recommended indoor setpoints.
| Reference taxon | POWO native range | Annual mean temperature | Annual precipitation | Relative humidity | Solar radiation | Evidence |
|---|---|---|---|---|---|---|
| Phalaenopsis amabilis (moon orchid) | Malesia to northeastern Australia | 24.1–26.4°C | 1967–3100 mm/yr | 65–69% | 18.3–19.5 MJ/m²/day | 30 climate points / 48 usable records; medium confidence |
What this changes in this guide: Do not correct a climate mismatch by adding water automatically. Inspect roots and medium first, especially because epiphytic roots need air as well as moisture.
Sources and method: Phalaenopsis amabilis in POWO and GBIF; CHELSA V2.1, 1981–2010. GBIF records are limited to POWO-native countries, then filtered for coordinates, establishment signal, licence, precision, and spatial duplication. No community or user-reported care data is used in this module.
Symptom Diagnosis Card
| What you see first | Most likely cause | Check this before changing care |
|---|---|---|
| One oldest bottom leaf turns yellow, rest of plant stays firm | Normal leaf aging | Look for healthy roots and active new growth |
| Several leaves turn yellow and feel soft | Overwatering or root rot | Slide the plant out and inspect for brown, mushy, hollow roots |
| Yellow leaves also wrinkle or feel limp | Underwatering or damaged roots | Check whether roots are silvery and shriveled or whether roots are gone entirely |
| Yellow patches on the sun-facing side | Too much direct light | Look for bleaching, heat, or a harsh afternoon window |
| Yellowing after feeding, often with brown tips | Fertilizer salt buildup | Flush the pot and inspect the bark for crusty residue |
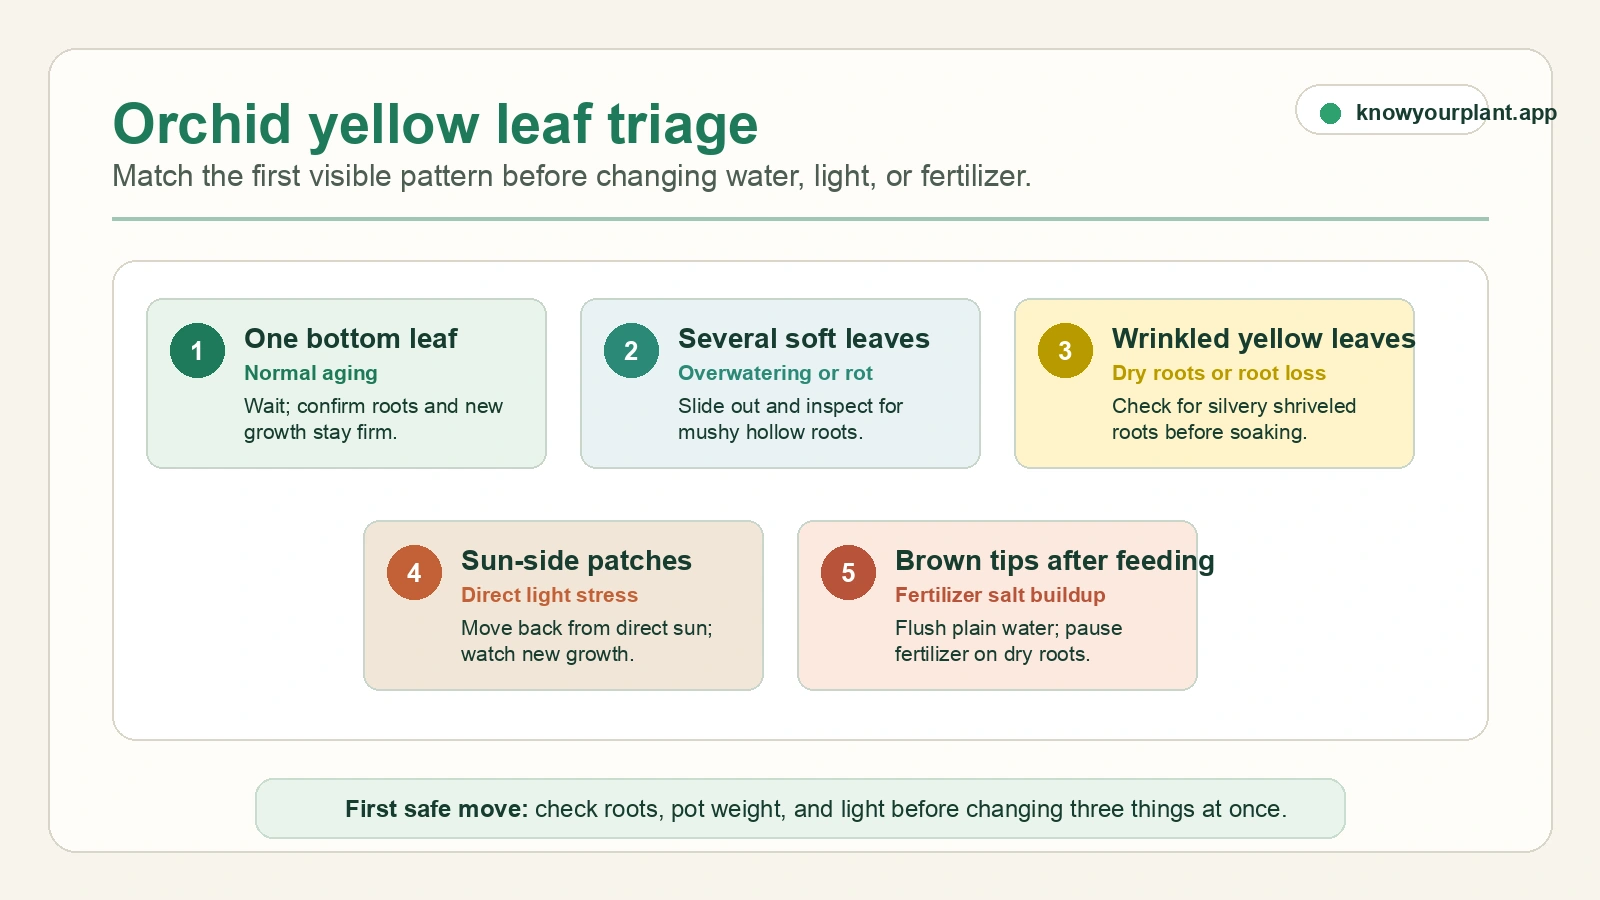
Use the triage card to match the first visible pattern before changing water, light, or fertilizer all at once.
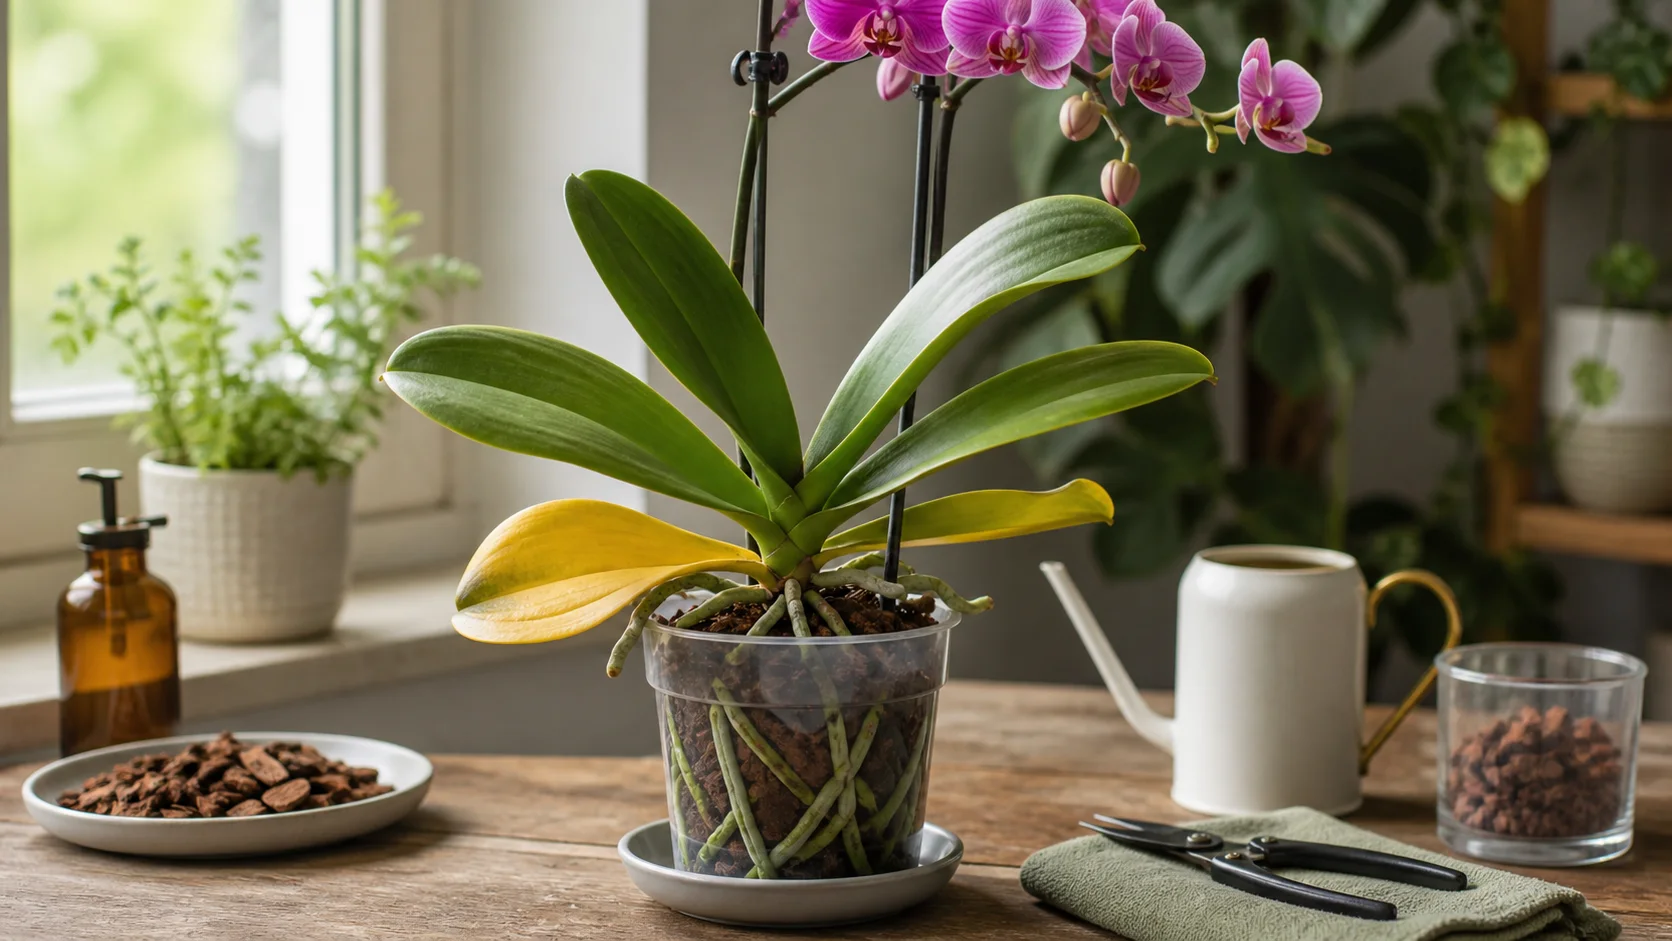
A clear pot exposes root condition while lower-leaf yellowing is compared with otherwise firm, green orchid growth.
Let’s go through the eight most likely causes, one by one.
Yellow Orchid Leaf Decision Tree
- Is only the oldest bottom leaf yellowing? If yes, treat normal aging as the first explanation unless the roots also look poor.
- Are newer leaves yellowing too? If yes, unpot the orchid and inspect the roots before watering again.
- Are roots brown, mushy, or hollow? If yes, trim rot, replace broken-down media, and reset watering.
- Are roots silvery and shriveled, with dry bark? If yes, rehydrate with a full soak, then return to a lighter watering rhythm.
- Do you see bleaching or hot patches on the window side? If yes, move the plant out of direct sun and reassess after new growth appears.
- Did the problem start after feeding or after a year in the same mix? If yes, flush salts and consider repotting into fresh orchid bark.
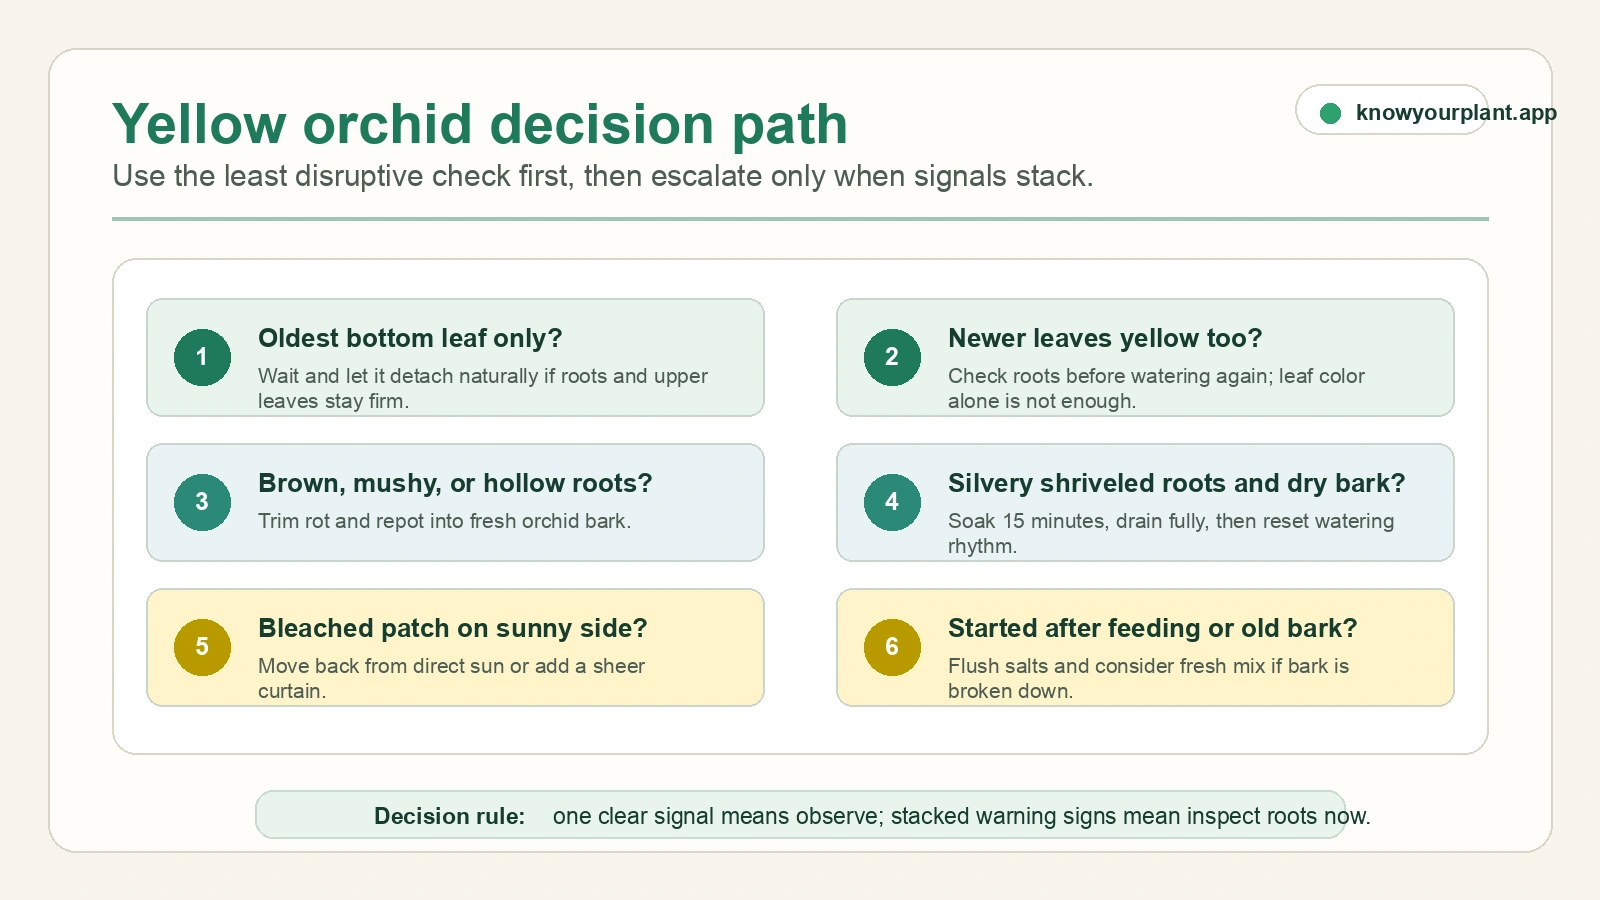
Follow the decision path from least disruptive check to root inspection so you do not overcorrect a normal leaf or miss active rot.
Start With the Pattern, Not One Cause
Most articles about yellow orchid leaves list possible causes. That is helpful, but it can also make you change watering, light, fertilizer, and soil all at once, which makes the plant harder to read.
What Most Guides Miss
Before you change care, check the roots and the potting medium. A yellow leaf by itself rarely tells the whole story. Bark that has broken down, roots that have gone hollow, or moisture trapped near the crown can make overwatering and underwatering look almost identical from above the pot.
Start with the pattern instead:
- Oldest leaves first: often points to watering rhythm, root stress, or normal aging.
- Newest growth first: look harder at light, nutrients, pests, or temperature stress.
- Tips and edges first: check drying, salts, heat, or inconsistent moisture.
- Stems, crown, or soil smell: treat it as a root-zone warning before adding more water.
Make one change, then watch new growth. The goal is not to guess every cause; it is to choose the first safe check.
1. Natural Aging
Not every yellow leaf is a crisis. Orchids shed older leaves from the bottom of the plant as they put energy into new growth. If the yellowing is happening on the lowest, oldest leaf and the rest of the plant looks healthy – glossy green leaves, firm roots, maybe even a new spike forming – this is just the plant doing what plants do.
The American Orchid Society notes that Phalaenopsis orchids typically carry three to five leaves at a time, shedding the oldest as new ones emerge. One yellow leaf at the bottom, once in a while, is normal turnover.
You don’t need to do anything except remove the leaf once it’s completely yellow and pulls away cleanly on its own.
Expert note: The American Orchid Society and University of Maryland Extension both make the same distinction growers miss in a panic: one old lower leaf yellowing can be routine, but yellowing in newer leaves, shriveling, or crown softness points to a root-zone problem that needs a closer look.
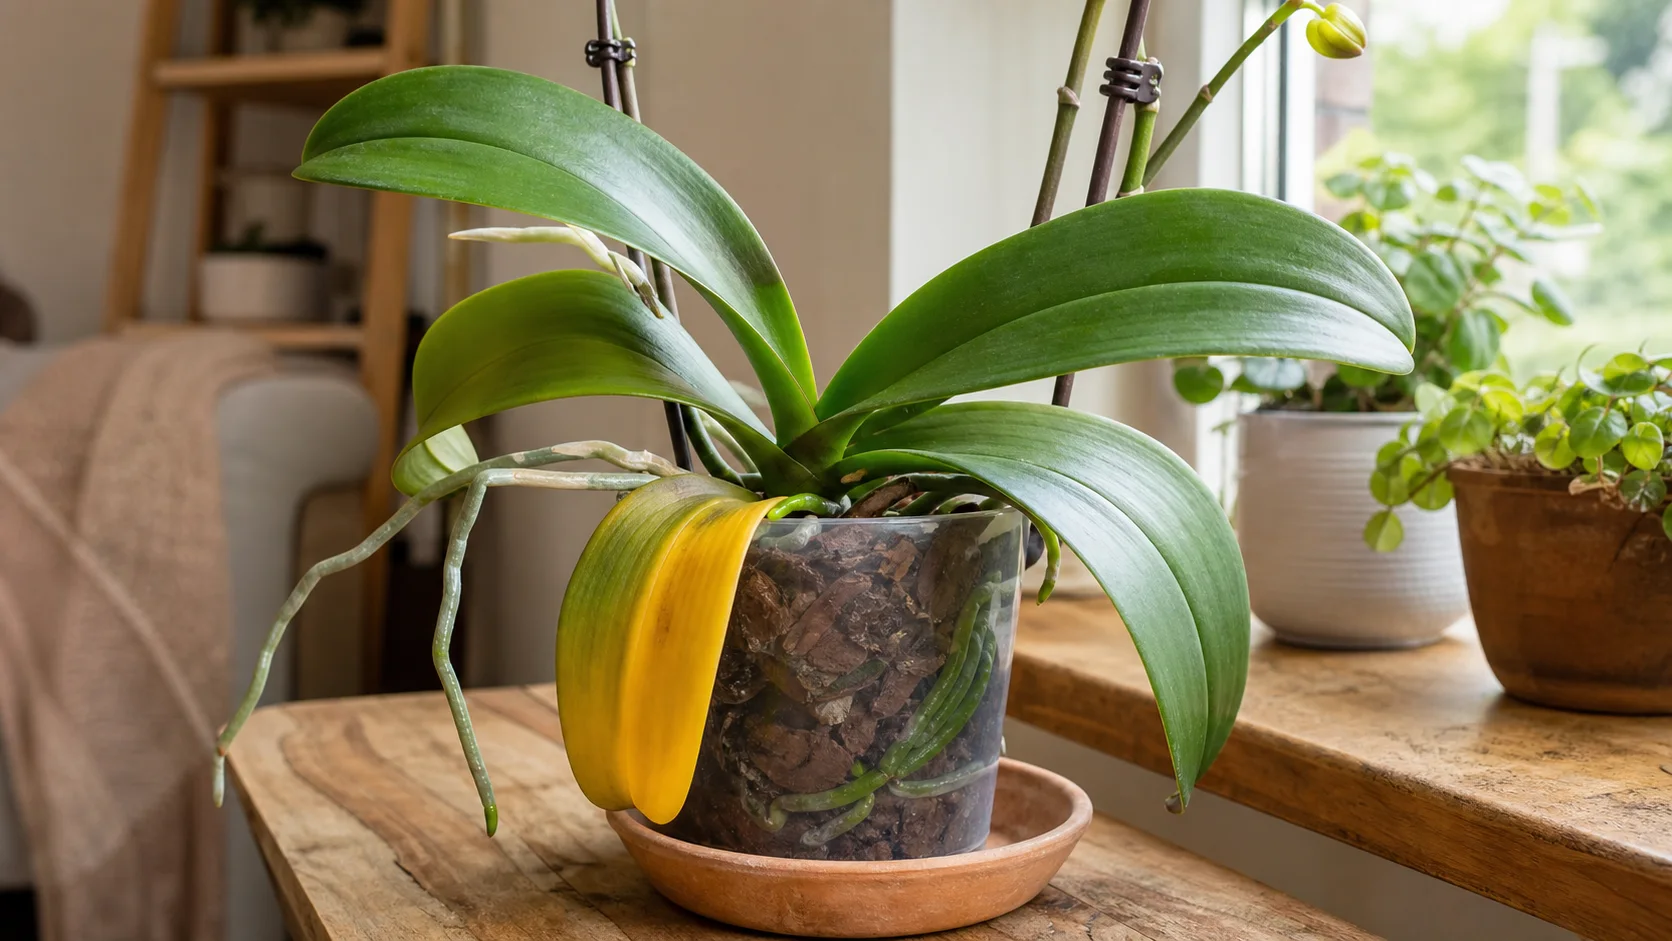
One aging lower leaf contrasts with firm green growth and a developing bud, the classic pattern of normal orchid turnover.
2. Overwatering
This is the most common reason orchid leaves turn yellow, and it usually starts slowly. The lower leaves go soft and pale first, then yellow. If you press the leaf between your fingers and it feels limp or papery rather than firm, overwatering is likely involved.
Overwatering is so prevalent that the American Orchid Society lists it as the single most common cause of orchid death in home cultivation. It’s easy to understand why: the instinct when a plant looks unhappy is to give it more water, but with orchids, that instinct often makes things worse.
Orchids – especially Phalaenopsis, the kind most of us have at home – don’t want to sit in moisture. Their roots need air as much as water. The fix is simple but requires patience: let the potting medium dry out almost completely before watering again. Pick the pot up. If it feels light, it’s time. If it still feels heavy, wait another day or two.
3. Root Rot
Root rot is what happens when overwatering goes on too long. The roots stop functioning, the plant can’t take up water or nutrients, and the leaves start to yellow and wrinkle even if the potting mix is wet.
Take the orchid out of its pot and look at the roots. Healthy roots are silvery-white when dry and bright green when freshly watered. Rotted roots are brown, mushy, and hollow. Trim everything that looks dead with clean scissors, let the roots air out for a few hours, then repot into fresh orchid bark. If you need a calmer walkthrough, our root rot treatment guide explains how to clean up damaged roots safely, and our step-by-step repotting guide covers the full process. It sounds drastic, but orchids are surprisingly resilient once you remove the rot.
4. Underwatering
Less common than overwatering, but it happens. If the leaves are yellowing and also wrinkling or going slightly leathery, the plant is thirsty. The roots will look silvery-grey and shriveled rather than plump.
A good soak helps here: set the pot in a basin of water for about 15 minutes so the roots can drink properly, then let it drain completely before putting it back. In warmer months, once a week is a reasonable starting point; in winter, a little less.
5. Too Much Direct Sunlight
Orchids like bright light, but not direct sun. If your orchid sits in a south- or west-facing window where afternoon sun hits the leaves directly, you might start to see yellowing – sometimes with a bleached or slightly scorched look in the center of the leaf.
The University of Florida IFAS Extension recommends 1,500 to 3,000 foot-candles of indirect light for Phalaenopsis orchids – roughly the brightness of a spot near a bright window with a sheer curtain. Direct midday sun can easily exceed 10,000 foot-candles, which is far more than the plant can handle.
Move it back from the glass, or filter the light with a sheer curtain. The leaves should be a medium green. Very dark green means not enough light; yellow-green or washed-out means too much. For more on matching light levels to your setup, the grow lights guide for indoor plants covers this in detail. If your windowsill setup is still stressing the plant, our low-light indoor plants guide helps you compare safer spots and understand when an orchid needs brighter filtered light instead of harsher direct sun.
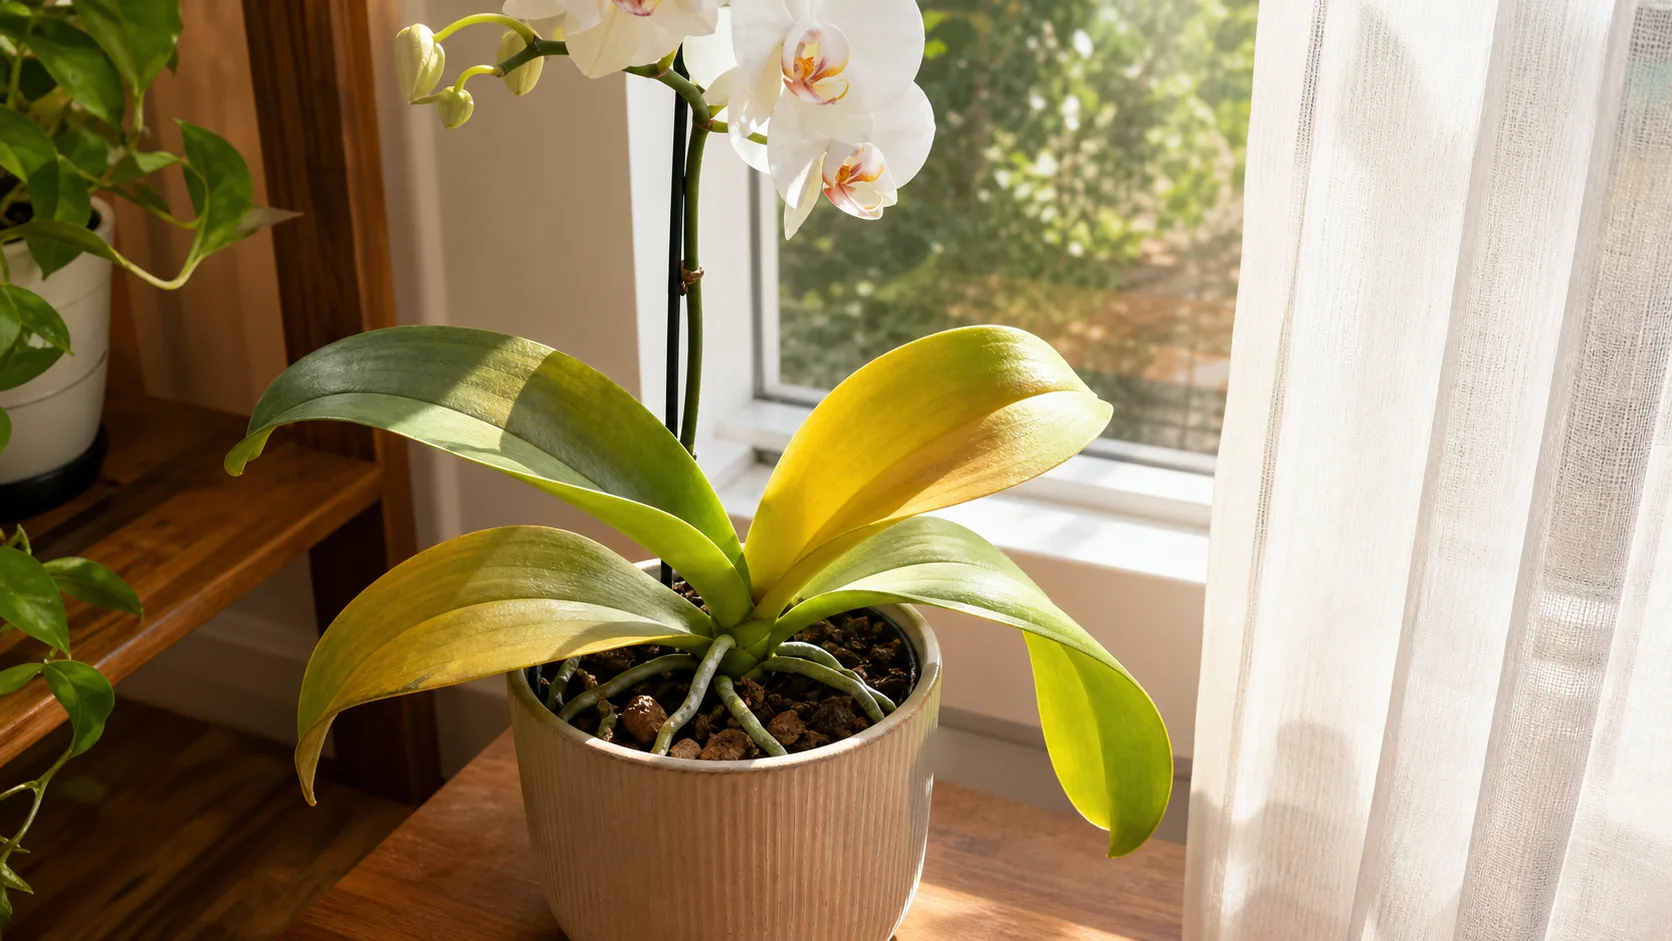
Unfiltered window light washes the exposed leaves yellow while the nearby sheer curtain shows the safer way to diffuse it.
6. Fertilizer Burn
Fertilizer is meant to help, but too much of it – or using it on dry roots – can damage the roots and cause leaves to yellow at the tips or across the whole leaf. Salt buildup from fertilizer accumulates in the potting medium over time and becomes toxic at high concentrations.
North Carolina State University Extension notes that salt accumulation from repeated fertilizer applications is one of the most overlooked causes of declining orchid health, particularly in plants that have been growing in the same bark mix for more than a year without flushing.
If you suspect this, flush the pot with plain water for a few minutes to wash out the buildup. Going forward, fertilize lightly – a half-strength orchid fertilizer once every two weeks during the growing season is plenty. Our houseplant fertilizer guide explains how to feed without causing salt buildup. And always water before you fertilize, never onto dry roots.
7. Temperature Stress
Orchids are comfortable in the same temperature range that most of us are: roughly 16 to 29 C, or about 60 to 85 F. What they dislike are sudden changes. A cold draft from an open window, an air conditioning vent blowing directly on the plant, or a radiator cycling hot air can all stress the plant and show up as yellowing leaves.
Check the orchid’s spot at the time of day the room changes most. Is there a window that gets left open at night? An AC unit directly above it? A radiator or heat vent close enough that the leaves feel warm? Move the plant a few feet away from the source of the swing and watch the next new leaf. Existing yellow leaves will not turn green again, but new growth should look steadier.
8. Low Humidity
Orchids come from tropical environments where the air holds moisture. Most homes, especially in winter with heating running, are much drier than that. The University of Florida IFAS Extension recommends 50 to 70 percent relative humidity for Phalaenopsis orchids – most heated homes in winter sit closer to 30 to 40 percent.
When the air gets very dry, orchid leaves can start to yellow and the tips may go brown and crispy.
You don’t need to go overboard here. A pebble tray with water beneath the pot raises humidity a little around the plant. Grouping plants together helps too. If your home is genuinely very dry, a small humidifier nearby makes a noticeable difference.
Seasonal Orchid Care Calendar: When Yellow Leaves Are Most Likely
Most orchid care guides treat yellow leaves as a year-round constant, but in practice, the cause shifts with the season. Knowing which problem is most likely right now helps you diagnose faster.
Spring
This is when natural leaf turnover picks up as the plant channels energy into new growth. If you see one or two lower leaves yellowing in March or April while a new leaf or spike is forming at the top, that’s the plant redistributing resources – not a care failure. Spring is also when you can resume fertilizing after a winter break. Start at half strength and watch how the plant responds before increasing.
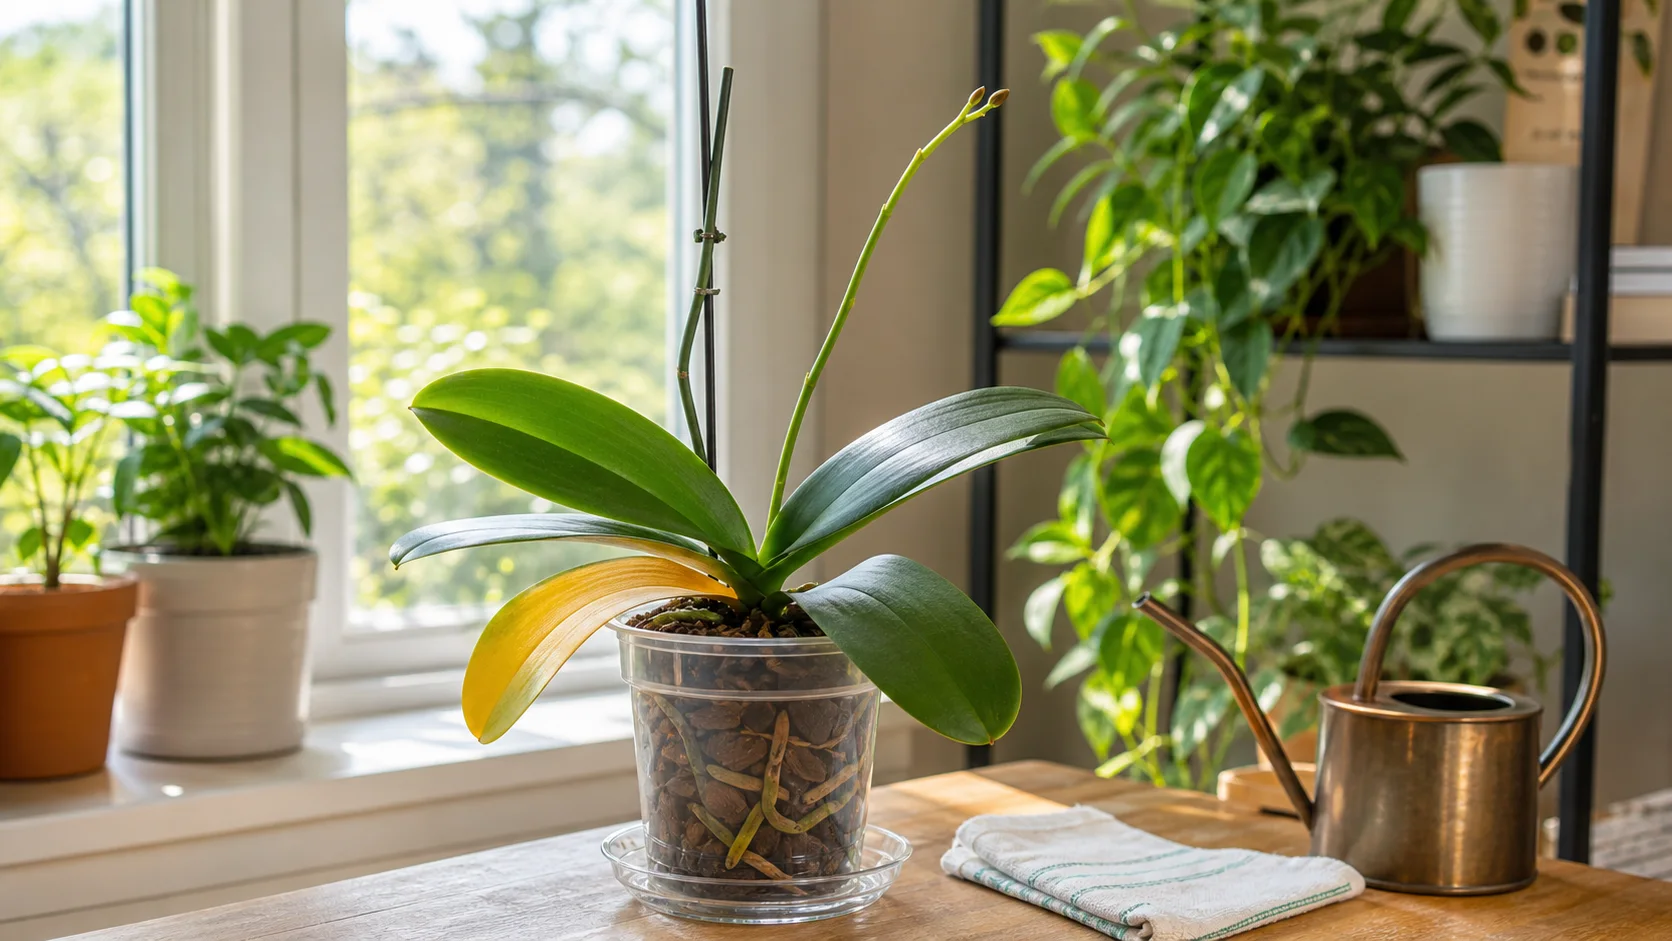
A fresh budded spike rises while one lower leaf yellows, showing how spring growth and normal leaf turnover can happen together.
Summer
Light burn becomes the main risk as the sun’s angle shifts and afternoon light intensifies. A leaf that was fine in April may be getting far too much direct sun by July. Check your orchid’s spot after the move to summer hours. Humidity is usually easier in summer, which works in your favor – but if you’re running air conditioning, position the plant away from the vent.
Autumn
This is the most overlooked danger period. Heating turns on, humidity drops overnight, and temperature swings happen near windows as outdoor temperatures fall. Orchids near glass can go from a warm afternoon to a cold night draft within hours. Autumn is also a good time to flush fertilizer salt buildup before the plant heads into its slower winter phase – run plain water through the pot for a few minutes and let it drain completely.
Winter
Heating systems are the main culprit. Forced-air heat dries out indoor air significantly, and orchids near vents or radiators suffer for it. Reduce watering in winter – the plant’s roots aren’t drinking as fast, so the potting mix stays wet longer, and overwatering risk goes up even if you haven’t changed your habits. Hold off on fertilizer or use it at quarter strength at most until you see new leaf growth starting again in late winter.
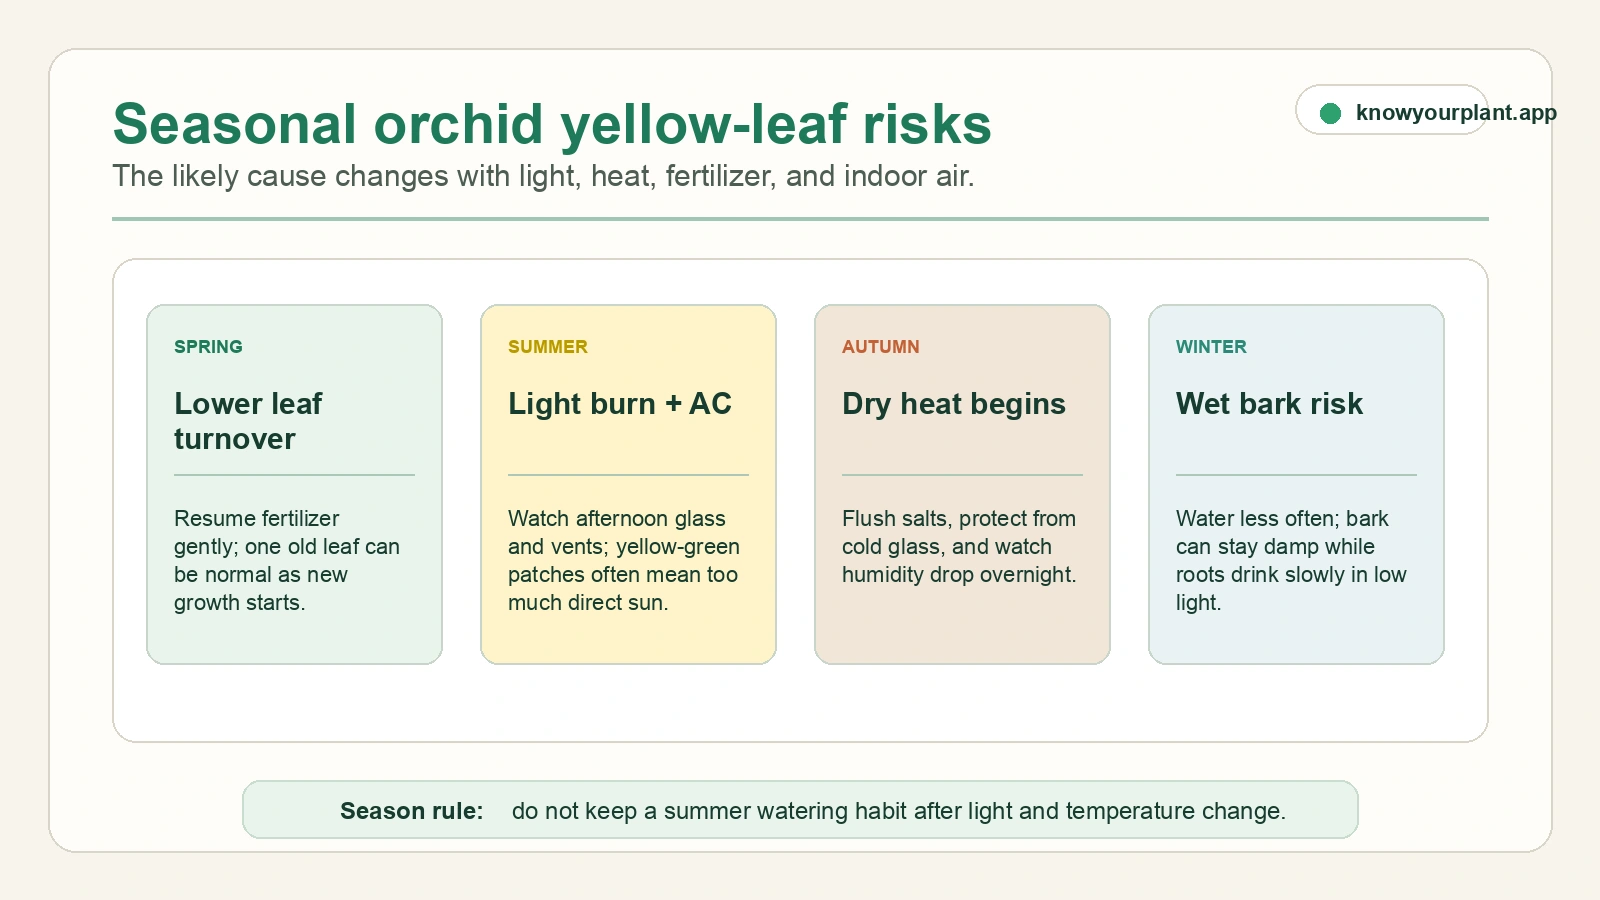
Use the seasonal calendar to update your orchid check before a summer watering habit carries into cooler, darker months.
Symptom by Likely Cause Comparison Table
| Symptom pattern | Likely cause | What usually confirms it |
|---|---|---|
| Single bottom leaf, no mush, active new growth | Normal aging | Healthy roots and stable upper leaves |
| Yellowing plus soft tissue and stale smell | Overwatering or rot | Brown mushy roots, wet broken-down bark |
| Yellowing plus wrinkles | Underwatering or root failure | Dry, silvery roots or very few live roots left |
| Yellow patch where the sun hits | Light stress | Bleached area, hot glass, direct afternoon sun |
| Yellow tips after feeding | Fertilizer burn | Salt crust, recent feeding, roots irritated but not rotted |
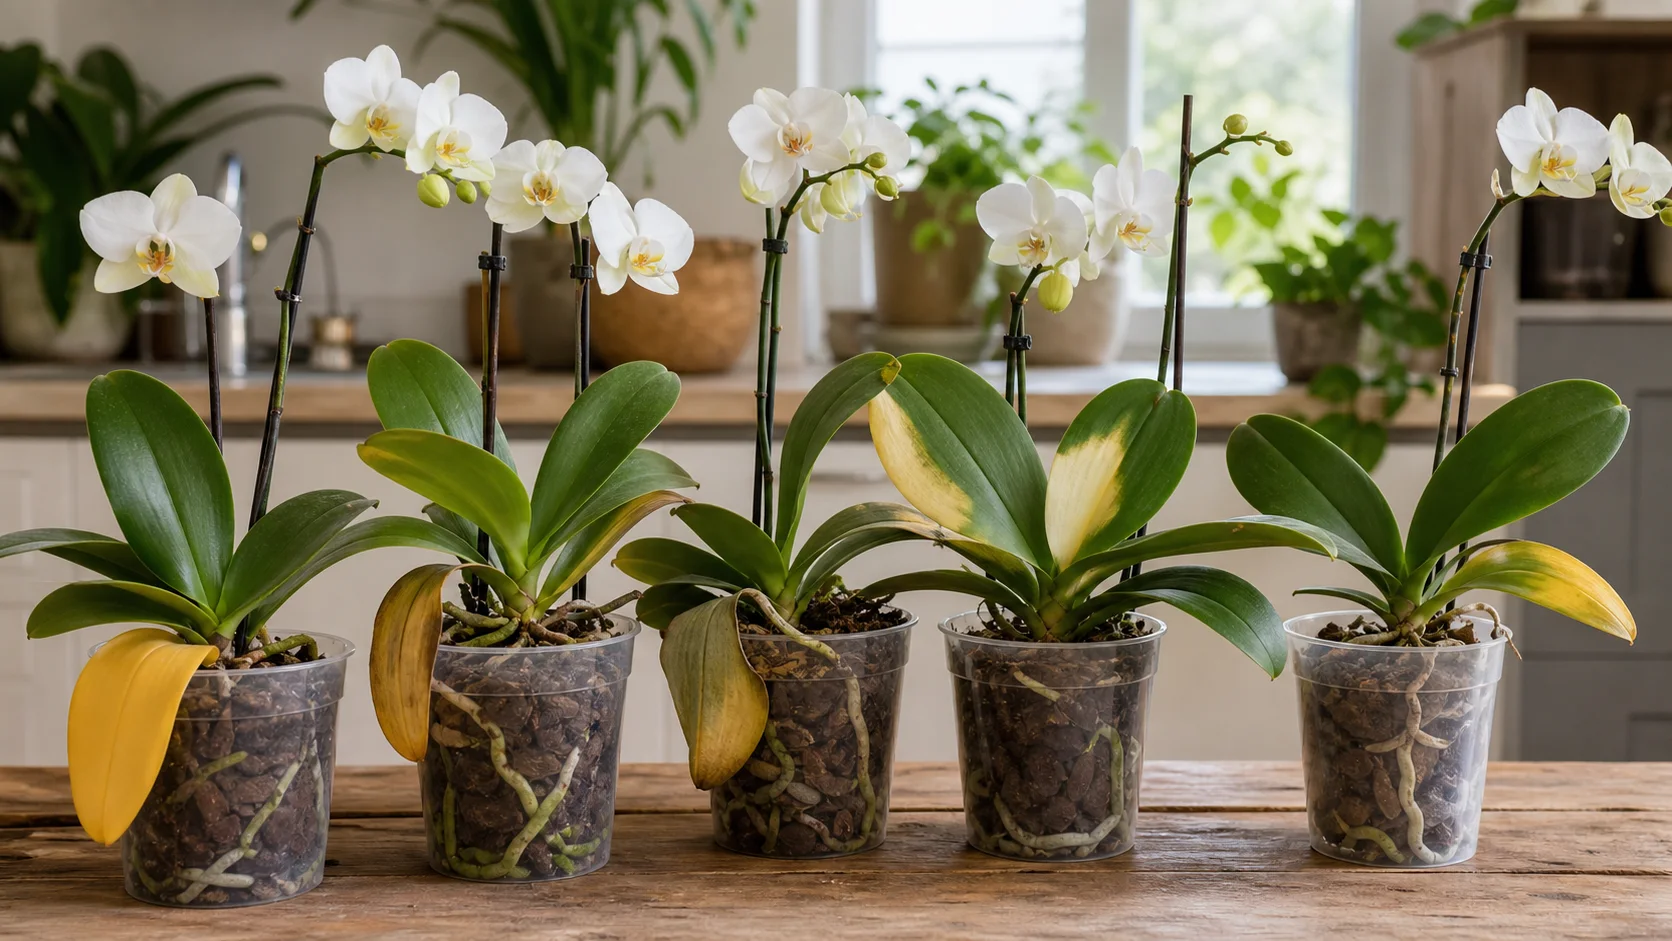
Side-by-side orchids make it easier to compare lower-leaf aging, dry tissue, light bleaching, yellow tips, and visible root condition.
How to Diagnose Your Orchid
When you notice yellow leaves, work through these questions in order:
- Is it just one old leaf at the bottom of the plant? Probably natural aging.
- Are multiple leaves yellowing and the roots look brown and mushy? Root rot from overwatering.
- Are the leaves wrinkling as well as yellowing? Underwatering or root damage.
- Is there bleaching or a washed-out color, especially where the sun hits? Light burn.
- Did you recently fertilize, or has it been a while since you flushed the potting mix? Fertilizer salt buildup.
- Is the plant near a vent, radiator, or drafty window? Temperature or humidity stress.
- Is it autumn or winter, with heating recently turned on? Humidity drop is a strong candidate.
Most of the time, one of these will point clearly to the answer.
Common Mistakes Orchid Owners Make
- Watering again before checking the roots. A thirsty-looking orchid can still have root rot.
- Treating one yellow bottom leaf like an emergency. Normal leaf turnover does not need fertilizer, repotting, or extra water.
- Changing three things at once. If you move the plant, repot it, and change watering on the same day, you lose the diagnostic signal.
- Keeping old bark too long. Broken-down orchid mix holds more water and suffocates roots even if your watering schedule stayed the same.
- Leaving water trapped in the crown. Moisture sitting where the leaves meet can trigger rot fast, especially in cooler rooms.
If you are troubleshooting another common plant symptom, see Orchid Wrinkled Leaves: Check the Roots Before Adding Water for a focused diagnosis and recovery plan.
Methodology
This article was refreshed against American Orchid Society guidance and University of Maryland Extension references for phalaenopsis care, then compared with recurring beginner questions in orchid communities to see where people get stuck. Expert sources were used for care and diagnosis guidance. Community discussion was used only as a qualitative signal for common confusion, especially around normal leaf aging versus root trouble.
Frequently Asked Questions
Should I cut a yellow orchid leaf off? Wait until the leaf has turned completely yellow and detaches easily on its own. If you pull it too early, you risk tearing the stem or leaving an open wound. If the leaf is partly yellow and the rest is still green, leave it. The plant will finish the process in its own time.
Can a yellow orchid leaf turn green again? No. Once a leaf turns yellow, the chlorophyll is gone and it won’t recover. What you can do is address the underlying cause so the healthy leaves stay green. The yellow leaf will eventually drop – focus your attention on the rest of the plant.
My orchid has yellow leaves but the roots look fine. What’s going on? If the roots are firm and healthy-looking but leaves are yellowing, look at light, temperature, and humidity first. Fertilizer salt buildup is also worth investigating – flush the pot with water and see if things improve over the next few weeks.
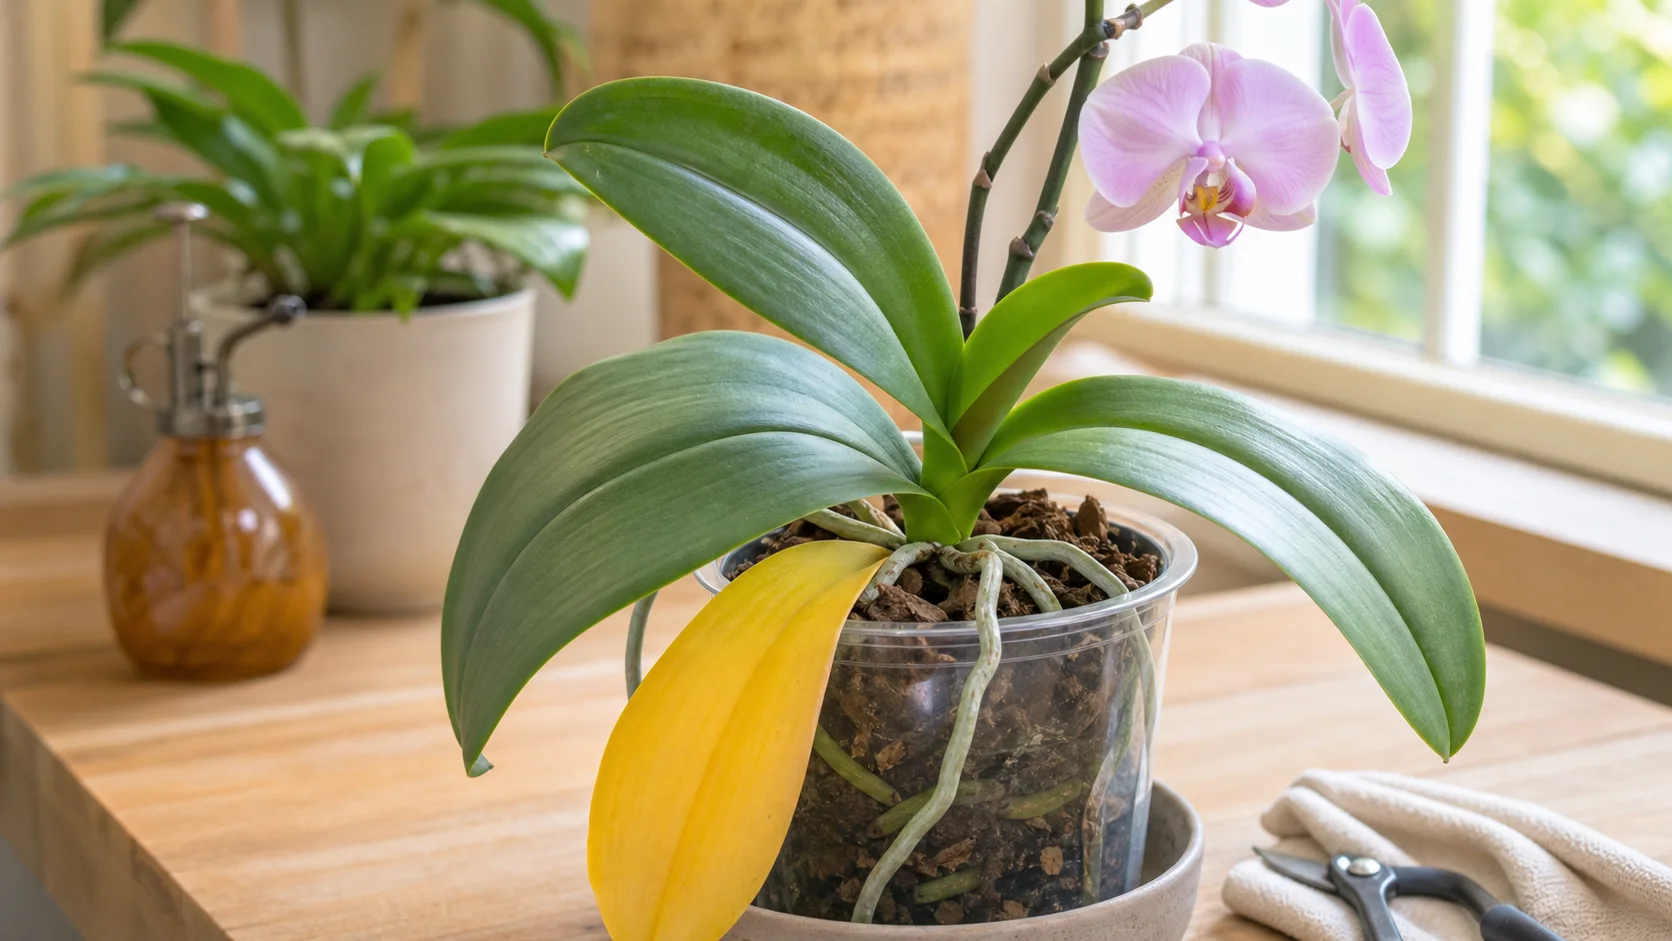
A fully yellow lower leaf can be left to detach naturally while firm leaves and healthy roots remain the better guide to overall plant health.
How often should I water an orchid to avoid overwatering? There’s no universal schedule, because it depends on your pot size, bark mix, temperature, and humidity. A more reliable method: pick up the pot. If it feels light, water thoroughly and let it drain. If it still feels heavy, wait. Most Phalaenopsis orchids in average home conditions need watering once every seven to ten days in summer and less in winter.
Are yellow orchid leaves a sign of disease? Occasionally. Bacterial rot and fungal infections can cause yellowing, usually with soft, water-soaked patches and sometimes a foul smell. If the yellowing is accompanied by mushy spots, dark lesions, or an unpleasant odor, that points toward disease rather than a care issue. Isolate the plant and remove affected tissue with sterilized scissors.
My orchid’s bottom leaf yellows every few months. Is something wrong? Probably not. If it’s always the single lowest leaf, and the plant otherwise produces new leaves and spikes regularly, this is normal leaf turnover. Phalaenopsis orchids cycle through leaves gradually. One leaf every few months is within the range of healthy behavior.
Do orchids need humidity trays? They help, but they’re not essential for most home conditions. If you live somewhere with naturally humid summers, a humidity tray probably won’t make a noticeable difference. Where they earn their place is in heated, dry winter homes. A tray of pebbles and water under the pot won’t transform your humidity levels, but it keeps the immediate environment around the plant a little more comfortable.
Are orchids safe for cats? Phalaenopsis orchids are non-toxic to cats and dogs according to the ASPCA. If you’re building a plant collection with pets in mind, the cat-safe indoor plants guide covers which common houseplants are genuinely safe and which ones to avoid.
Orchids have a reputation for being difficult, but they’re more honest than most plants. When something is wrong, they tell you. A yellow leaf is not the plant giving up – it’s the plant asking for something. The fact that you noticed and looked it up already puts you ahead of most people.
Download KnowYourPlant for personalized plant care reminders that track your orchid’s watering schedule, fertilizing routine, and seasonal needs – so you catch small problems before they become big ones.