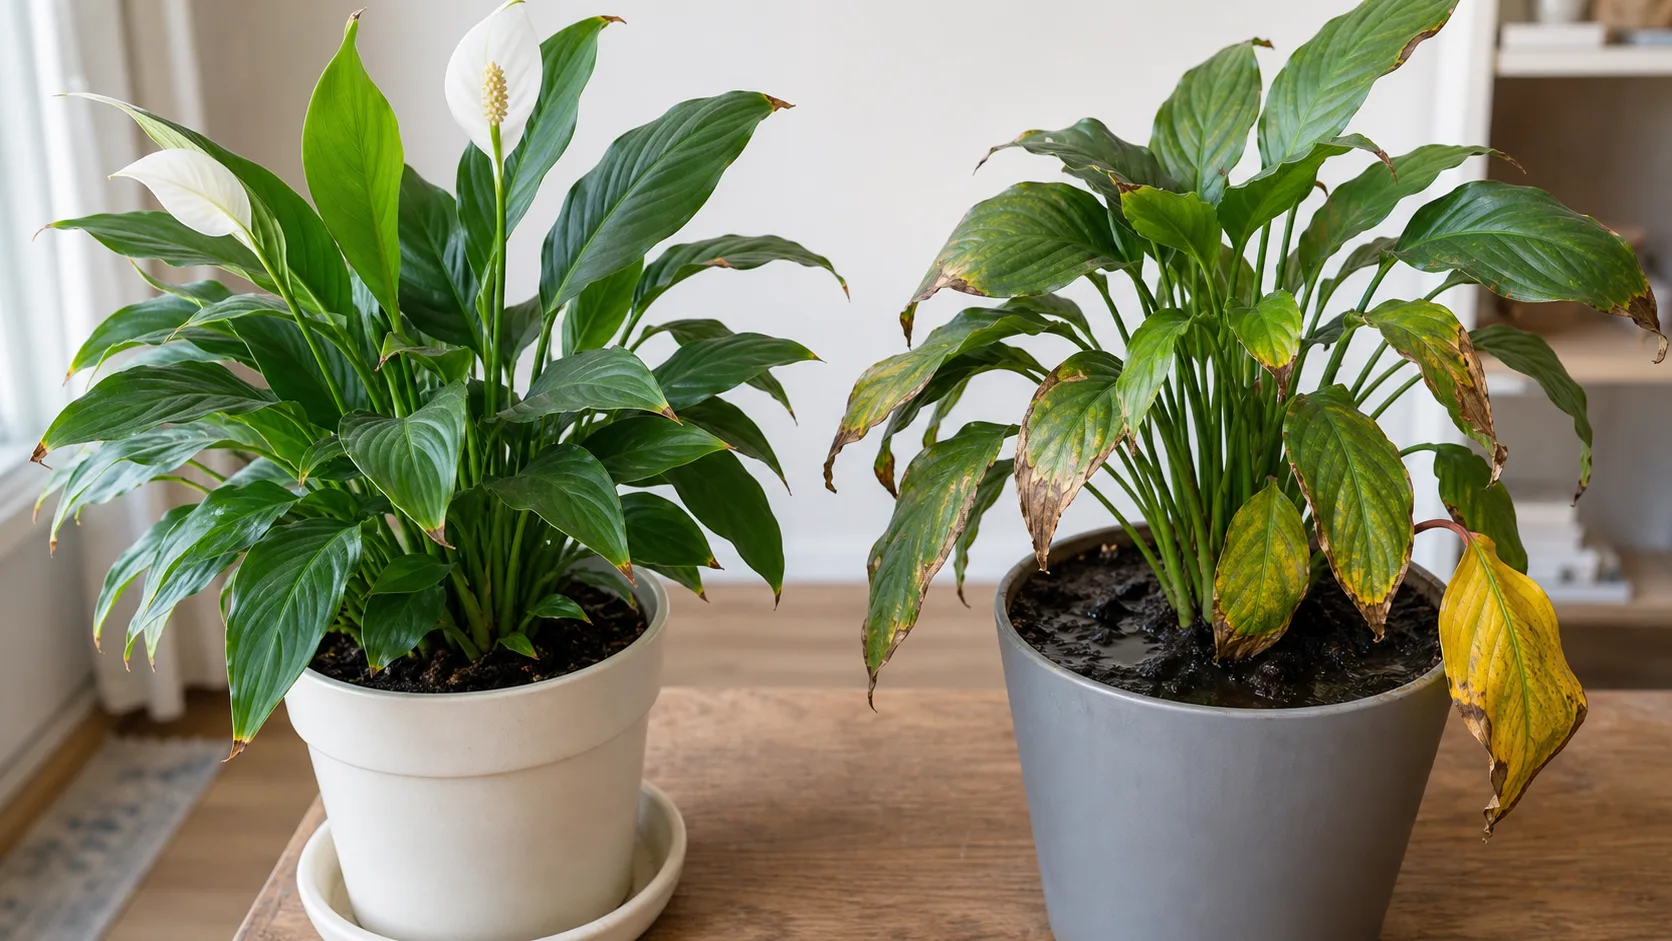
You trim one brown tip, then another appears. Meanwhile, your peace lily is still standing upright, opening new leaves, and perhaps even blooming. Is she quietly struggling, or are those crispy ends mostly cosmetic?
Peace lily brown tips are dead leaf-edge tissue caused by stress, but the pattern of damage and the moisture inside the pot tell you whether to investigate water quality, fertilizer salts, dry air, inconsistent watering, direct sun, or troubled roots.
Make one decision first: is the damage limited to small tips, or is it spreading along the leaf margins and appearing on new growth?
Small brown points on older leaves are rarely an emergency. Browning that reaches new leaves, spreads down the edges, or appears beside yellowing and wet-soil wilt deserves a closer look. Before changing her care, check the leaves, moisture at the center of the pot, and any salt residue around the soil or pot rim.
If you want help recording which leaves changed first, KnowYourPlant can keep the symptom and plant details together while you investigate.
What Most Care Guides Miss
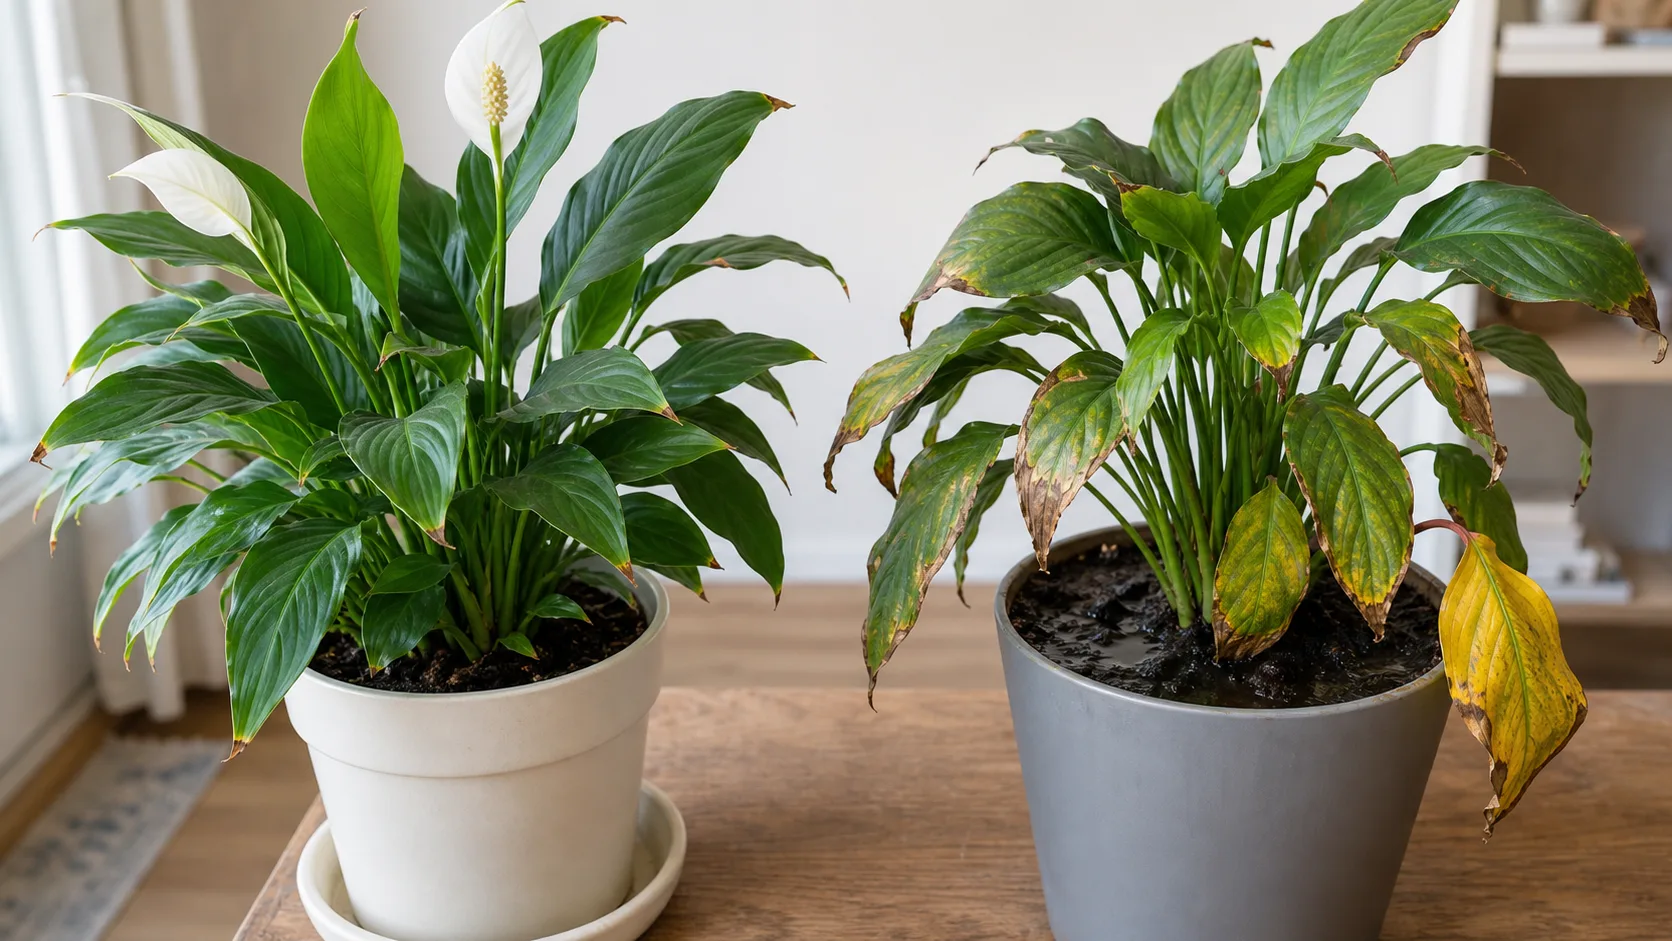
The common misdiagnosis is that every crispy tip means low humidity or thirst. That sends many of us straight to the watering can, even when the soil around the roots is already wet.
Generic advice is incomplete because dry air, mineral residue, fertilizer salts, and root stress can all produce a brown tip. The color alone cannot separate them. Start with this decision rule:
- Narrow brown tips on older leaves, with healthy new growth: begin with water quality, fertilizer history, and dry airflow.
- Tips spreading down the margins or appearing on new growth: check moisture at depth, salt residue, and recent care changes.
- Brown tips with yellow leaves or wilt in moist soil: do not water again until you inspect drainage and the root zone. Use the peace lily yellow-leaf guide to separate overwatering, light stress, and normal aging.
- Damage concentrated on the window-facing side: check direct sun and heat from the glass.
This order preserves the evidence. If you flush, repot, relocate, and change the watering routine at the same time, you may never learn what was bothering her. Worse, a well-meant fix such as flushing can add stress if the pot is already waterlogged.
The 60-Second Brown-Tip Check
Before reaching for water or scissors, take one minute:
- Compare old and new leaves. Is the damage limited to older leaves, or is the newest unfurling leaf also tipped brown?
- Follow the brown tissue. Does it stop at the point, travel along the margin, or form a patch on the window-facing side?
- Test the middle of the pot. Push a clean wooden skewer toward the center, wait a few seconds, then pull it out.
- Look for residue. Check the soil surface, drainage holes, saucer, and pot rim for a white or tan crust.
- Check the surroundings. Notice nearby vents, fans, hot glass, direct afternoon sun, and standing water inside a decorative pot.
If the leaf is otherwise green, the newest growth looks healthy, and the root ball is drying normally, you have time to make a gentle, controlled adjustment. If the soil is wet and the leaves are yellowing or wilting, treat the root zone as the priority.
Symptom Diagnosis Card
| What you see | What it suggests | Check first |
|---|---|---|
| Tiny dry tips, leaf otherwise green | Mild cosmetic stress is more likely | Water source, fertilizer history, airflow |
| Tips spreading along the margins | Stress may still be active | Moisture at depth and recent care changes |
| Brown tips on new growth | Current conditions are affecting tender tissue | Salts, water source, roots, direct sun |
| Brown tips with yellow lower leaves | Roots may be staying too wet | Drainage, saucer water, pot size |
| Wilt while the soil is moist | Roots may not be taking up water normally | Salt buildup, drainage, root condition |
| White or tan crust on soil or pot | Soluble salts are accumulating | Fertilizer, softened water, retained runoff |
| Pale or brown patches after a window move | Direct sun or hot glass is likely | Direction and duration of sun exposure |
The practical split is simple: tip-only damage invites observation; spreading damage invites investigation.
A Three-Check Decision Tree
1. Where does the browning begin?
Look at five or six leaves, including the newest one.
If only the final few millimeters of older leaves are dry, your peace lily may be dealing with mild mineral, salt, or humidity stress. The damaged points will not recover, but the rest of the leaf can remain useful and green.
If the newest leaf opens with a brown point, the stress is probably still active. Check recent fertilizer use, the water source, soil moisture, and direct sun before trimming again.
Browning that travels down an edge or appears beside yellow tissue deserves more attention than a neat, isolated tip. Random tan patches are different from true tip burn. If they sit on the side facing a bright window, compare the pattern with our guide to plant sunburn symptoms.
2. What does the root ball feel like?
The surface can look dry while the center remains wet. Insert a clean wooden skewer toward the middle of the pot, leave it briefly, then remove it.
- Nearly clean and dry: the root ball is probably ready for water.
- Cool, dark, and carrying damp soil: wait before watering.
- Wet several days after watering: inspect the drainage hole, cachepot, and saucer.
- Dry around the edges but wet in the center: the mix may be compacted, hydrophobic in places, or held in an oversized pot.
A peace lily can droop when thirsty, but damaged roots can also leave her wilted in wet soil. Watering both symptoms the same way is where a small problem can become a serious one. The peace lily drooping guide gives a symptom-first check before you reach for the watering can.
3. Is there evidence of accumulated salts?
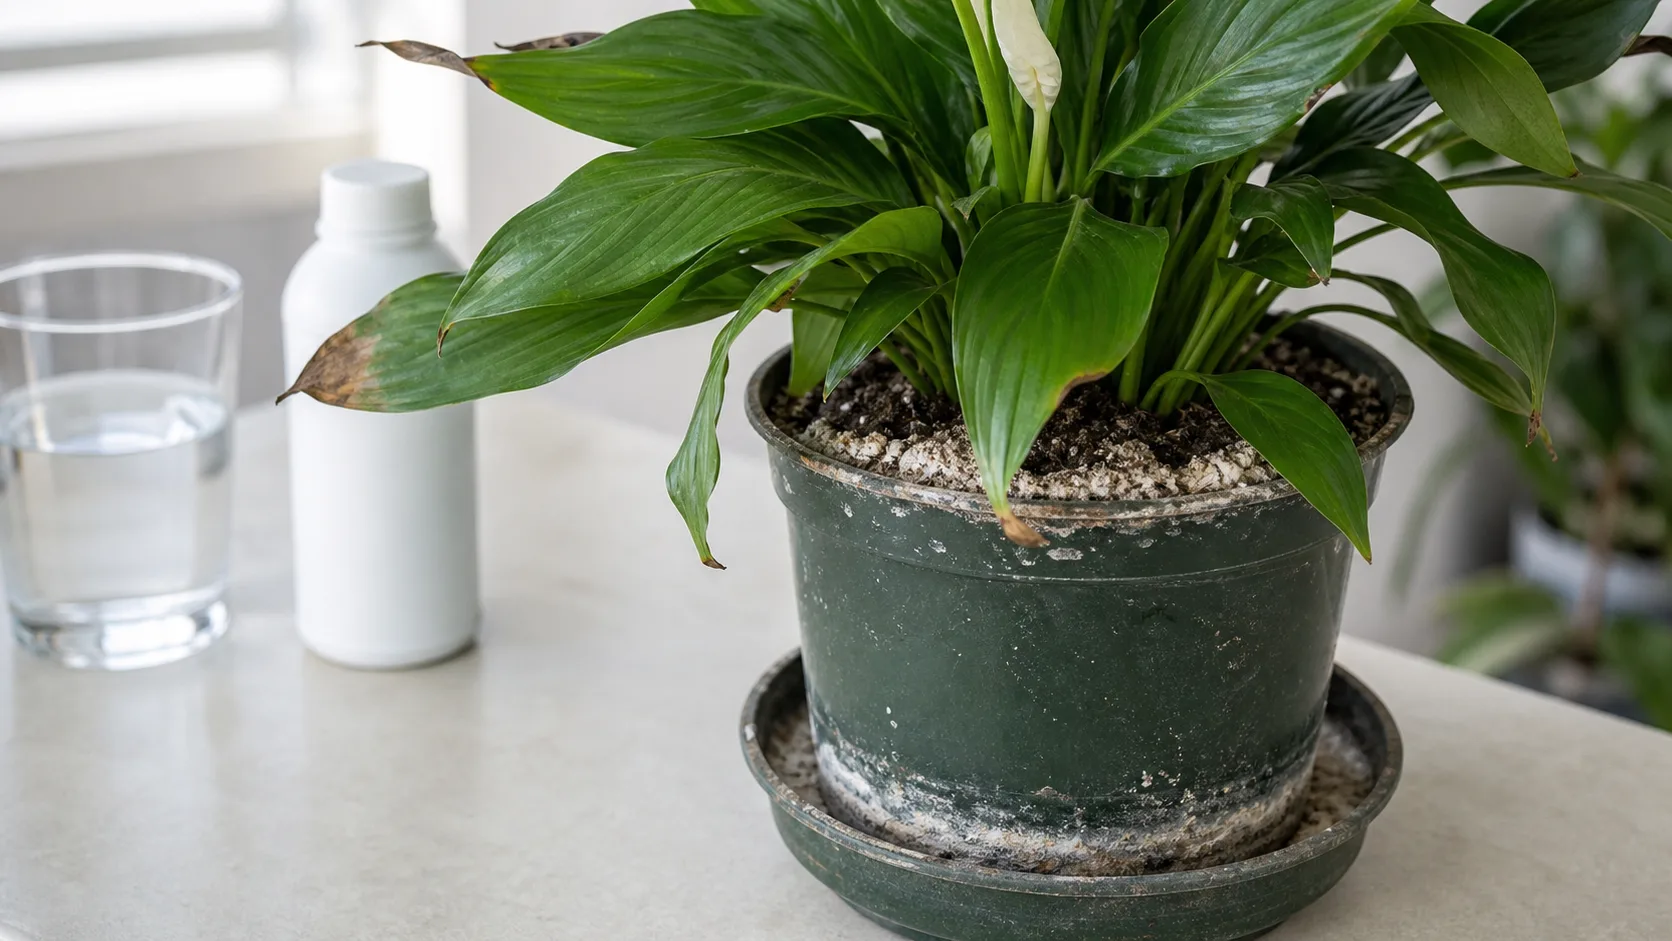
Check for chalky white or tan residue on the soil, pot rim, saucer, or drainage holes. Also think back to when you last fertilized and whether runoff is left under the pot.
Colorado State’s PlantTalk notes that salt buildup can cause brown tips, yellowing, and even wilt while the soil is moist. Those salts may come from fertilizer or irrigation water. As water evaporates, dissolved minerals remain in the pot. If runoff is reabsorbed from the saucer, they return to the root zone instead of leaving it.
Visible crust is a strong clue, but its absence does not completely rule salts out. Use it alongside the leaf pattern and watering history.
Brown-Tip Causes Compared
| Likely cause | Pattern and context | Safest first action |
|---|---|---|
| Water-quality stress | Tips keep returning while growth remains steady | Trial lower-mineral water for three or four waterings |
| Fertilizer salts | Recent feeding, white crust, or damaged new growth | Pause feeding and check whether drainage works |
| Dry air or drafts | Narrow papery tips, often worse near moving air | Move her away from the vent or fan |
| Inconsistent watering | Repeated dramatic wilt-and-recovery cycles | Check the soil instead of waiting for collapse |
| Wet-root stress | Yellowing, persistent wilt, slow-drying soil | Stop watering and inspect drainage |
| Direct sun or hot glass | Damage strongest on the exposed side | Move back or filter direct rays |
Once you have recorded the leaf pattern, moisture, and recent changes, KnowYourPlant can help you keep that diagnosis separate from your regular care reminders.
The Six Causes to Separate
Water quality
Tap water is not automatically bad for a peace lily. The better question is what your water contains and whether dissolved minerals are concentrating in the pot.
Water quality moves higher on the list when the plant otherwise grows normally, the root ball dries at a reasonable pace, and small tips keep returning. It is also worth checking if your tap water leaves obvious mineral marks on kettles, faucets, or plant saucers.
Safest first action: use rainwater, distilled water, or reverse-osmosis water for the next three or four waterings without changing anything else. Treat this as a controlled trial, not a universal cure.
Do not judge the test by damaged leaves because their tips cannot turn green again. Watch whether the next leaf opens cleanly and whether existing browning stops spreading.
Letting tap water stand may allow some chlorine to dissipate, but it does not remove hardness minerals or fluoride. There is no need to assume one specific mineral is responsible without local water information.
Fertilizer and soluble salts
Peace lilies usually need less fertilizer than an eager owner expects. Feeding a stressed plant can add salts just when her roots are least able to handle them.
Look for recent feeding, fertilizer applied to dry soil, a stronger-than-label mixture, retained runoff, or a pale crust around the pot. Damage on new growth makes an active salt problem more concerning than one old brown point.
Safest first action: pause fertilizer and confirm that water can move through the pot and out of the drainage hole.
If the mix drains freely, remove loose surface crust and slowly run room-temperature water through the soil. Let it drain completely, then empty the saucer. Do not flush a dense, waterlogged mix. Adding more water to poorly aerated roots can make the problem worse.
For help reading fertilizer labels and avoiding repeat salt buildup, see our houseplant fertilizer guide.
Softened water
Household water softeners often replace hardness minerals with sodium or potassium ions. That may be useful for plumbing, but it can add to the dissolved-salt load in a plant pot.
Safest first action: if your peace lily receives softened water, bypass the softener or use another water source for several waterings. Do not immediately repot a healthy-looking plant just because softened water was used. First change the water source and watch new growth.
Dry air and drafts
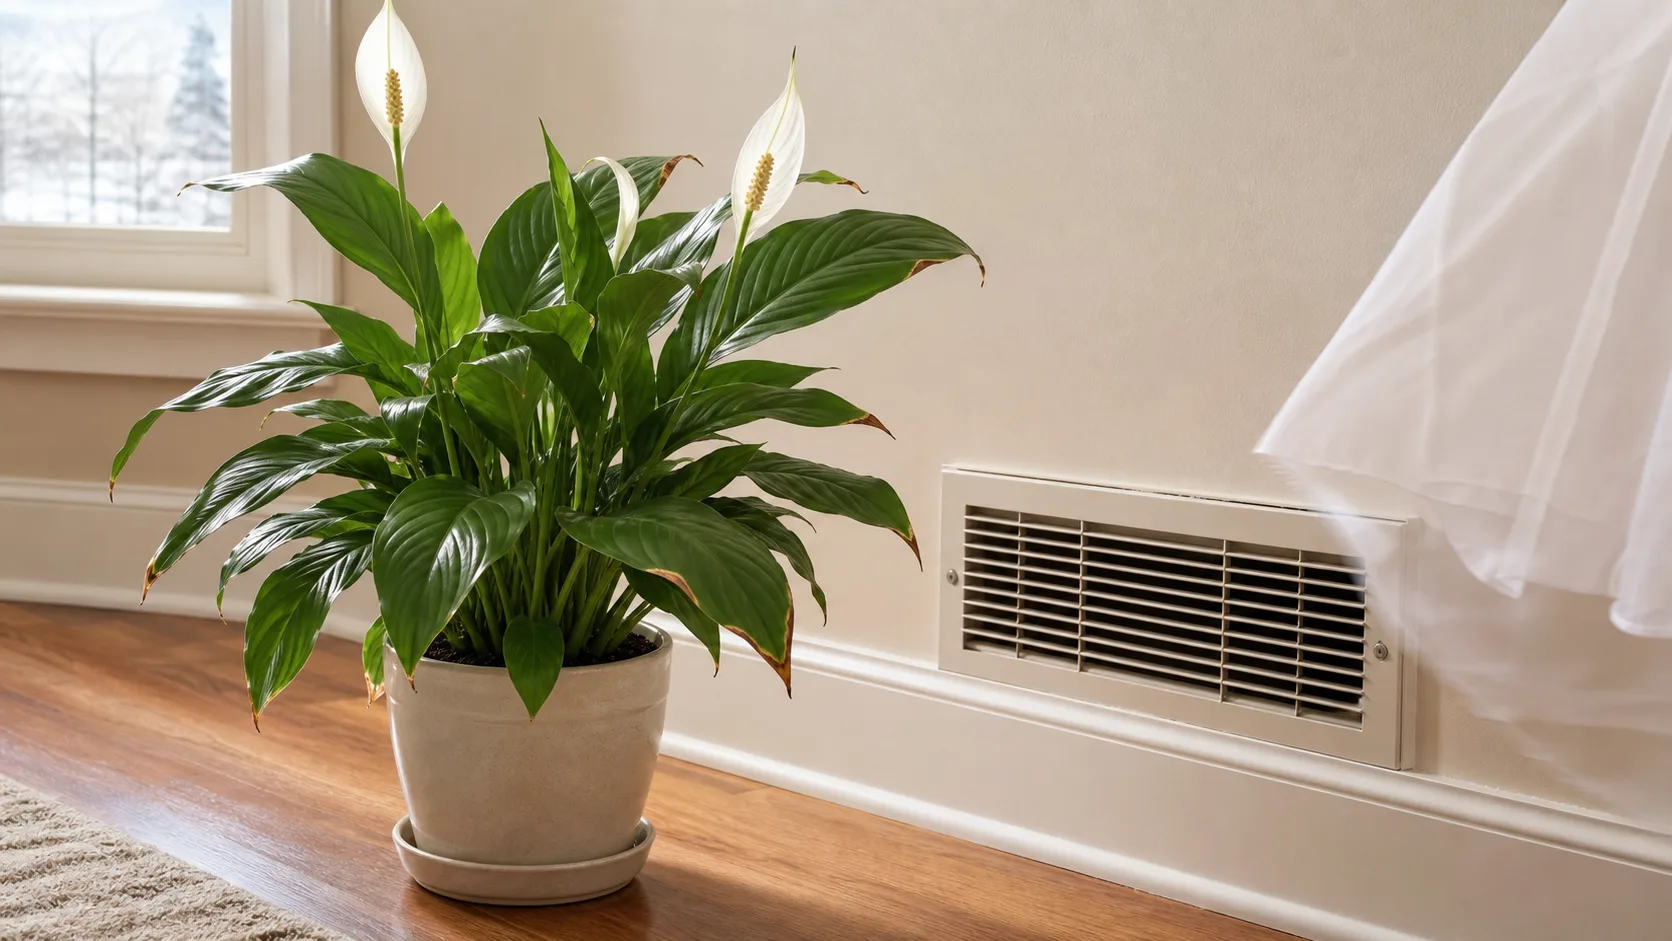
Low humidity is often blamed for every brown tip, but it is most convincing when the tip is narrow and papery, the leaf is otherwise green, and the plant sits near air conditioning, a heater, a fan, or a frequently opened door.
Safest first action: move the peace lily out of direct airflow. This is easier to test and less disruptive than changing the pot or watering more often.
If the room genuinely stays dry, a nearby humidifier makes a more consistent difference than occasional misting. Misting does not remove salts or repair wet roots, and droplets should not be left sitting on leaves overnight.
Our guide to humidity for indoor plants explains how to improve the room without keeping the soil too wet.
Inconsistent watering
Peace lilies are famous for dramatic drooping. That can train us to wait for a full collapse, soak the pot, and repeat the cycle. She may stand back up quickly, but repeated severe drying still stresses tender leaf edges and root tips.
Safest first action: check the mix before the plant collapses. Water when the upper layer has dried and the center of the root ball is only lightly moist, not bone dry and not cold and saturated.
When it is time, water thoroughly, let the excess escape, and empty the saucer or decorative pot. Do not use brown tips as a signal to water. Use the soil.
Our full peace lily care guide explains how light, temperature, season, and pot size change the interval.
Roots staying wet
Brown tips do not always mean the plant needs more water. Roots need oxygen as well as moisture. When dense soil or standing water keeps air away, the roots cannot function normally, so the leaves may wilt despite a wet pot.
Move wet-root stress higher on your list when:
- yellowing accompanies the brown margins;
- the mix stays wet for many days;
- water is trapped inside a decorative pot;
- the pot is much wider than the root ball;
- the base smells sour or feels soft;
- wilt does not improve after watering.
Safest first action: stop watering and empty any trapped runoff. Check the drainage hole and give the pot time to lose excess moisture.
One isolated crispy tip does not justify pulling the roots apart. If several warning signs appear together, inspect them. Healthy roots are generally firm. Decaying roots are dark, soft, and may smell unpleasant. Use the root rot treatment guide before cutting or repotting.
Direct sun and hot glass
Peace lilies prefer bright, indirect light. Direct afternoon sun can bleach or brown exposed tissue, especially after a sudden move from a dimmer spot.
Sun damage tends to face the window rather than appearing evenly around the plant. A hot pane of glass can also raise leaf temperature even when the rest of the room feels comfortable.
Safest first action: trace the light across the room for one day, then move the pot farther from the glass or add a sheer curtain. Do not move her into deep shade. She still needs enough indirect light to grow and bloom.
Expert Guidance and Useful Numbers
North Carolina State Extension recommends keeping the mix moist but not soggy and allowing it to dry between waterings. It identifies direct sun, underwatering, low humidity, excess fertilizer, and salt buildup as possible contributors to brown tips.
Clemson Extension suggests daytime temperatures around 68 to 85°F, avoiding temperatures below 60°F, feeding at roughly one-quarter strength every six to eight weeks during active growth, and never leaving the pot in collected runoff. These are guardrails, not targets to chase together. Choose the one adjustment supported by the pattern you see.
Your Five-Minute Root-Zone Evidence Log
Before intervening, note the last watering, moisture at the pot center, standing runoff, recent fertilizer, visible mineral marks, any move near a window or vent, and whether old leaves or new leaves changed first. This short record keeps one cause from turning into five simultaneous fixes.
Make One Change for 7 to 14 Days
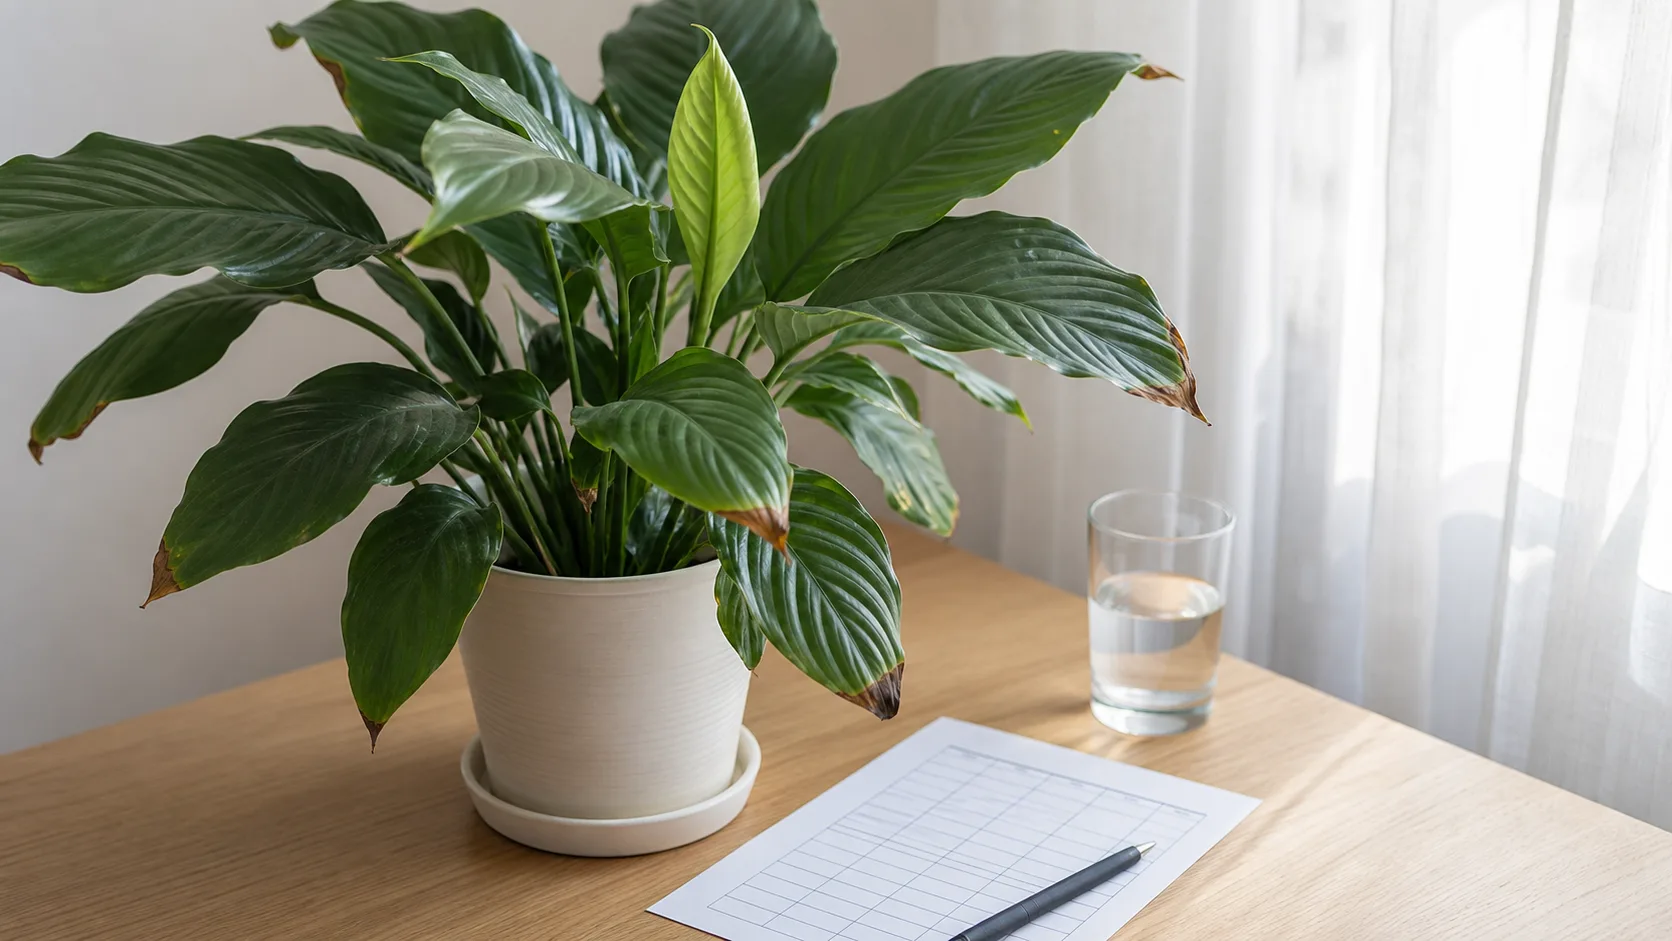
Choose the lowest-risk action that matches your evidence:
- Switch water source if the plant is otherwise steady and tips keep returning.
- Pause fertilizer if you recently fed her or see residue.
- Move her out of dry airflow if the soil and roots seem normal.
- Correct trapped runoff if the pot remains wet.
- Filter direct sun if damage faces the window.
Then wait 7 to 14 days before adding another change, unless the roots are clearly rotting or the plant is declining quickly.
Existing brown tissue will not heal. Look instead for three success signals:
- the brown margin stops expanding;
- the plant regains normal firmness without staying saturated;
- the next leaf opens with a clean green tip.
If the damage continues onto new growth, return to the evidence log and move to the next supported cause.
What to Do Today
- Empty any standing water.
- Check moisture in the middle of the pot.
- Pause fertilizer until the pattern is clear.
- Move the plant away from strong airflow or direct sun if either is present.
- Mark or photograph the edge of spreading damage for comparison.
- Leave the roots undisturbed if growth is normal and only old tips are affected.
If salt residue is visible and drainage works well, flush once and let the pot empty completely. If the soil is already wet, skip the flush and deal with drainage first.
Can You Trim Brown Tips?
Yes. Use clean, sharp scissors and follow the natural outline of the leaf. Leave a very thin line of brown tissue instead of cutting deeply into living green tissue.
Trimming is cosmetic. Iowa State University Extension cautions that new browning will occur if the underlying cause remains. The leaf will not regrow its pointed end, but careful trimming will not harm an otherwise healthy peace lily.
If a leaf is mostly green, keep it. She can still use that leaf even if its tip is no longer perfect.
Common Mistakes
- Watering because the tip looks dry. Check the root ball first.
- Stacking several fixes. One change gives you information; five erase it.
- Flushing a waterlogged pot. Salt removal helps only when water can drain.
- Using softened water without checking alternatives. It may add to the salt load.
- Repotting for minor cosmetic damage. Disturb roots only when the evidence supports it.
- Feeding to encourage recovery. Fertilizer can worsen active salt or root stress.
- Judging recovery by old leaves. Watch new growth instead.
- Leaving runoff in a decorative pot. Empty it after every watering.
Seasonal Note
Brown tips often appear when the room changes but your routine does not.
Winter heating can lower humidity and create dry airflow near vents. Cooler, darker months also slow water use, so the same pot may remain wet longer. In spring and summer, stronger sun may suddenly reach a window that was safe in winter, while warmer conditions can make the pot dry faster.
At each seasonal shift, recheck light, airflow, and drying time before changing how often you water.
Download KnowYourPlant for personalized plant care reminders that follow your peace lily’s actual routine, not a fixed calendar.
Frequently Asked Questions
How often should I water a peace lily with brown tips?
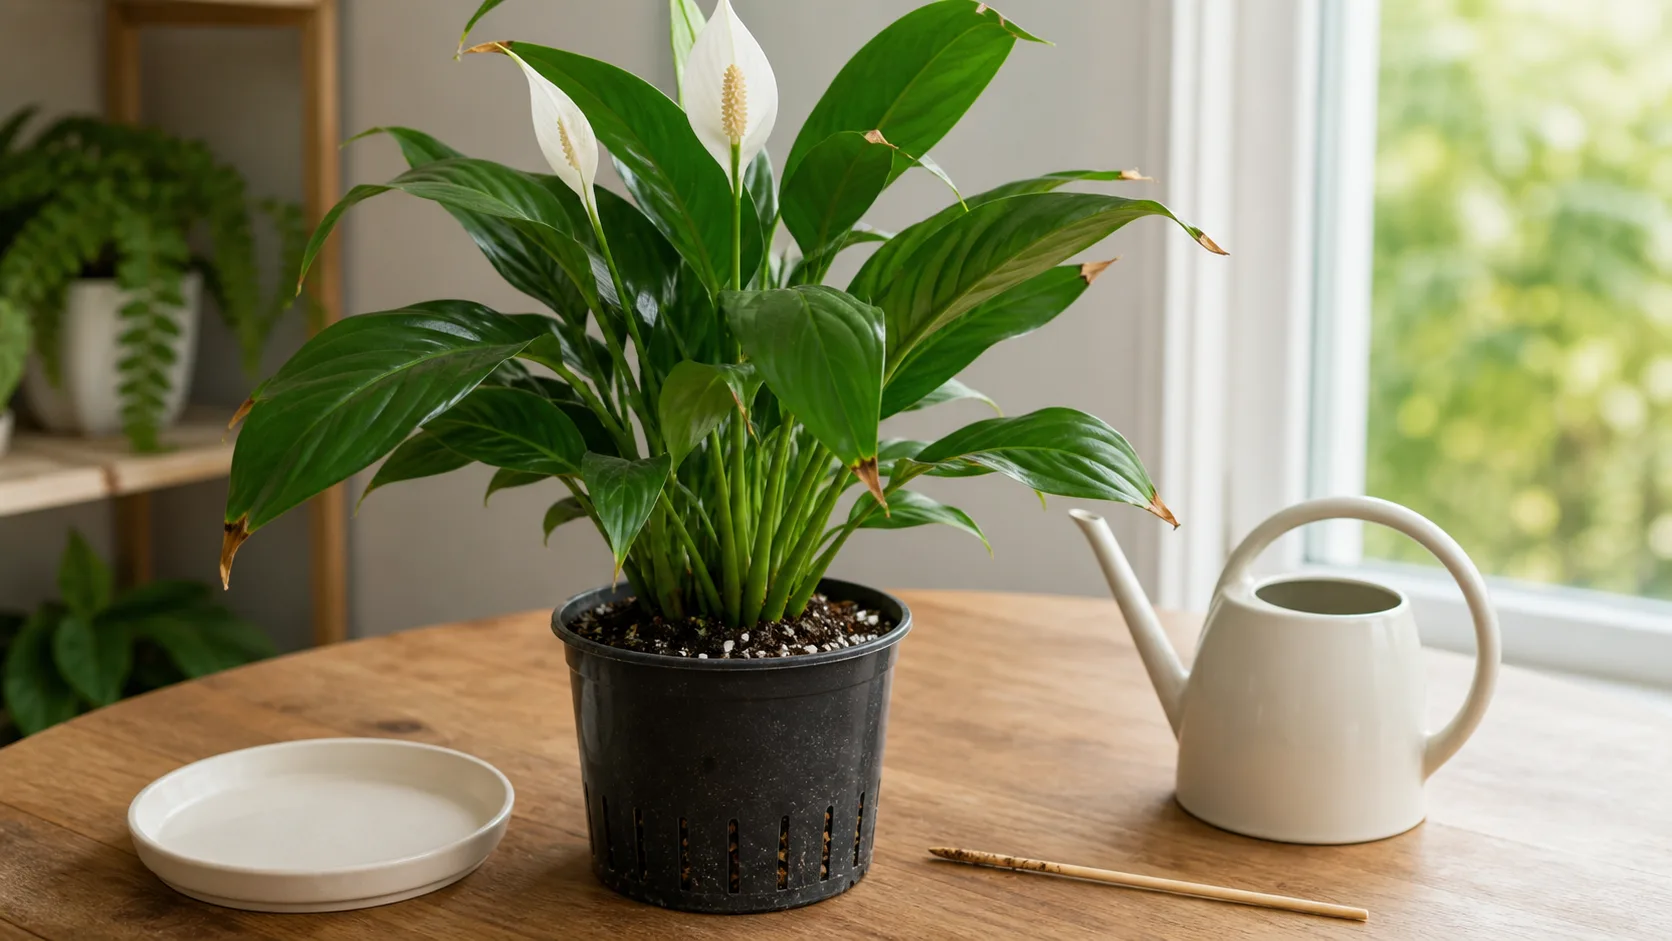
Do not increase watering just because the tips are brown. Check the pot every few days and water when the upper layer is dry and the center is only lightly moist. Water thoroughly, let excess drain, and empty the saucer. The interval changes with light, temperature, pot size, and season.
Should I use distilled water for peace lily brown leaf tips?
A temporary distilled-, rain-, or reverse-osmosis-water trial is reasonable when tips keep returning on an otherwise healthy plant, especially if tap water leaves mineral deposits. Use the lower-mineral source for three or four waterings while keeping other care steady. Avoid softened water because it may add salts.
Does misting stop brown tips on a peace lily?
Occasional misting does not reliably correct persistently dry room air, and it cannot fix salt buildup or wet roots. Move the plant away from vents first. If the room remains dry, a humidifier creates a steadier change. Keep watering decisions tied to the soil, not the air.
Are brown tips a sign of root rot?
Not by themselves. Root trouble becomes more likely when brown tips appear with yellowing, persistent wilt in moist soil, slow drying, a sour smell, or soft dark roots. A few dry points on firm green leaves do not justify an emergency repot.
Why are new peace lily leaves getting brown tips?
Damage on new growth suggests the stress is still active. Check recent fertilizer use, salt crust, your water source, moisture at the center of the pot, retained runoff, and direct sun on the tender unfurling leaf. Make one supported correction, then watch the following leaf.
Methodology and Sources
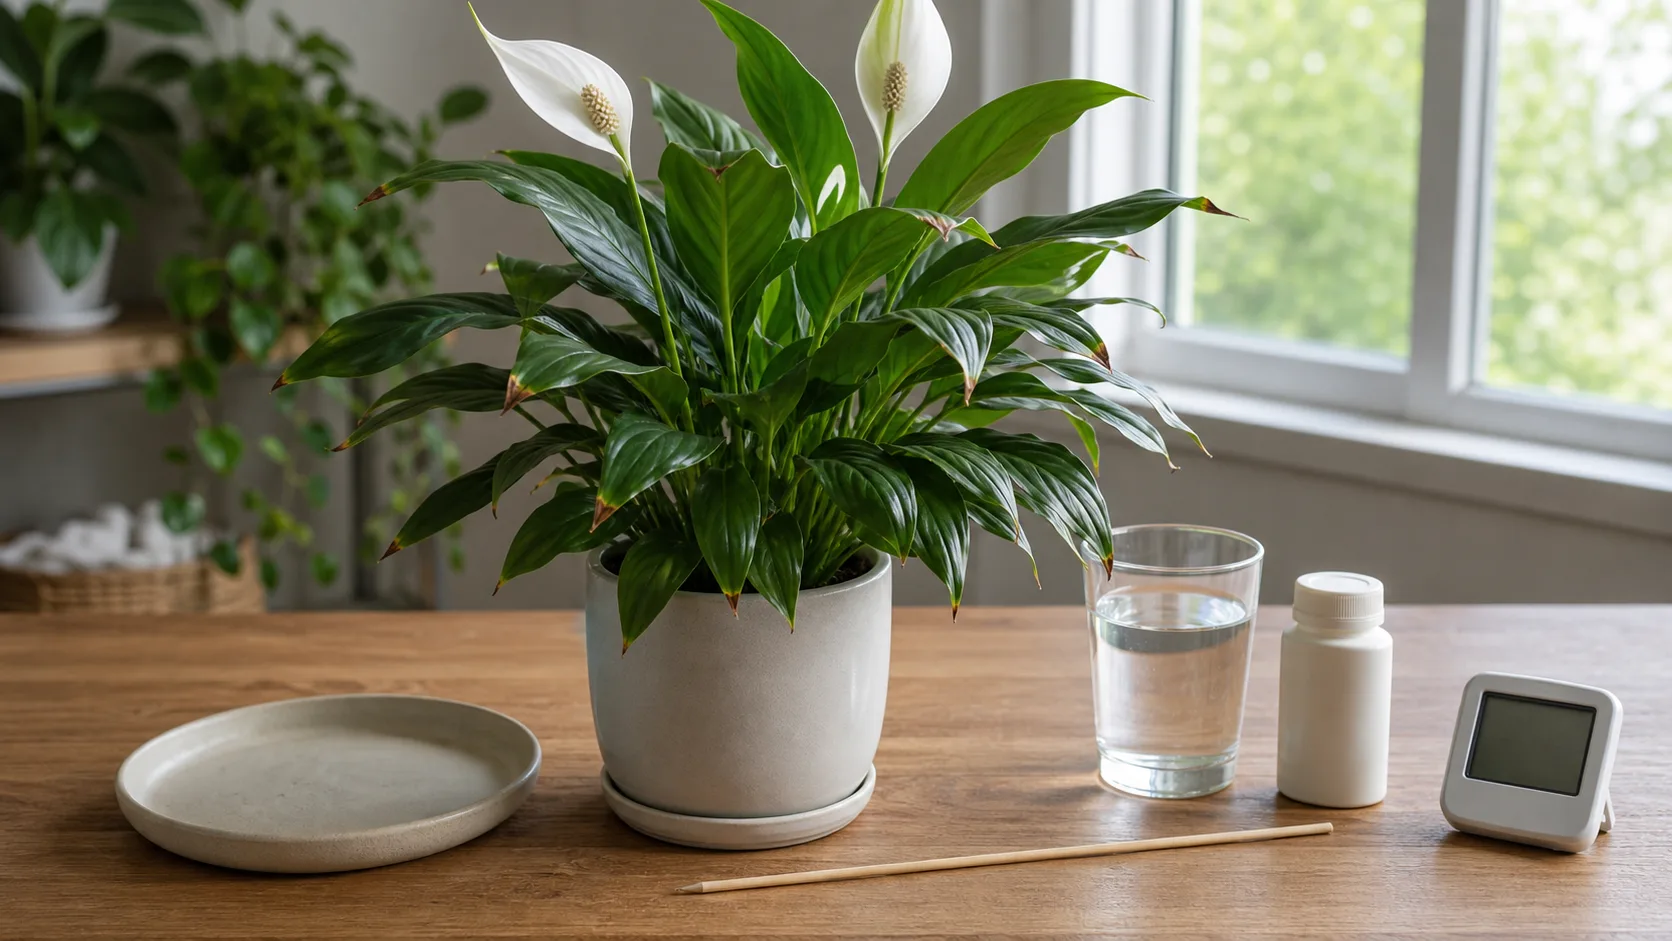
This guide was prepared by the KnowYourPlant editorial team using a pattern-first troubleshooting framework: leaf location, root-zone moisture, salt evidence, airflow, and recent environmental change.
Care claims were checked against North Carolina State Extension, Clemson Extension, Iowa State University Extension, Colorado State PlantTalk, and UC Statewide IPM.
No case counts, prevalence claims, or unverified community reports are used. The decision tree is an editorial synthesis designed to help you choose a safer first check, not a laboratory diagnosis.
Freshness Note
Research and source guidance were reviewed on 2026-07-19. Water chemistry and indoor conditions vary by home, so use the next healthy leaf, not an old trimmed tip, as the clearest sign that your correction worked.