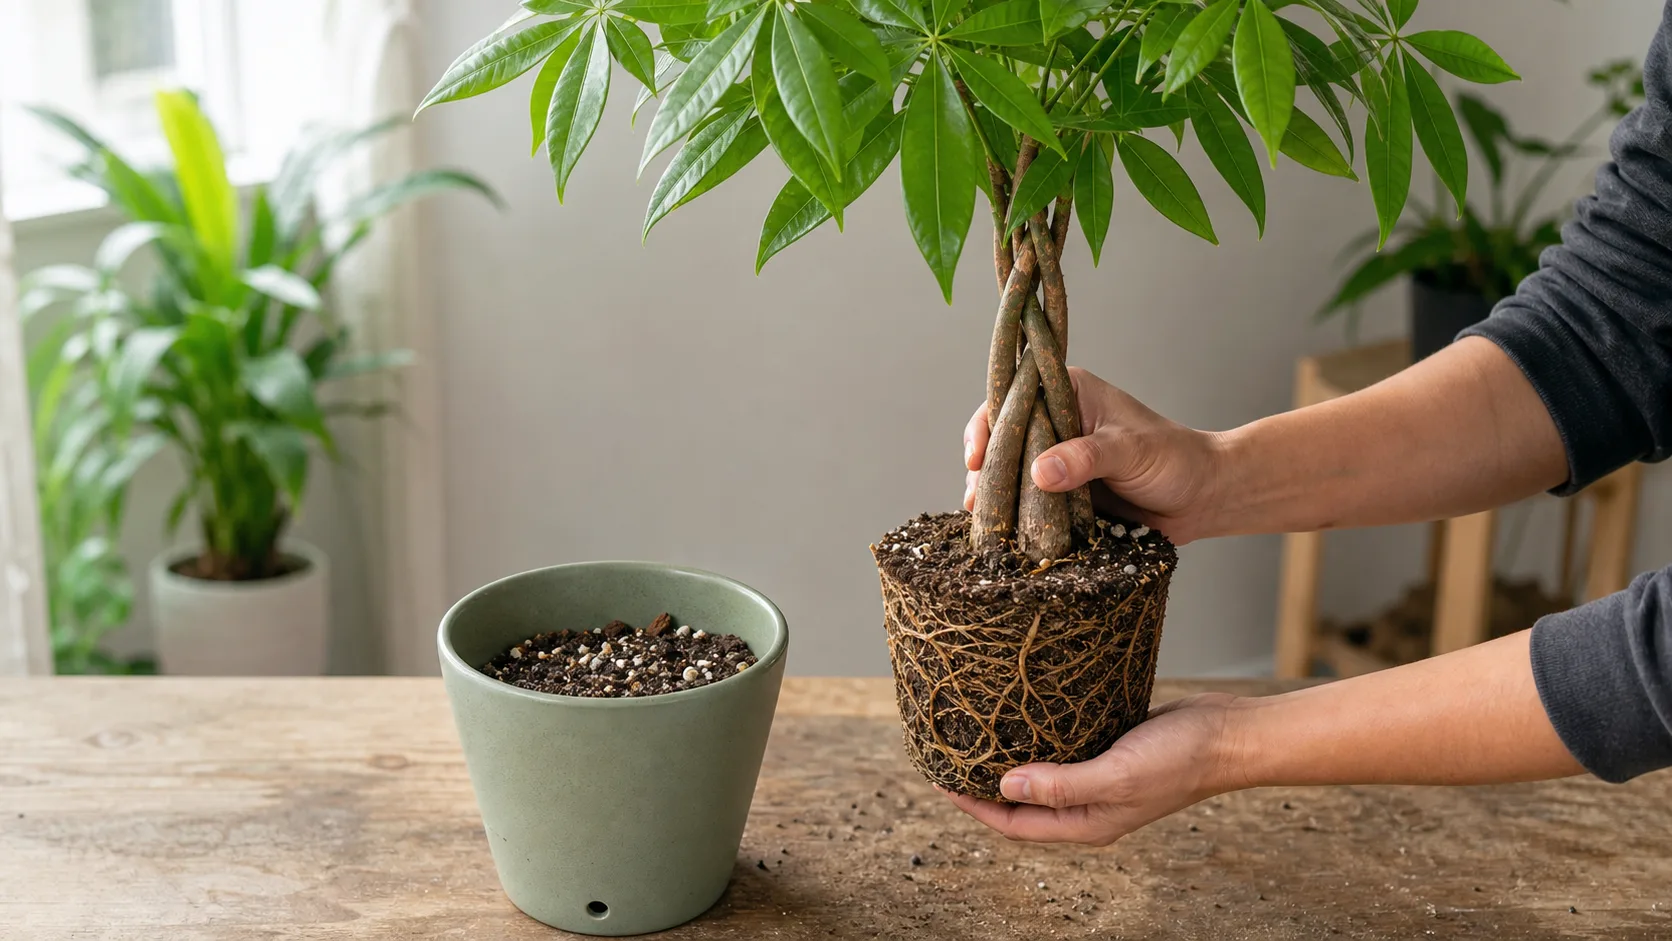
Money Tree Repotting: Pot Size, Soil, Roots, and Aftercare
Money tree repotting usually goes wrong for one simple reason: we assume a bigger pot is always the kind move. Then the soil stays wet too long, the roots lose air, and a plant that was mostly fine starts looking suddenly dramatic.
If your money tree is drying out fast, pushing roots through drainage holes, or sitting in tired mix that has turned dense and hard to re-wet, repotting can help. If she is stable and just looks a little crowded up top, the better move may be to wait, refresh the top layer, or fix the soil and watering routine around her first.
Here is the short version if you came in stressed and just want the safest path:
- repot only when the root zone shows real crowding or the mix has stopped working
- go up just one pot size, not two or three
- check for hidden ties, soft roots, and trunk problems while the plant is out of the pot
- keep the trunks at the same soil level as before
- water once, let excess drain, then slow down and let her settle
What most care guides miss
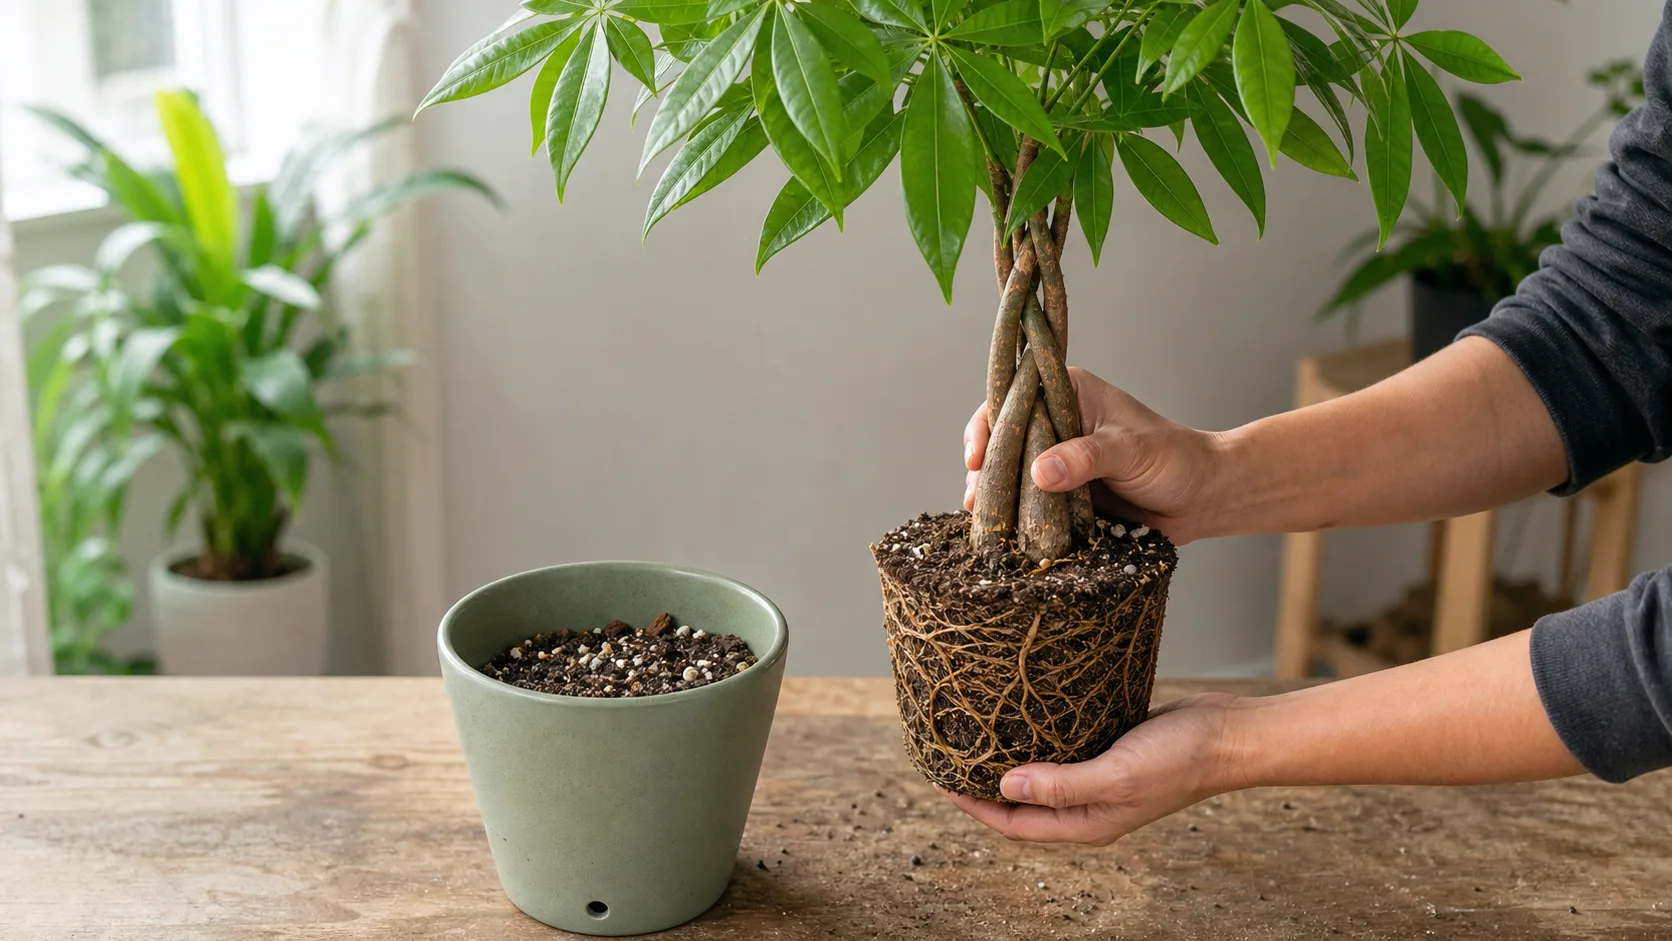
Repot only when the root ball and drainage behavior say she needs more room, then move up conservatively.
Most money tree repotting articles jump straight to tools and steps. The more useful question comes first: does your plant need a full repot, or are you about to solve the wrong problem?
A common misdiagnosis is assuming every droopy or yellowing money tree needs a larger pot. In real life, those same symptoms can come from overwatering, low light, cold stress, or roots sitting in a pot that is already too large and staying wet too long. A bigger container does not fix that. Sometimes it makes it worse.
The first check is not the leaf. It is the root zone. Slide the nursery pot out and look for a tight circle of roots, roots pushing through drainage holes, or a soil mass that dries much faster than it used to. If the pot still stays heavy and damp for too long, size is probably not the real problem.
That diagnosis-first approach matches extension guidance. Illinois Extension lists roots through drainage holes, roots on the soil surface, smaller new leaves, and wilting between normal waterings as useful repot signals. UMN Extension makes the other half of the point: repot only when the plant truly needs it, not just because spring showed up.
If your plant is mostly yellowing and the soil feels swampy, pause here and read our guides on overwatered plant signs and fixes and root rot treatment before you size up.
Money tree repot now, wait, or refresh: a quick decision tree
Repot now
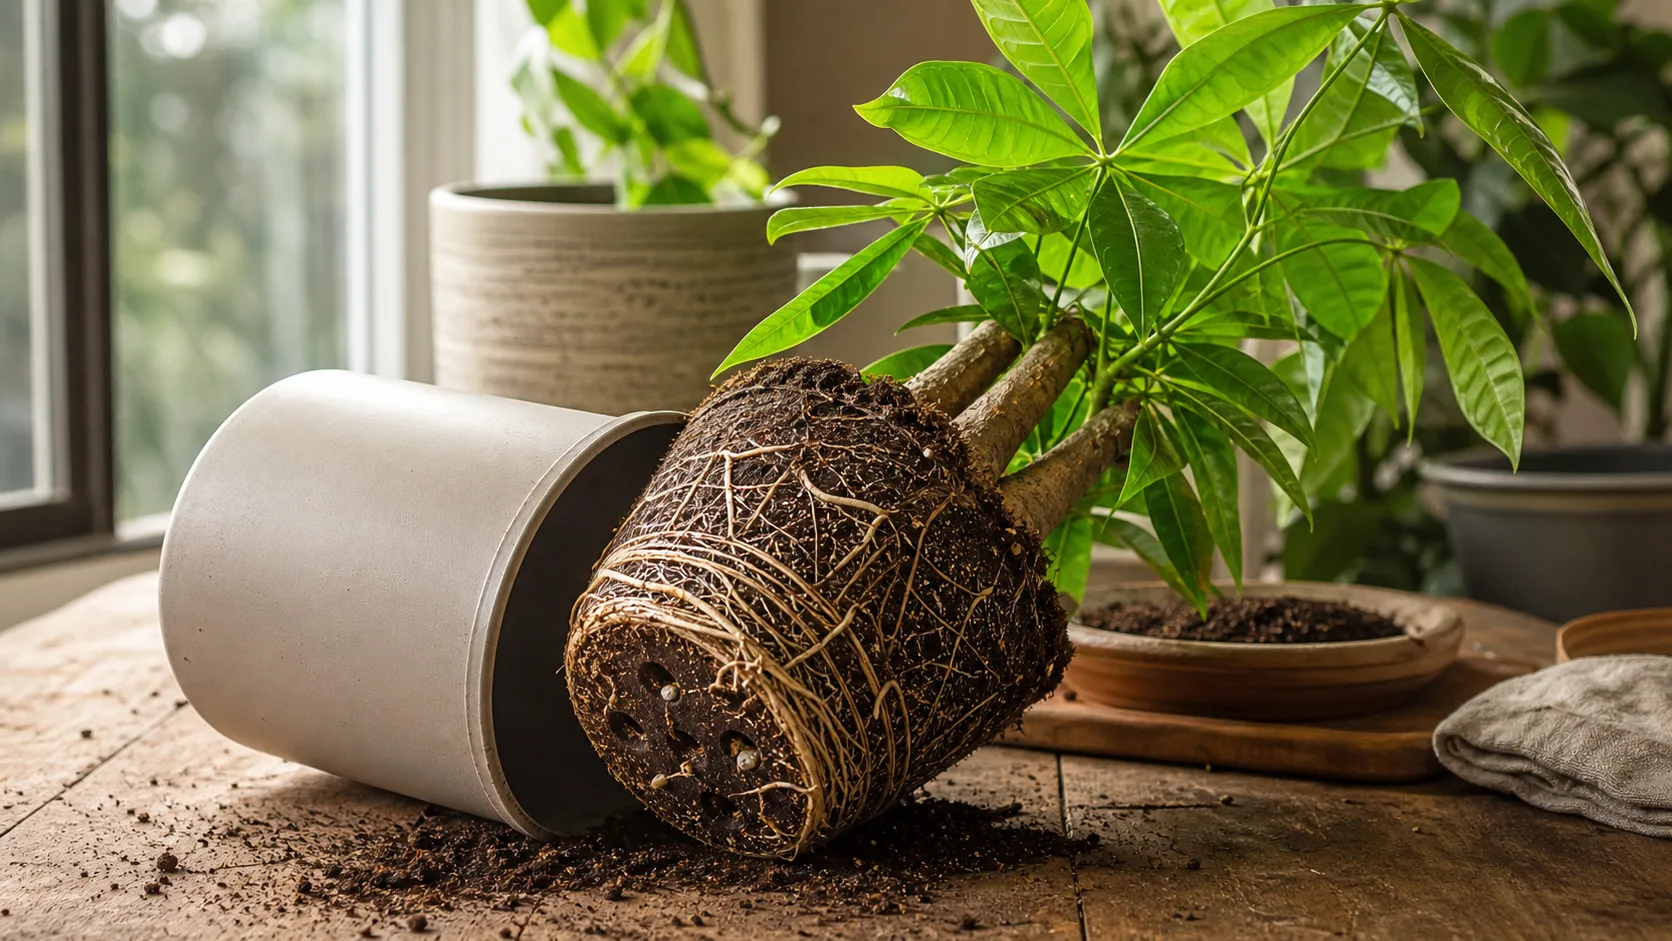
Dense circling roots at the outside and bottom of the root ball are stronger evidence than the calendar alone.
Choose this if you see two or more of these together:
- roots circling tightly inside the pot
- roots growing through drainage holes
- soil drying unusually fast
- smaller new leaves during active growth
- compacted mix that sheds water or stays unevenly wet
Refresh the top layer only
Choose this if the plant is otherwise doing well but the top 1 to 2 inches of soil look crusty, shrunken, or depleted.
Wait and monitor
Choose this if your money tree is growing normally, holding moisture reasonably well, and not showing real root congestion. A healthy money tree does not need an automatic yearly pot upgrade.
That middle option matters. A lot of healthy money trees get repotted simply because they are tall, braided, or a little top-heavy. Height alone is not the trigger. Root evidence is.
A quick real-life split
- Tall but still stable: If your money tree looks big for her pot but the soil still dries at a normal pace and the roots are not packed into a tight coil, waiting is usually kinder than sizing up.
- Smaller but clearly crowded: If the root ball is tight, water runs through too fast, and new growth is getting smaller, repotting usually helps even if the plant does not look dramatic from across the room.
Best time to repot a money tree
Spring and early summer are usually the easiest windows because the plant is actively growing. Illinois Extension notes that repotting is best done when the plant is actively growing, typically in spring or early summer. That gives your money tree the best shot at replacing disturbed roots and settling into fresh mix without dragging the stress out.
Still, timing is not more important than the plant’s condition. If she is badly root bound in another season, it is usually better to repot thoughtfully than to leave her stuck in a dry root brick for months. Just keep everything else calm afterward. No sudden direct sun, no cold draft, no aggressive feeding.
Expert note: how much bigger should the pot be?
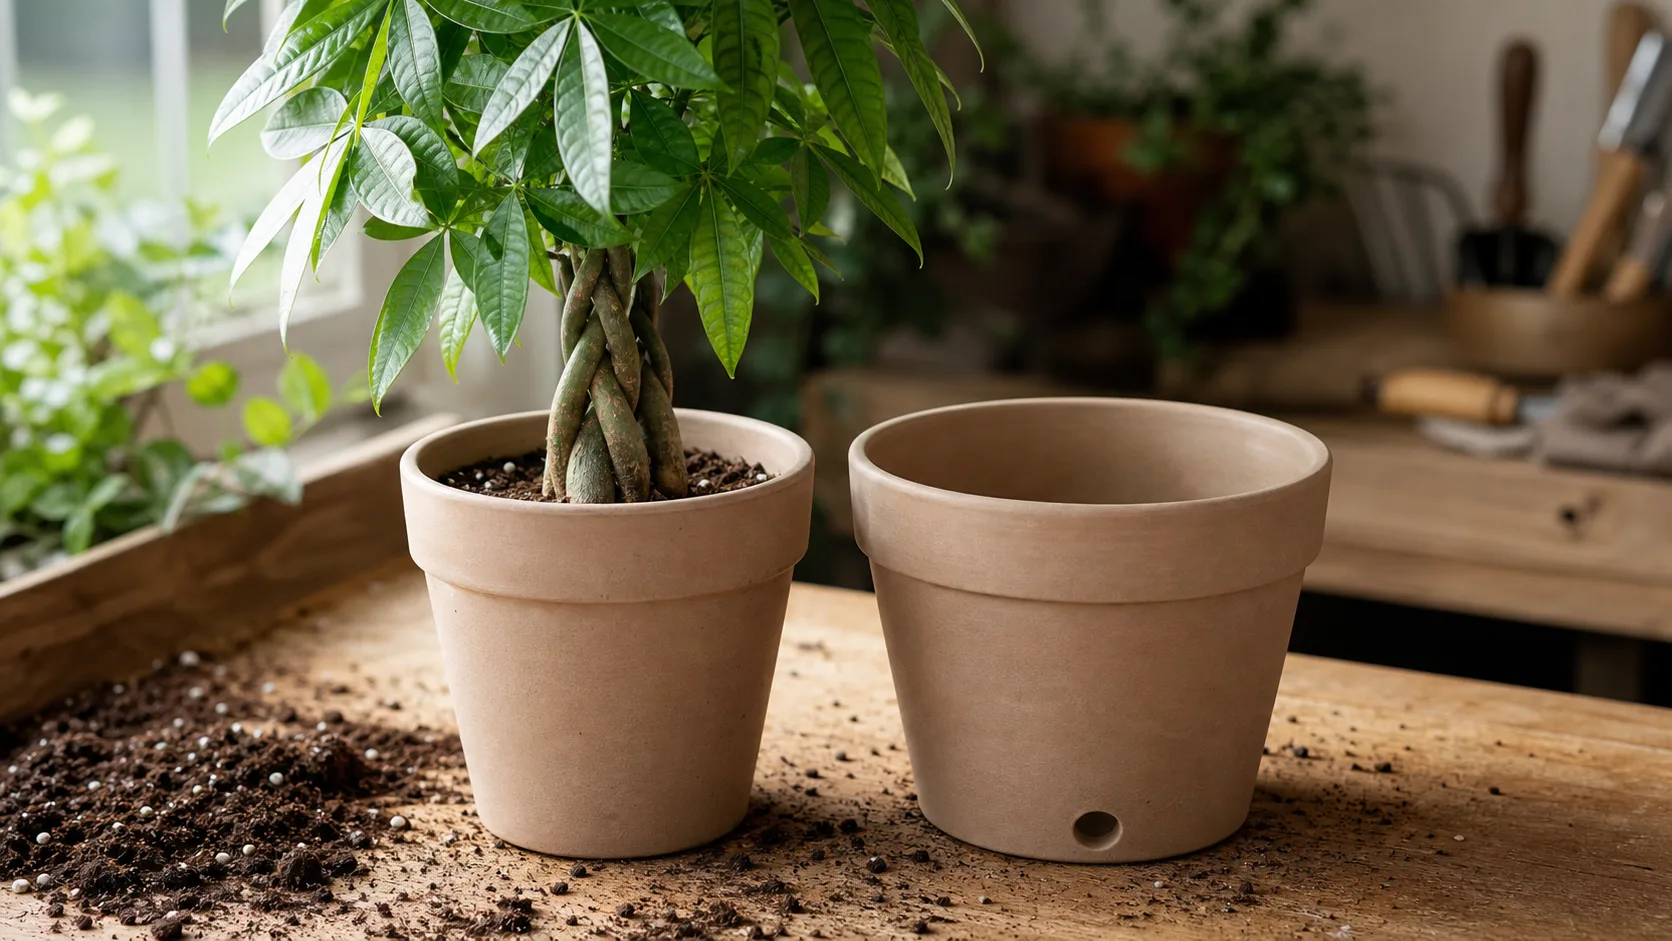
A replacement pot just one size larger gives roots room without surrounding them with too much slow-drying mix.
This is where a lot of plant owners get mixed messages. The safest rule is modest, not dramatic.
“Choose a pot just one size larger. Too much extra soil can hold too much water, which can cause root problems.”
Source: UMN Extension, Spring houseplant care
Penn State Extension recommends moving into a slightly larger container, and Wisconsin Horticulture points to the reason behind the rule: oversized containers hold excess moisture around roots and make rot much easier to start.
Practical size rule
- from a 4 inch pot, go to about 5 to 6 inches
- from a 6 inch pot, go to about 7 to 8 inches
- avoid jumping multiple pot sizes at once
If your money tree looks large for her pot, I know the urge is to compensate with a dramatic planter. Try not to. A slightly bigger pot usually helps more than a big decorative leap.
A simple pot-size comparison
| Choice | What usually happens | Main risk |
|---|---|---|
| Same pot, freshened top layer | Stable if roots are not crowded | Delays a needed repot if root-bound signs are already present |
| One size larger | Best balance of fresh soil, airflow, and stability | Mild transplant stress |
| Two or more sizes larger | Soil stays wet longer than roots can use it | Yellowing, slow recovery, root rot |
The best soil for money tree repotting
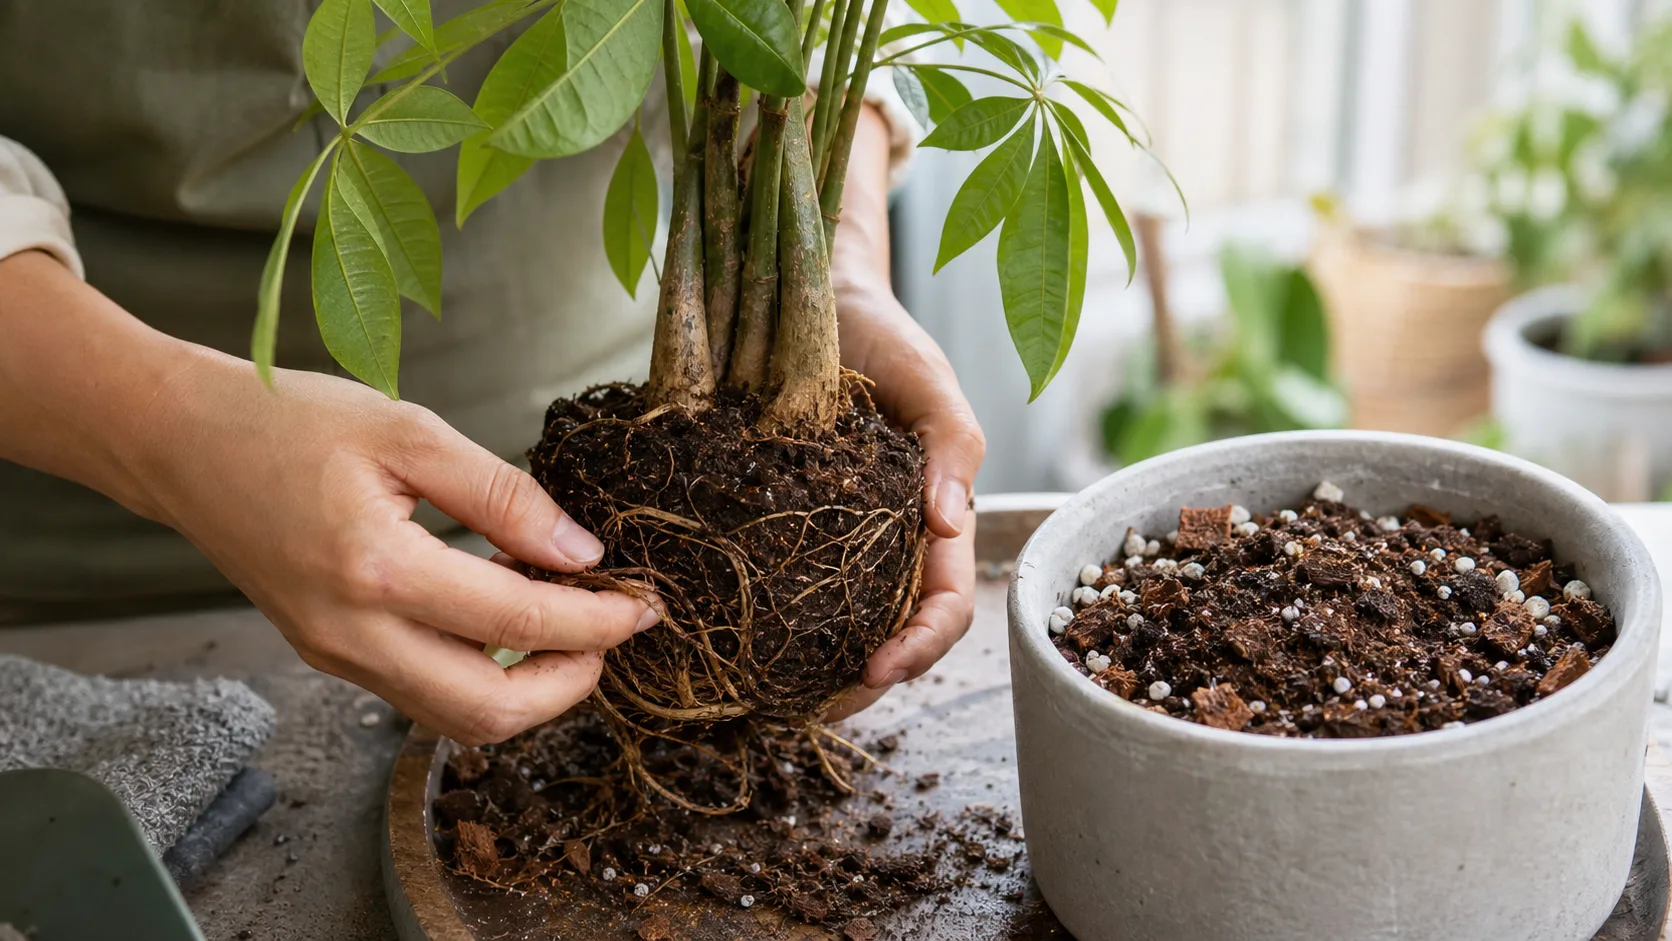
Keep the center of the root ball intact, loosen only the outer roots, and backfill with coarse, airy mix.
Money tree soil should hold some moisture while still letting air move through the root zone. Think airy and springy, not dense and muddy.
A good mix usually looks like this:
- quality indoor potting or soilless mix as the base
- extra perlite or pumice for faster drainage
- a little bark or coco chips if the base mix feels heavy
Penn State Extension recommends a quality soilless mix, and Wisconsin Horticulture stresses that roots need drainage and oxygen, not just water. That is the real goal of the mix. You are building a root zone that can breathe.
If you are not sure whether your mix is too heavy, wet a handful and squeeze lightly. If it stays gummy and compact like a dense sponge, lighten it before you use it. If it breaks apart easily and still holds a little shape, you are closer.
If you want a broader breakdown of indoor soil structure, our guide to best potting soil for indoor plants can help you troubleshoot the mix before you even open the repotting mat.
Root-ball inspection checklist, the money-tree-specific step
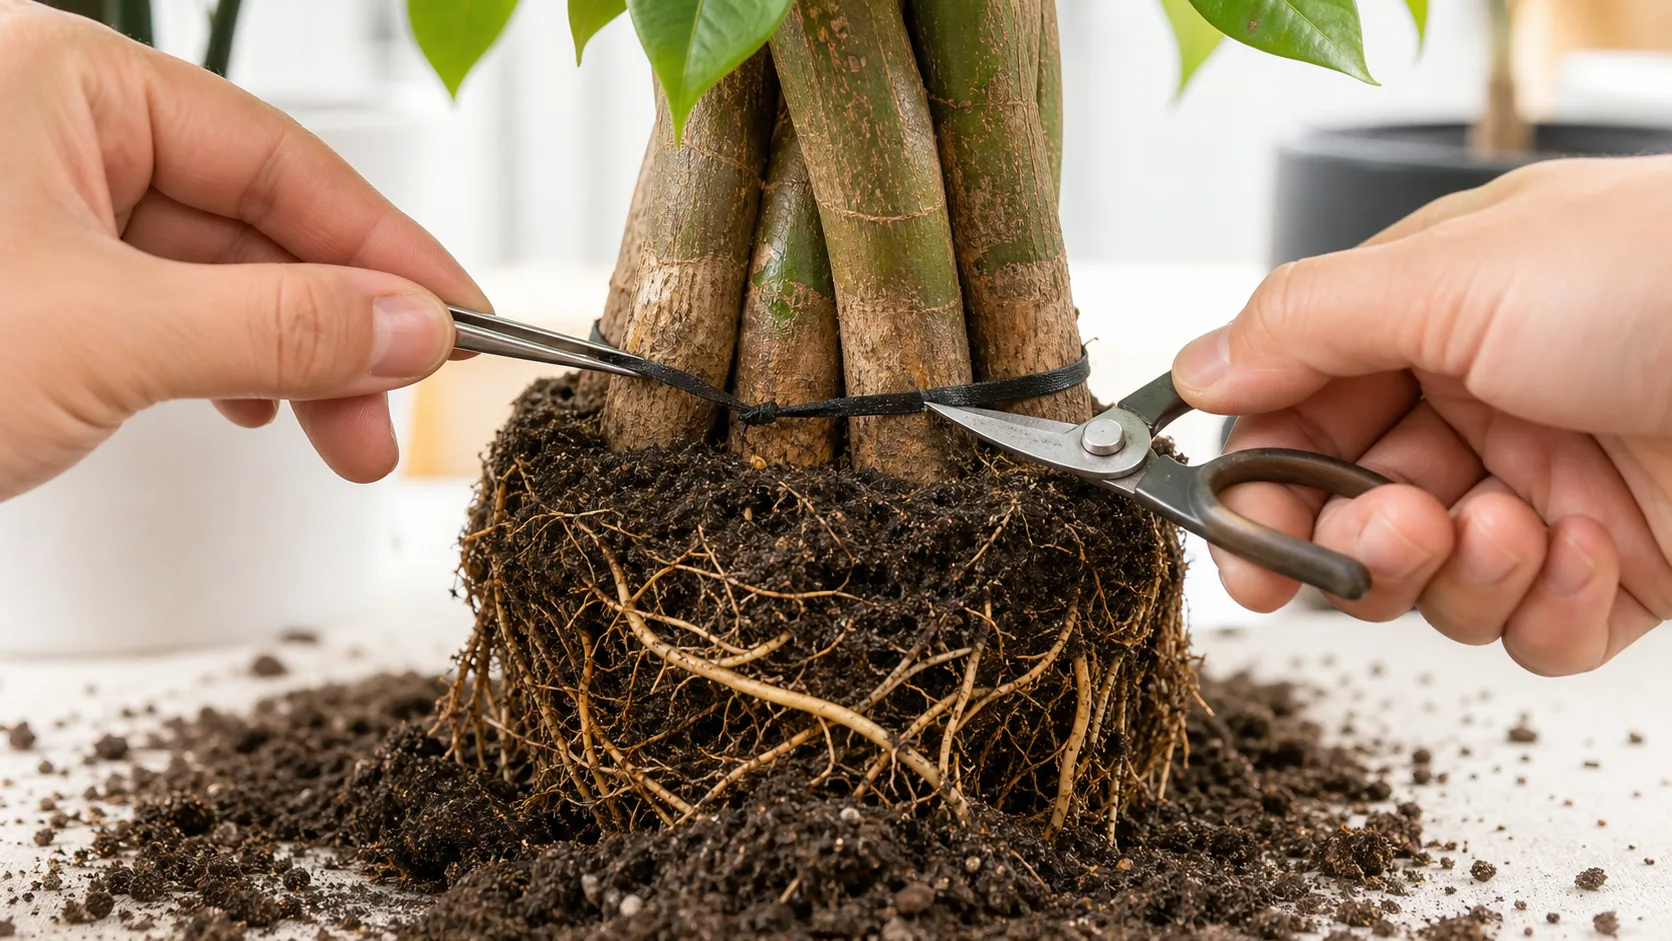
Inspect below the soil line for a nursery tie that may tighten as the braided trunks expand.
This is the part generic houseplant guides often skip, and it is where money tree repotting becomes more useful than a basic potting tutorial.
When the plant comes out of the pot, check these in order:
- Drainage-hole roots. A few roots at the bottom are normal. A dense mat is a stronger sign she has used up the space.
- Circling roots. If roots wrap tightly around the outside of the root ball, loosen them gently with your fingers.
- Compacted core. If the soil mass is mostly roots with very little mix left, watering problems will keep repeating until you repot.
- Base of the trunks. Look just below the soil line for hidden rubber bands, twist ties, nursery tape, or mesh.
- Soft or dark roots. Healthy roots are usually pale and firm. Mushy, sour-smelling roots point to rot, not just crowding.
- Trunk firmness. Press gently near the base. A soft trunk is not a normal repotting issue. That is a rot warning.
That fourth check matters a lot with braided money trees. You do not need to automatically undo the visible braid. What you do need to inspect is the hidden material at the base and in the root zone. That is where constriction trouble starts.
How to repot a money tree, step by step
If you want the safest beginner path, keep the whole process calm. Money trees usually handle a thoughtful repot better than a rough one.
1. Water lightly the day before if the root ball is bone dry
Slightly moist roots are easier to handle than a dry brick. Do not repot straight from soggy soil, and do not soak a stressed plant just to make the task feel easier.
2. Prep the new pot
Choose a pot with drainage holes. Penn State Extension is very clear here: drainage holes are necessary so excess water can escape instead of turning the root zone stagnant.
If you love a decorative planter with no holes, use it as a cachepot around a planted nursery pot instead of planting directly into it.
3. Add a shallow base layer of soil
Set the plant so the top of the root ball will sit at the same height as before. Do not bury the trunks deeper. The base of a money tree is one place where “a little deeper for support” can backfire.
4. Ease the plant out and inspect the roots
Support the base gently and tip the pot sideways if needed. If roots are circling, loosen only the outer ring. Do not tear the whole root ball apart unless you are dealing with obvious rot or severe compaction.
If you find hidden constricting bands below the soil line, remove them carefully.
5. Settle the plant into the new pot
Center her, then fill around the sides with fresh mix. Press lightly to settle the soil, but do not pack it down hard. Roots need air pockets as much as they need contact with the mix.
6. Water thoroughly once, then let it drain
Water until it runs through the drainage holes, then let the pot finish draining before you empty the saucer. Wisconsin Horticulture gives a practical timing cue here: let the excess collect for about 10 to 20 minutes, then empty it.
7. Do not keep fussing with it
This is the hard part for most of us. Once the plant is stable in the new pot, resist the urge to rotate, fertilize, re-tie, prune heavily, and water again just because she looks a little offended. Fresh mix and calm aftercare solve more than constant correction.
If you want the broader mechanics of the potting process, our how to repot plants guide covers the universal basics, and when to repot plants can help if you are still stuck on the timing question.
Aftercare: what to do in the first month
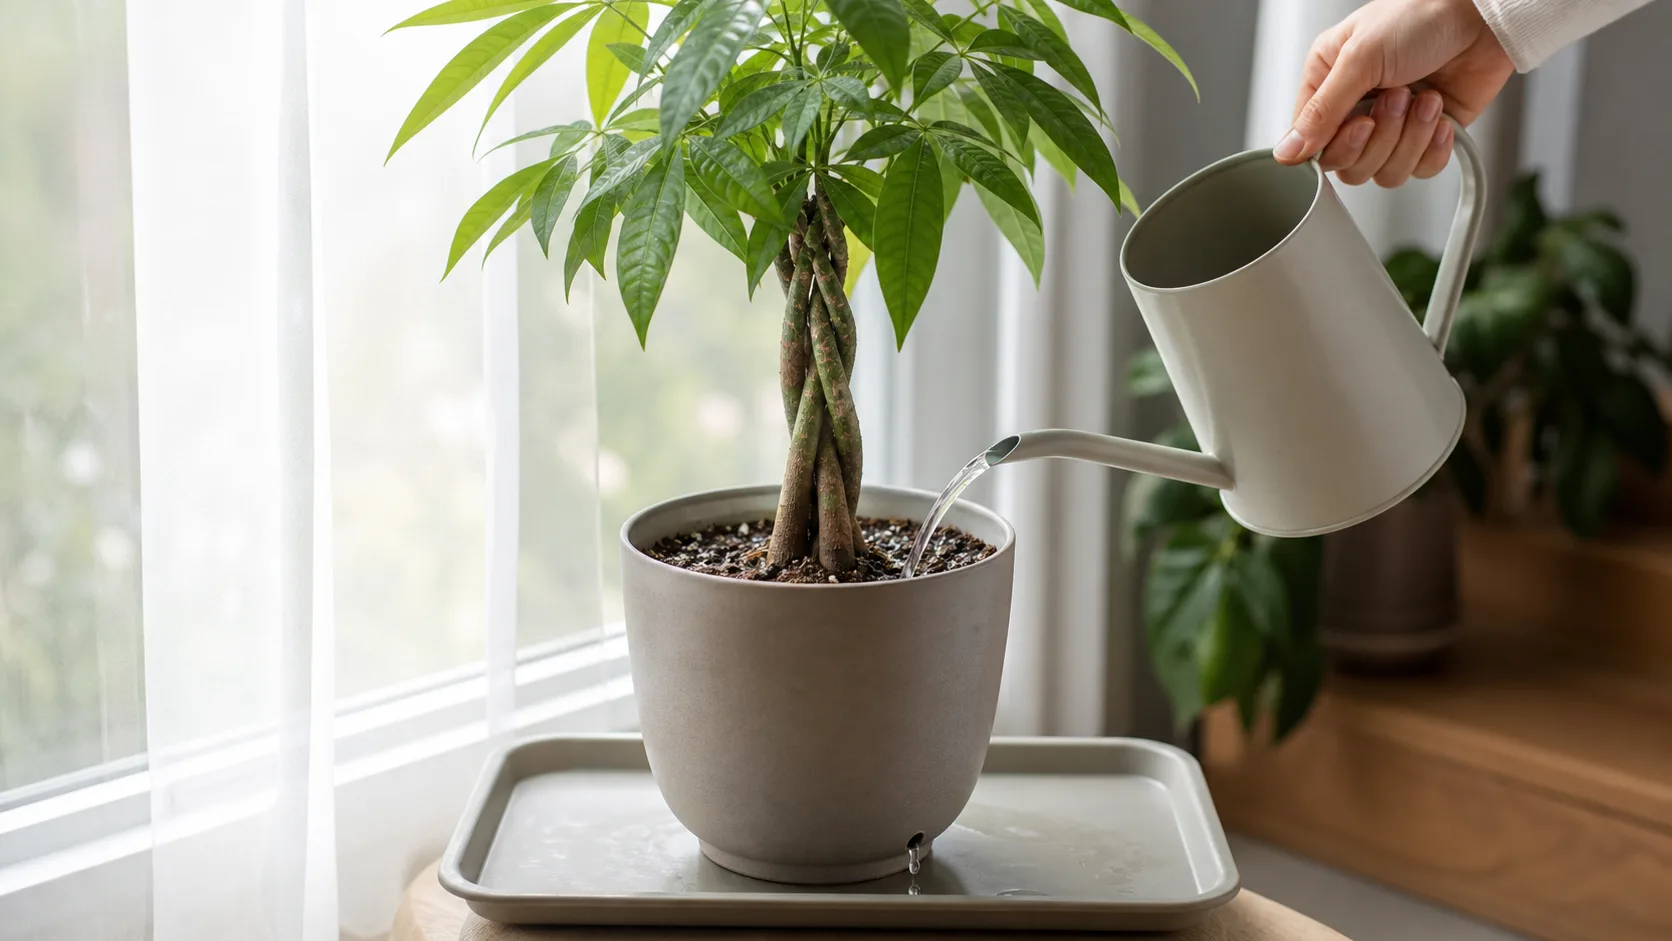
Water thoroughly once, let every excess drop drain, then wait for the mix to dry appropriately before watering again.
Aftercare is where a careful repot either settles in or starts to unravel.
First 48 hours
Put her back in bright indirect light, not harsh direct sun. Money trees prefer bright light and moderate, even moisture, so stability matters more than chasing a “recovery boost.”
First 2 weeks
Check moisture with your finger, not habit. For a newly repotted money tree, the top inch or so drying is a better cue than a calendar reminder. If the pot still feels heavy deeper down, wait.
First month
Do not fertilize right away. Give the roots time to settle first, usually around 4 weeks, before feeding again. Fresh mix and transplant stress are enough change for now.
Symptom diagnosis card: normal adjustment or a real repotting problem?
| What you notice | More likely meaning | What to do next |
|---|---|---|
| One or two older leaves yellow | Normal adjustment stress | Keep light and watering steady, do not repot again |
| Brief droop for a few days | Mild transplant shock | Give her time, avoid extra watering |
| Soil stays soggy and the pot feels heavy for too long | Pot too large or mix too dense | Slow down watering, reassess drainage and soil structure |
| Sour smell from the pot | Root trouble, not normal shock | Check the root zone and remove any stagnant water |
| Soft trunk base | Serious rot warning | Unpot and inspect immediately |
| Ongoing yellowing across multiple leaves | Root stress, overpotting, or previous damage | Review pot size, soil, and root condition instead of feeding |
That last line is important. A repot can reveal a problem that was already there. If the roots were already compromised, fresh soil alone will not hide it for long.
What normal adjustment actually looks like
A money tree that was repotted thoughtfully may still do a few mildly dramatic things:
- drop one or two older leaves
- look a little droopy for several days
- use water more slowly while the roots settle
- pause new growth for a short stretch
That is normal. It does not mean you ruined her.
What worries me more is a plant that keeps declining while the soil stays wet, the trunks soften, or the pot smells off. That pattern is usually telling you the issue is below the soil line.
Three numbers worth remembering
These are small, but they prevent a lot of repeat stress:
- 1 size larger is the safest pot jump for most money trees
- 1 inch down is a practical first moisture check before rewatering fresh soil
- 10 to 20 minutes is a good drainage window before you empty excess water from the saucer
They are simple numbers, but they keep you from guessing when you are tired and the plant looks needy.
Common money tree repotting mistakes
Going too big, too fast
This is still the classic one. A larger pot does not help if the roots cannot use or dry the extra soil.
Using heavy moisture-retentive soil
If the mix stays sticky and compact, repotting can make decline worse instead of better.
Burying the trunks deeper
The trunk base should sit at the same level as before. Deeper is not safer.
Ignoring hidden ties below the soil line
With braided money trees, this can matter more than the pot itself.
Treating every yellow leaf as proof the repot failed
A little adjustment is normal. Persistent decline is the real warning sign.
Repotting and changing everything else too
If you also move her to harsher light, change watering rhythm, and fertilize right away, it becomes much harder to tell what actually upset the plant.
Seasonal note
If you are repotting in spring, your money tree usually has the best chance to bounce back quickly. If you are doing it in late fall or winter because the plant truly needs help, keep everything else boring in the best way possible: steady light, no cold drafts, moderate moisture, and no rush to feed.
That calm matters more than people think. A stressed money tree does better with one careful change than with a whole rescue makeover.
So, is your money tree ready for a repot?
If the root zone is clearly crowded, the mix has broken down, or watering has become a constant battle, yes. Repotting is probably the right move.
If she is basically healthy and the urge is coming from her size, braided look, or a pretty empty planter you want to use, pause. Money trees do not need dramatic upgrades to stay happy. They need the right amount of room, air around the roots, and a slower hand than most of us want to give.
If the hardest part is remembering when to check the soil again after a repot, KnowYourPlant can help you track that quieter recovery window so you do not over-correct. If the rest of her care routine still feels shaky, start with our money tree plant care guide so you can separate repotting stress from ordinary watering and light issues.
Helpful related guides
If the repot question is really a drainage, watering, or root question, these can help next:
- When to Repot Plants
- How to Repot Plants
- Best Potting Soil for Indoor Plants
- Root Rot Treatment Guide
- Money Tree Plant Care Guide
If you are troubleshooting another common plant symptom, see Money Tree Yellow Leaves: Diagnose Before You Water for a focused diagnosis and recovery plan.
FAQ
When should I repot a money tree?
Not on a fixed yearly schedule. Repot when you see real root-zone signs like roots through drainage holes, very fast drying soil, or a root ball that is mostly roots with little mix left.
What soil is best for money tree repotting?
Use a light indoor mix that drains well and still holds some moisture. A base potting mix with extra perlite or pumice usually works better than a dense blend that stays soggy.
How much bigger should the new pot be?
Usually just one size larger. That gives the roots fresh space without surrounding them with a big ring of wet soil.
Should I loosen the roots?
Yes, but gently. Loosen outer circling roots just enough to stop the tight spiral. You usually do not need to fully tear apart the root ball unless there is obvious rot or severe compaction.
Why is my money tree drooping after repotting?
A brief droop can be normal transplant stress. Worry more if the soil stays soggy, the trunk base softens, or yellowing keeps spreading.
Can I repot a money tree into a pot without drainage holes?
It is much riskier. Use a nursery pot with drainage inside the decorative pot instead of planting directly into a closed container.
Should I remove the braid ties on a money tree?
Do not automatically undo the whole visible braid. Do inspect below the soil line for hidden rubber bands, wire, or tape around the base or roots, because those are the ties most likely to cause trouble over time.
Sources and methodology
Author: KnowYourPlant editorial team
Reviewed by: KnowYourPlant editorial review
Last updated: 2026-07-19
This article was built as a diagnosis-first money tree repotting guide, not a generic potting tutorial. The focus was practical: help you decide whether your money tree truly needs repotting, how much larger the pot should be, what to inspect in the root zone, and how to tell normal adjustment from a real mistake afterward.
Care guidance and repotting constraints were checked against:
- UMN Extension
- Penn State Extension
- Illinois Extension
- Wisconsin Horticulture
- Missouri Botanical Garden Plant Finder for Pachira aquatica
We used those sources to keep the article grounded in real repotting signals, drainage logic, and indoor aftercare rather than vague “size up and water lightly” advice.