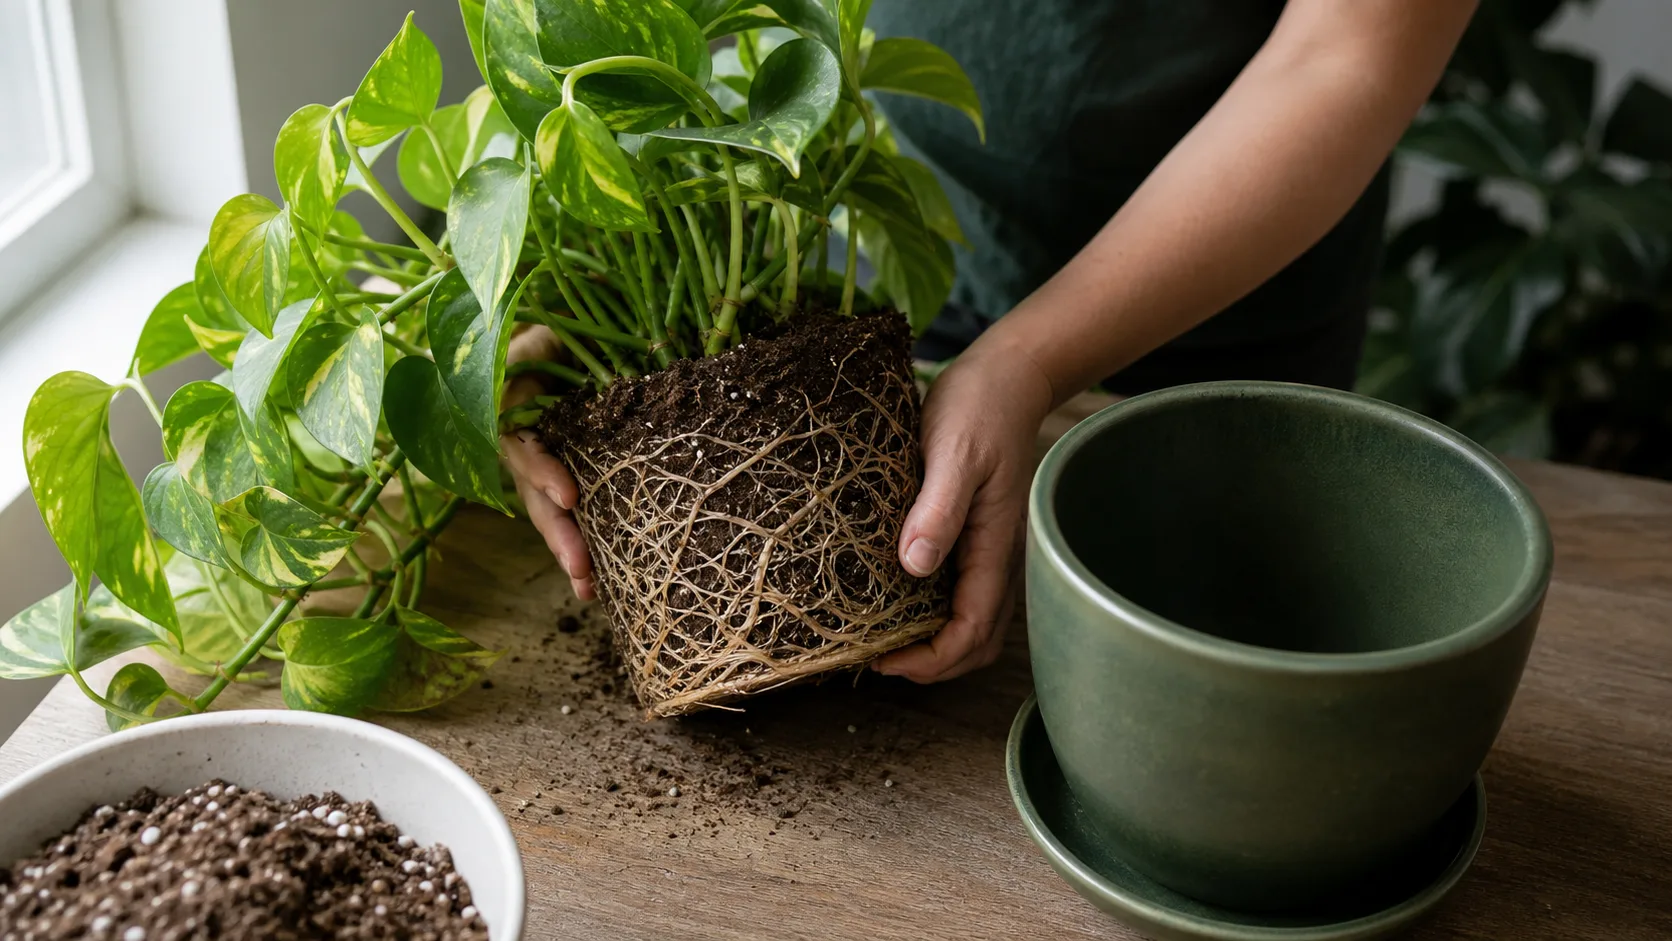
Afraid repotting will make your pothos droop, yellow, or rot? You can make the safe call in under a minute. Repot now only when the roots are packed and watering or growth has changed. Refresh the same pot when the soil is tired but roots still have room. Wait when one root has escaped but the plant otherwise behaves normally.
Repot now, refresh soil, or wait?
| If this sounds most accurate | Best next move | Why |
|---|---|---|
| The root ball is densely packed, roots circle the pot, water runs through fast, and the plant now dries out in about half its old interval | Repot now | Root crowding is affecting moisture balance |
| Growth is still steady, the root ball is not solid roots, but the mix feels compacted, crusty, or tired | Refresh soil, same pot if needed | Soil quality is the main issue, not space |
| There is only one escaped root or a few roots near the bottom, and watering rhythm and leaf size still look normal | Wait and recheck in 2 to 4 weeks | Slightly snug is not the same as stressed |
A simple rule helps: slide the plant out and check whether you still see a real layer of potting mix around the roots. If you mostly see soil, waiting or refreshing the mix may be enough. If you mostly see roots, repotting is more likely to help.
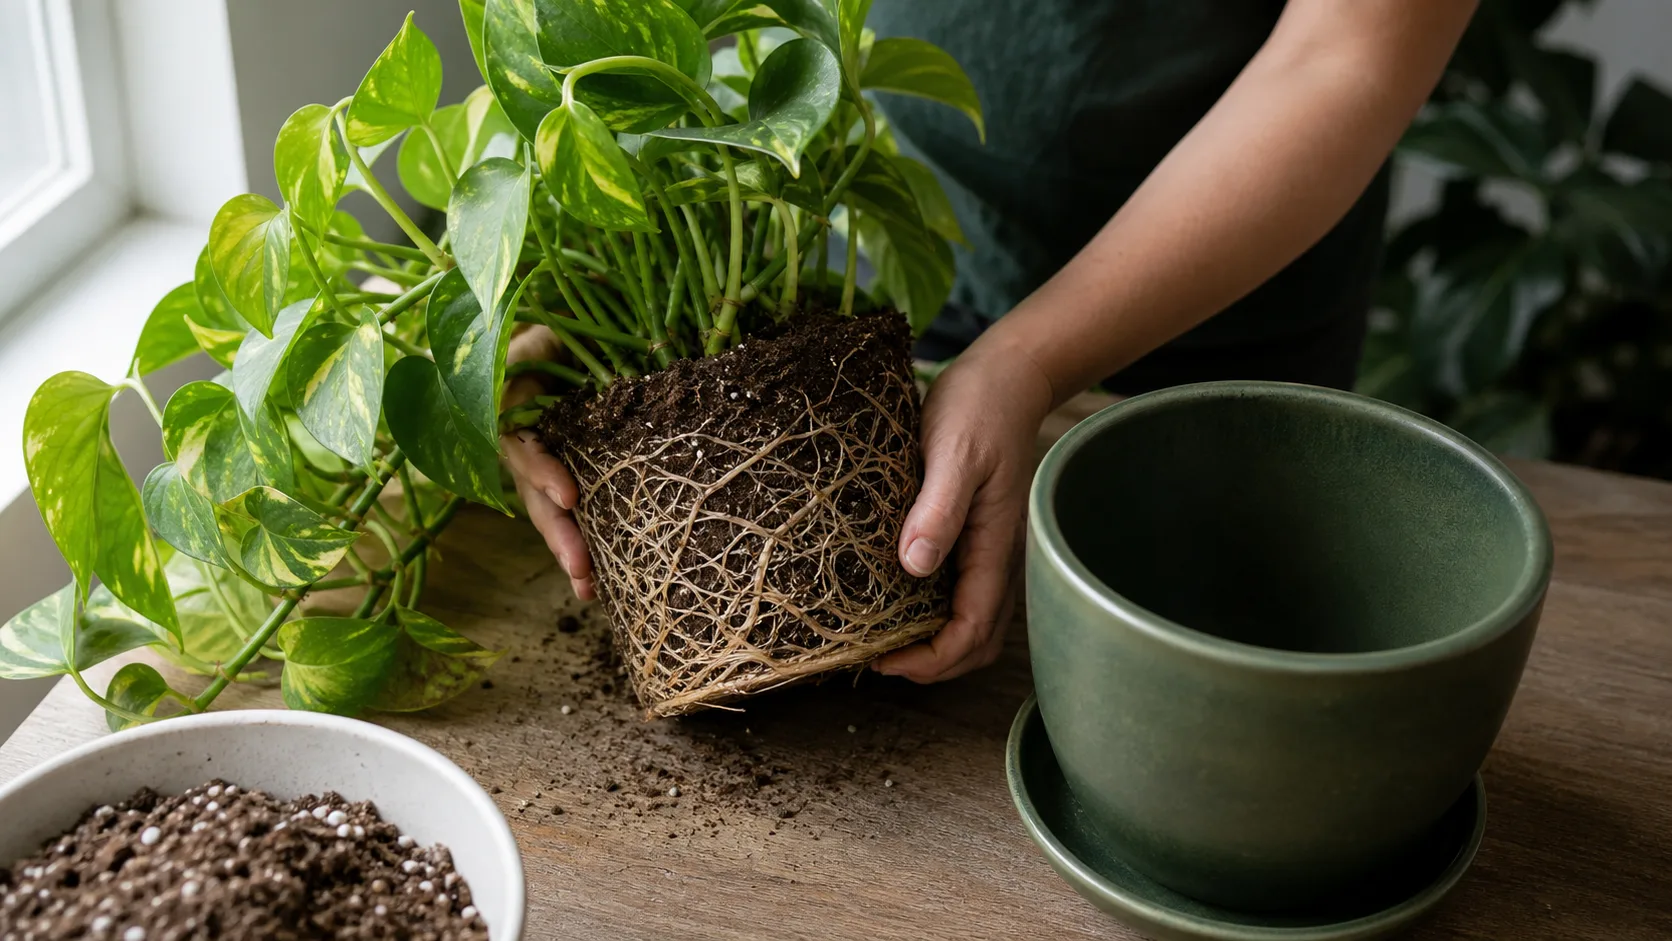
Start with the evidence: a packed root ball may need more room, tired mix may need refreshing, and a stable plant can wait.
What most pothos repotting advice gets wrong
Ignore three common shortcuts: one drainage-hole root is not an emergency, a full multi-cutting clump does not always need dividing, and a much bigger pot is not safer. Extension guidance supports reading roots, soil, watering speed, and growth together.
Worked owner case: too many changes at once
A directly reviewed Houzz discussion documents a large Marble Queen moved two pot sizes up and separated into about 15 individual plants, with some root loss, before it went limp over the next two days. One case cannot prove which change caused the decline. It does show the practical risk of stacking a larger pot, major division, root damage, and a new watering pattern at the same time. For a healthy clump that should remain one full plant, the lower-risk path is one size up, minimal loosening, one settling watering, and observation.
Identification matters before using pothos-specific root and watering guidance; confirm a lookalike before repotting it the same way.
When to repot pothos
Spring into early summer is easiest because active growth supports recovery. If roots are packed and watering no longer works normally, a careful repot outside spring is still reasonable; use a modest pot and expect slower recovery.
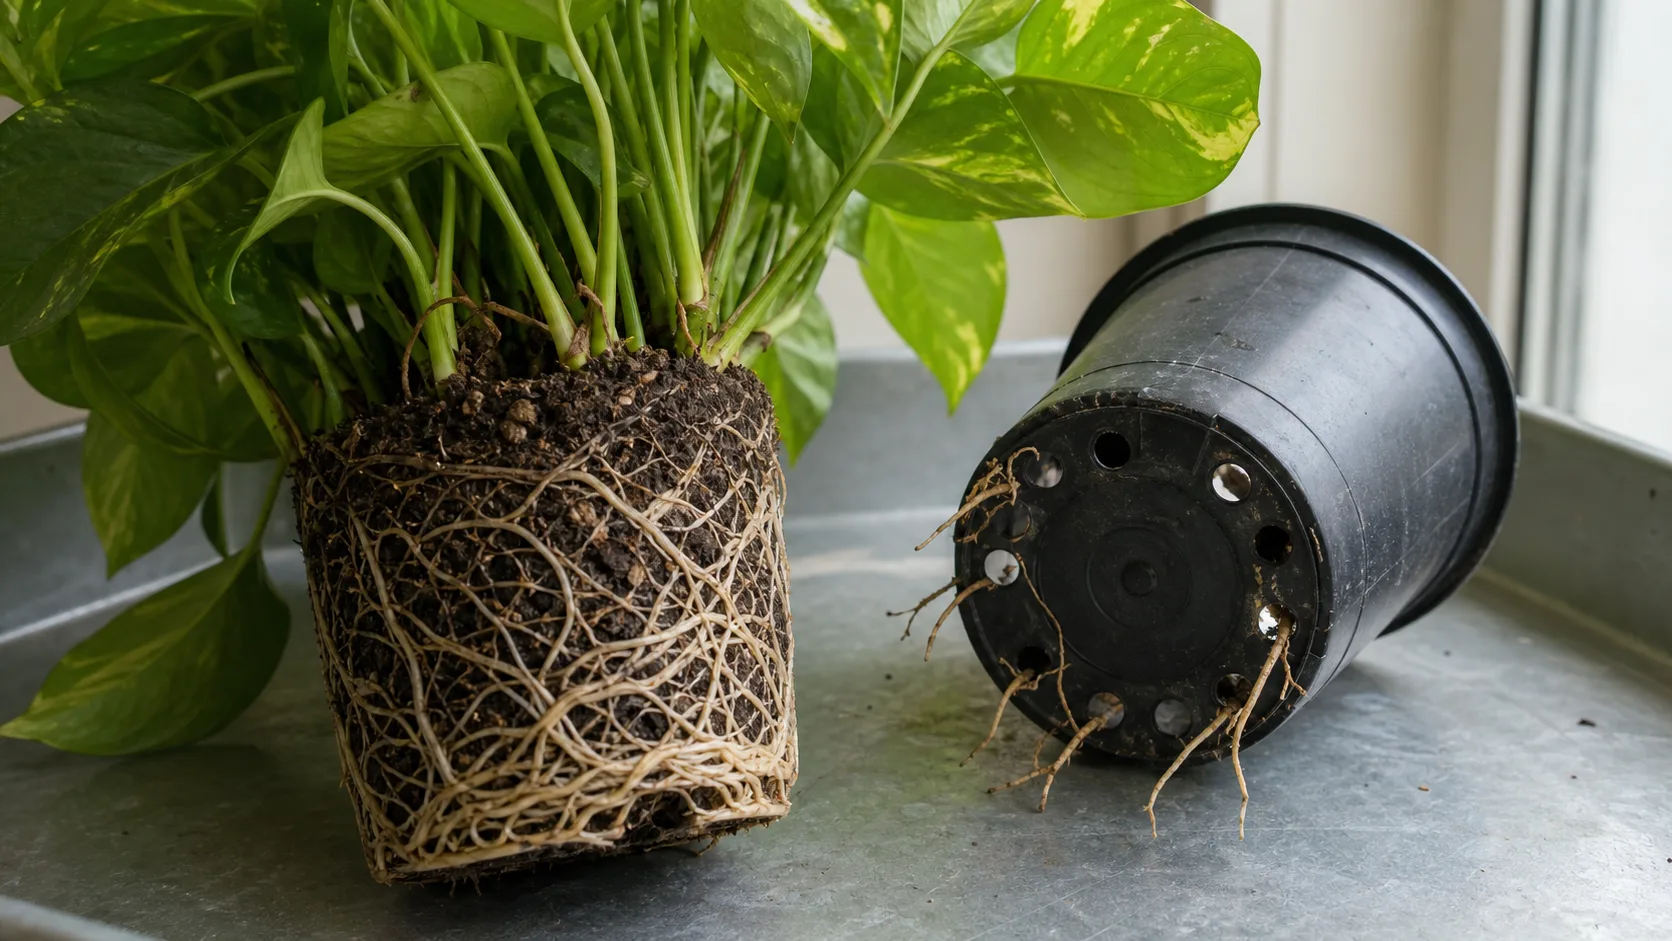
A real repot signal combines dense circling roots with changed watering behavior or reduced growth.
For baseline care, use how often to water pothos and the full pothos care guide.
How to repot pothos without creating avoidable problems
1. Pick a pot only one size bigger
For most pothos, the safe next pot is about 1 to 2 inches wider than the current one.
The new pot must have a drainage hole. If it sits inside a decorative cachepot, empty that outer container after watering.
Pot size comparison
| Pot choice | What happens | Risk level |
|---|---|---|
| Same pot, with refreshed mix | Moisture behavior stays more familiar | Low, if roots are not badly crowded |
| One size up | More room without creating a wet ring of unused soil | Best choice for most repots |
| Two or more sizes up | Too much soil stays wet around a smaller root system | Highest risk |
Oversized-pot risk is simple: unused soil stays wet longer than the roots can use it. That reduces air around the roots and raises failure risk.
2. Use an airy mix, not a heavy one
Clemson Cooperative Extension recommends an airy, well-draining mix for pothos and connects poor drainage or excessive moisture with root rot.
A conservative beginner blend is two parts indoor potting mix to one part perlite or fine orchid bark. This ratio is a starting point, not a universal formula; the pass/fail test is whether water drains promptly while the mix retains some moisture.
The point is not a trendy recipe. The point is a mix that holds some moisture but still leaves air space.
If you want more detail on soil texture and drainage, see the best potting soil for indoor plants.
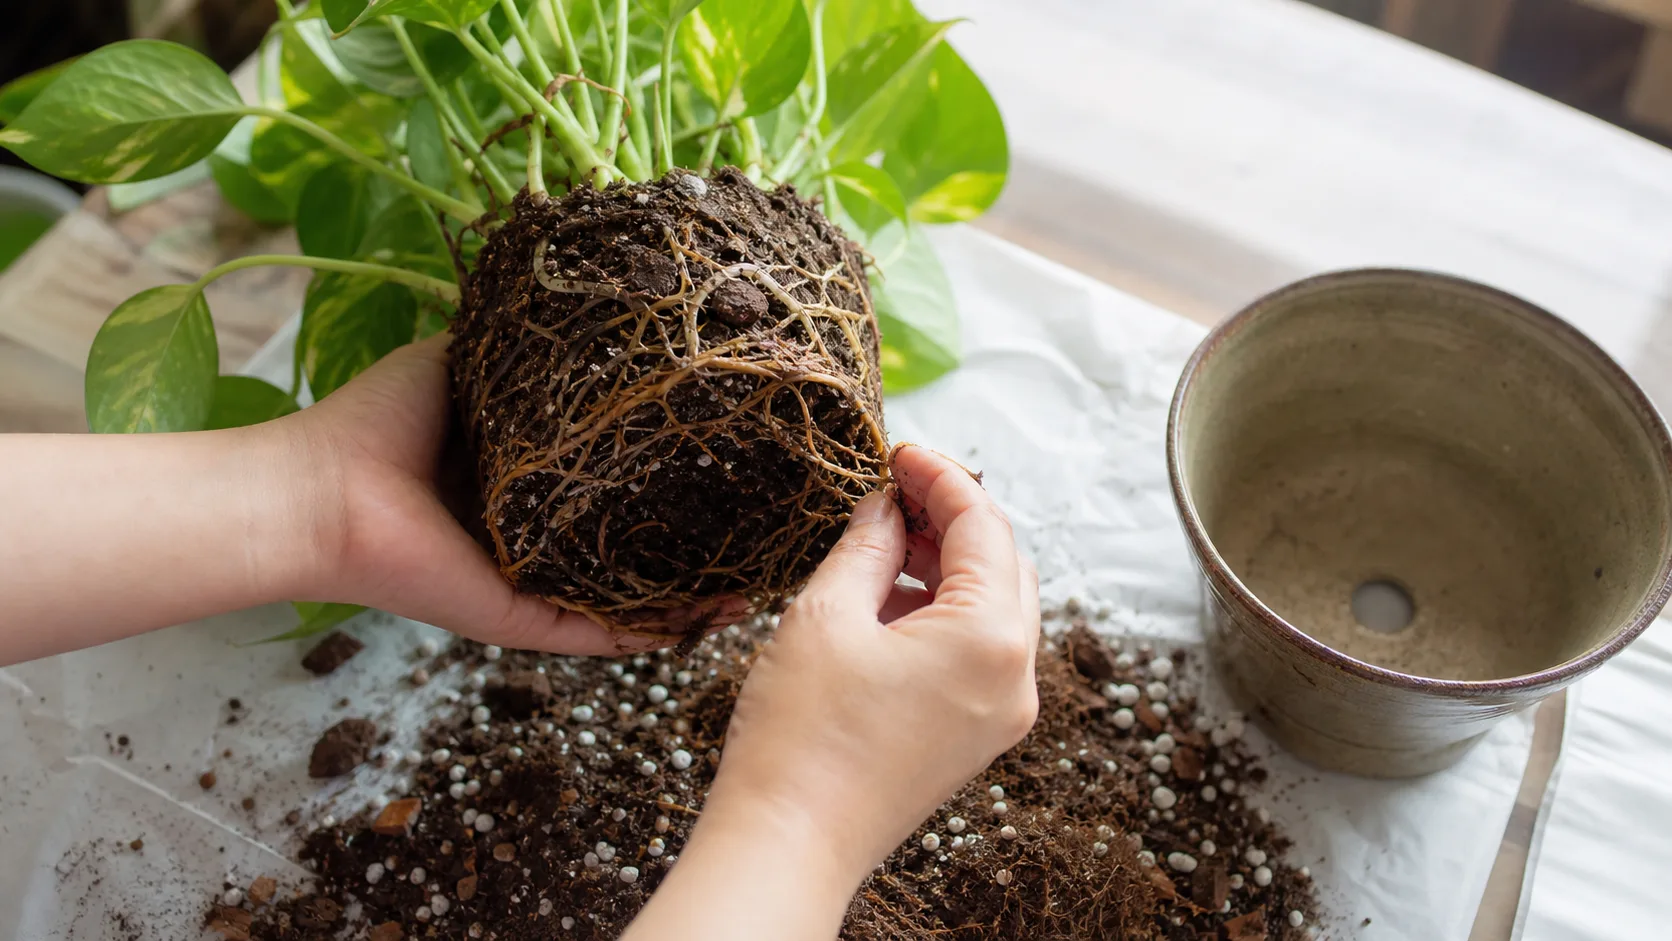
A practical pothos mix leaves air around the roots instead of turning the larger pot into a slow-drying wet mass.
3. Check whether it is root bound or simply a full cutting clump
Many nursery pothos are several cuttings planted together. That is why the top looks dense and full. A full canopy does not automatically mean a cramped root system.
When you slide out the root ball, look for:
- roots wrapping densely around the outside
- a thick pad of roots at the bottom
- very little loose mix left in the center
- separate rooted sections only if you actually want divisions
If the clump is healthy and your goal is one full trailing plant, keep it together.
If you want more plants instead of one fuller pot, use the pothos propagation guide rather than pulling the entire root ball apart during this repot.
4. Loosen only what needs loosening
If a few roots are circling at the bottom, gently free those sections. If the outside is lightly matted, tease it enough to help new roots move outward.
Root-disturbance warning: avoid turning a healthy root ball into a bare-root project. More handling is not better handling.
5. Replant at the same depth
Set the plant so the base sits at the same soil line as before. Fill around the root ball with fresh mix and press lightly to remove large voids. Do not bury stems deeper than they were, and do not compact the mix hard.
6. Water once, then switch to observation
Water enough to settle the new mix and let excess drain fully.
After that, ignore the old schedule. Check the top 1 to 2 inches with a finger or chopstick and lift the pot. Water only when that layer is dry and the container is noticeably lighter than it was after watering. Light, temperature, pot material, and root mass all change drying speed, so do not use a fixed number of days.
Overwatering warning: the first drink after repotting is useful; repeated “just in case” watering is what causes trouble.
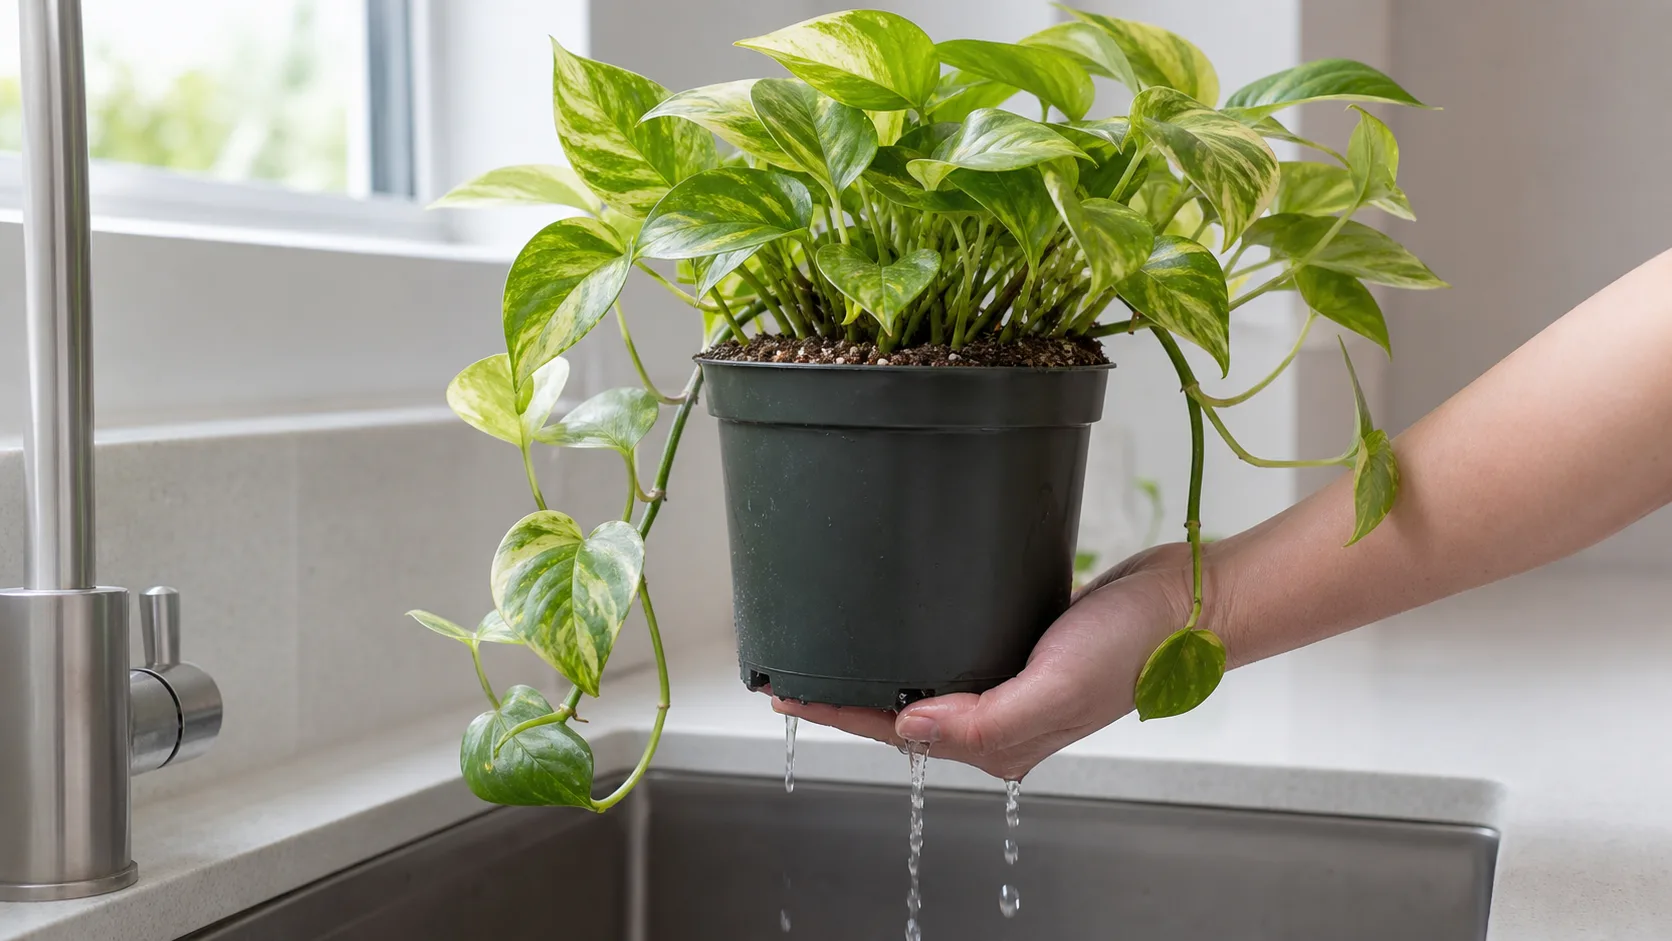
After the first thorough watering, let drainage, soil depth, and pot weight guide the next drink.
Log the repot date and first watering, then set the next check for the top 1 to 2 inches instead of following the old calendar.
Aftercare: normal adjustment or a real problem?
A mild droop that stabilizes within 48 hours can be normal. Spreading yellowing, soft stems, sour-smelling mix, or worsening collapse is not. If yellowing is the main symptom, the yellow pothos leaf diagnosis guide separates normal adjustment from wet roots, low light, and other causes. Penn State’s pothos guidance emphasizes avoiding excess moisture.
Symptom-to-action check
| What you see | Most likely issue to check first | Next action |
|---|---|---|
| Mild droop, soil evenly moist, no yellowing | Short adjustment | Keep conditions stable for 48 hours; do not add water automatically |
| Yellowing spreads while the pot stays heavy and wet | Excess moisture or oversized pot | Stop watering, empty the cachepot, and confirm drainage |
| Soft stem base or sour-smelling mix | Root or stem rot risk | Inspect roots and follow the root-rot guide; do not wait two weeks |
| Crisp curl or brown edges while soil dries very fast | Root disturbance, dry air, or insufficient moisture | Check soil depth and light before watering; avoid harsh sun |
| Droop worsens after 3 to 5 days | More than normal adjustment | Recheck pot size, moisture, drainage, and damaged roots |
When curling is the main symptom, use the pothos leaf-curl diagnosis to separate dry soil, wet root stress, heat, and pests before changing care again.
Today, this week, and the next two weeks
| When | Do this | Escalate only if |
|---|---|---|
| Today | Water once to settle the mix, drain fully, and return the plant to bright indirect light | Water cannot drain or the root base already smells sour |
| Days 2 to 7 | Check the top 1 to 2 inches and pot weight; do not water by the old calendar | Yellowing spreads, stems soften, or the pot stays saturated |
| Days 8 to 14 | Look for stabilization or fresh growth and keep conditions steady | Droop is worsening rather than stabilizing, especially with wet soil |
If roots are already mushy or the base smells off, use the root rot treatment guide instead of repeating generic repotting steps.
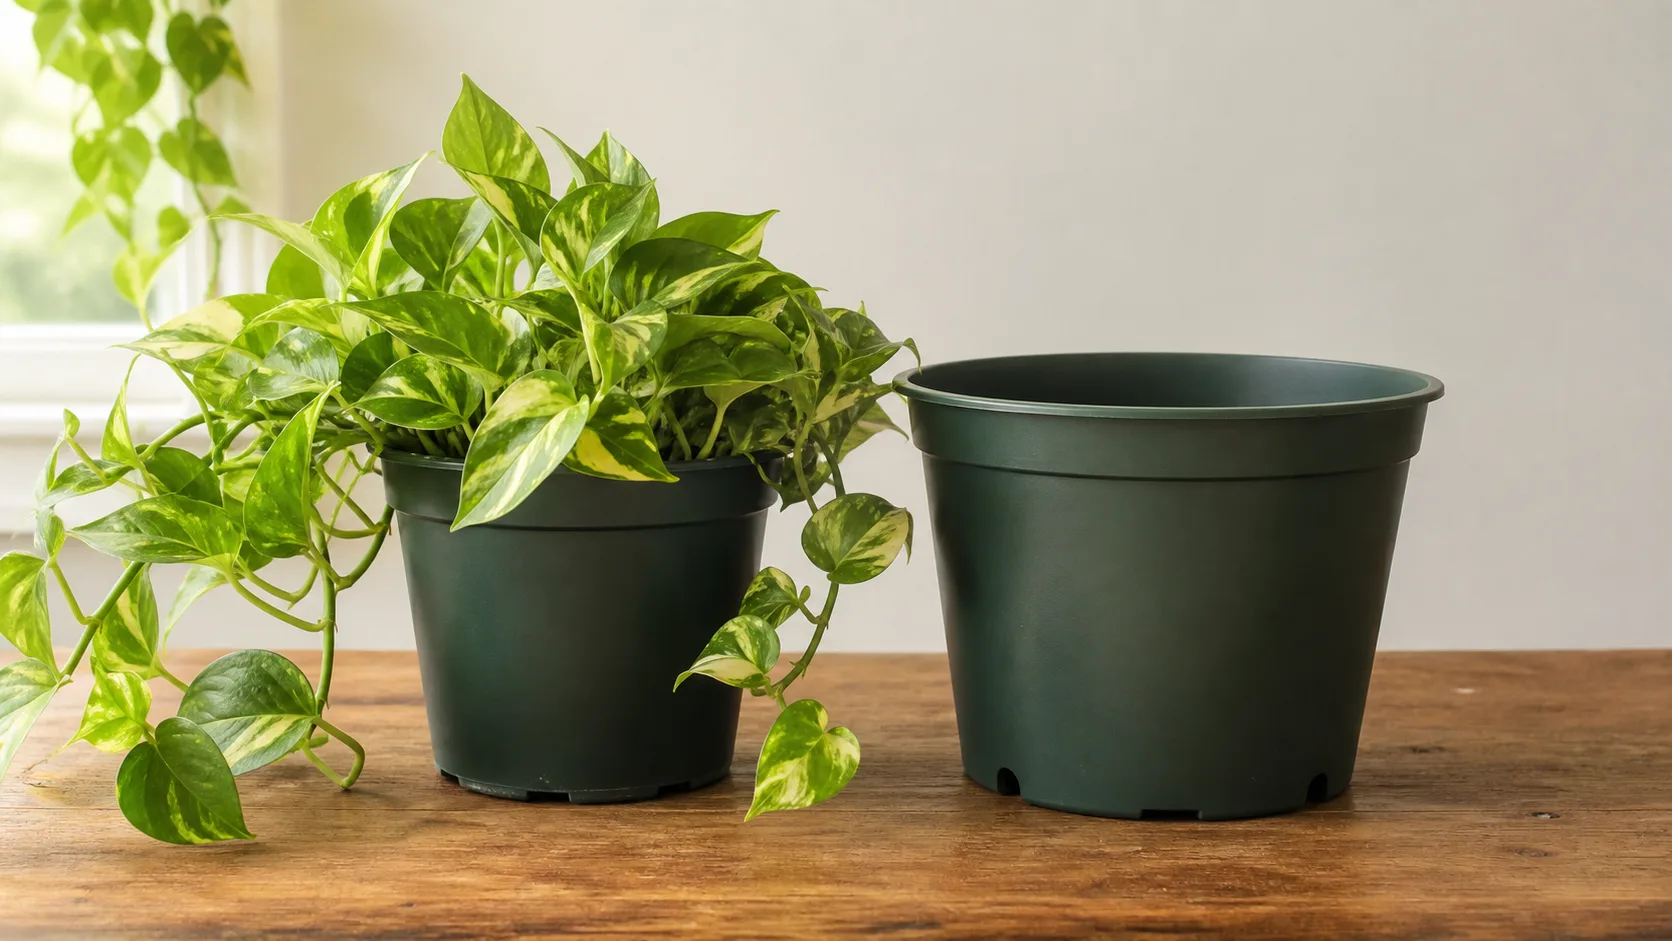
A small pot-size step and a consistent two-week check give the roots time to settle without stacking new stresses.
Four mistakes to avoid
- jumping two or more pot sizes
- pulling a healthy root ball completely apart
- burying stems deeper than their old soil line
- watering on the old schedule without checking the fresh mix
If leaves droop or yellow, compare the pattern with the wet-soil and root-rot warnings above, then track recovery for the next 14 days.
Sources and methodology
This article was reviewed on 2026-07-19 against Penn State Extension, UMN Extension, Illinois Extension, Clemson Cooperative Extension, and Wisconsin Horticulture. Community discussion identified common mistakes but was not treated as controlled evidence. Numeric household thresholds and the example mix ratio are conservative starting points, not universal rules.
How the household rules were derived
| Recommendation | Evidence base | Everyday adaptation in this guide |
|---|---|---|
| Repot for combined root, drying, wilt, or leaf-size clues | Penn State, UMN, and Illinois Extension | A packed root ball plus one real watering or growth change |
| Move up modestly and require drainage | Penn State, UMN, and Wisconsin Horticulture | About 1 to 2 inches wider; empty any cachepot |
| Use airy mix and avoid constant moisture | Clemson and Penn State Extension | Two parts potting mix to one part aeration as a beginner starting point |
| Judge recovery by direction, not one droopy leaf | Conservative editorial triage | Stable mild droop can wait 48 hours; softness, sour smell, or worsening collapse cannot |
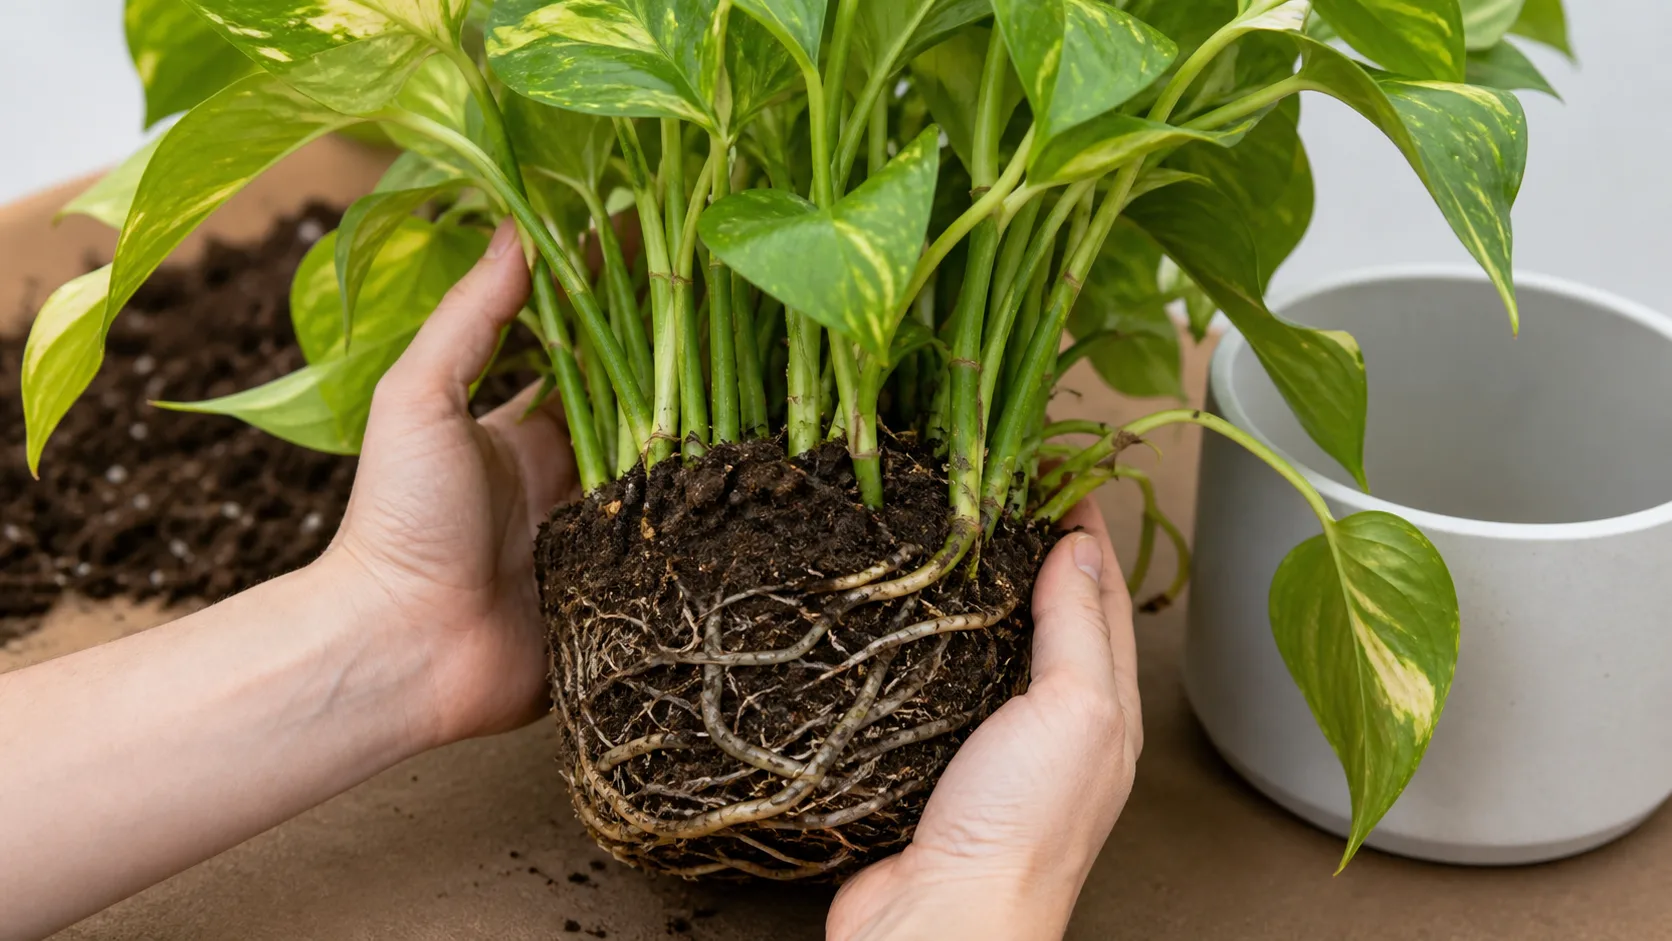
The method combines extension guidance with visible checks for root density, clump structure, drainage, soil texture, and moisture.
Last updated: 2026-07-19
Editorial review: KnowYourPlant editorial team. Unsupported claims and invented quotes were excluded.