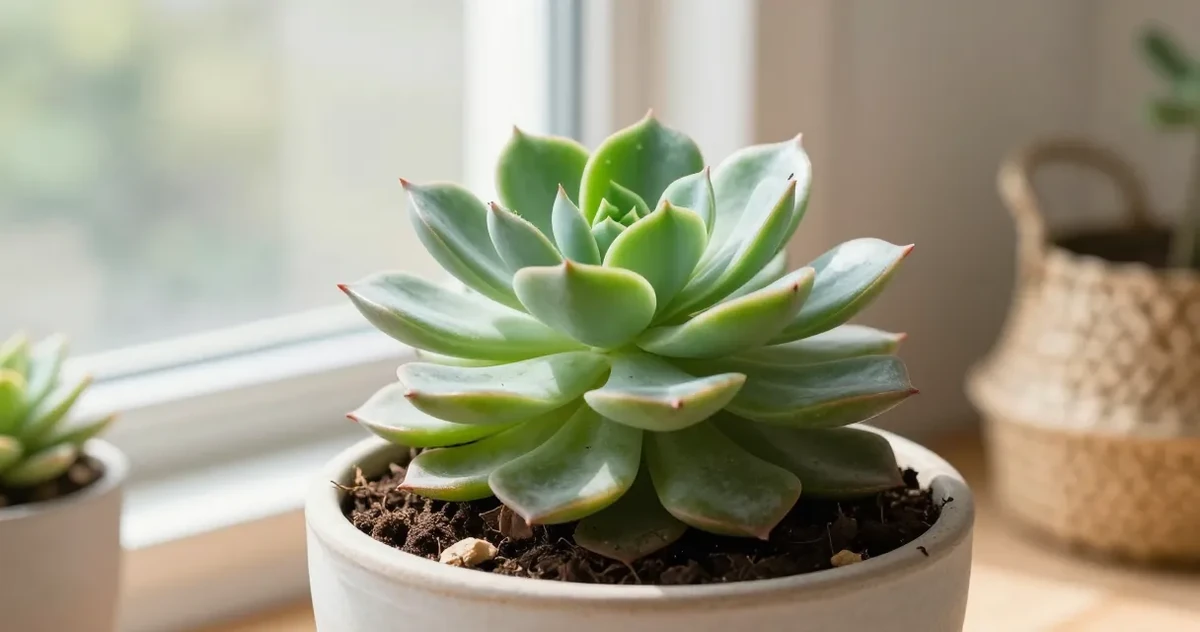
Most succulent problems are not about light or watering frequency. They are about soil that holds moisture just a little too long, and a container that does not let it escape.
Succulent soil is the one variable you can control from the start, so it is worth understanding what it needs to do and when a standard bag of cactus mix is enough versus when you need to go further.
Identification Snapshot: Soil Setup First
If you only remember four things from this guide, make them these:
- A drainage hole matters more than a perfect recipe.
- A good indoor succulent mix should dry through in about 5 to 7 days, not stay heavy for two weeks.
- Bagged cactus mix is a starting point, not an automatic finish line.
- Pet safety depends on the plant in the pot, not the soil label, so soil changes do not make a toxic succulent safer to chew.
Not sure what plant you are caring for?
Open KnowYourPlant, snap a photo, and get the plant name plus care notes matched to the species in front of you.
Identify your plantWhat Good Succulent Soil Actually Does
Here is a definition worth keeping: succulent soil does one job above everything else, and that is to get out of the way fast. A good mix dries completely between waterings, stays loose enough for roots to breathe, and never leaves a pocket of moisture sitting near the crown or at the base of the pot.
That is not just preference. Succulents store water in their leaves and stems precisely because their native soils are stingy with it. Give them a mix that holds moisture the way regular potting soil does, and the roots start sitting in conditions they are not built for. The result is usually soft, yellowing lower leaves, followed by slow rot that is hard to reverse.
According to Iowa State University Extension, succulents need sharp-draining soil that dries quickly, and typical potting soil holds too much water for them to thrive long-term. Their recommended ratio leans heavily mineral: roughly two-thirds mineral material to one-third organic. That is a notably sandier profile than most commercial bags labeled “succulent mix” actually deliver.
Want a care schedule you do not have to remember?
KnowYourPlant sends watering, feeding, repotting, and seasonal reminders based on the plants you actually own.
Get care remindersWhat Most Succulent Soil Guides Miss
You will find plenty of recipes online: two parts potting soil to one part perlite, or one part organic to two parts mineral. That is useful, but it is missing something important.
The same mix can behave very differently depending on your container.
A 4-inch terracotta pot with a drainage hole will dry out in three or four days in a bright spot. The same mix in a 6-inch glazed ceramic pot without a drainage hole might still feel damp after two weeks indoors. The recipe did not change, but the drying rate did. And it is the drying rate, not the recipe, that determines whether your succulent thrives or slowly declines.
This is the common misdiagnosis: owners assume the soil is wrong and buy new ingredients, when the real problem is the container. Generic soil guides stop at the recipe and leave you there.
The practical first check: before you buy anything, lift the pot five to seven days after watering. If it still feels heavy, the problem is either the container or the drainage situation, not the mix ratio.
The variables that matter alongside the mix:
- Pot material. Terracotta breathes and wicks moisture out through the walls. Plastic and glazed ceramic hold it.
- Pot size. A bigger pot contains more mix and takes longer to dry through completely, even if the top inch looks fine.
- Drainage holes. Non-negotiable for most setups. Without one, water has nowhere to go and will eventually saturate the lower half of the mix regardless of what is in it.
- Indoor light and airflow. Succulents indoors sit in lower light with less air movement than they would outside, which slows dry-down time considerably.
If you have been following recipes and still struggling, the answer is usually the container, not the soil.
University of Minnesota Extension recommends growing cacti and succulents in pots with drainage holes and allowing them to dry out completely between waterings, and notes that even a good mix needs the right container to do its job. A beautiful pot without a drainage hole cancels out the mix.
Save this plant plan before you forget the details.
Keep the plant, diagnosis notes, reminders, and care changes in KnowYourPlant so the next decision is based on your actual plant history.
Open KnowYourPlantBagged Cactus Mix: When It Works and When It Does Not
A commercial cactus or succulent mix is a reasonable starting point. Most drain faster than standard potting soil, and for a small plant in a terracotta pot with a drainage hole in a bright window, they often work well enough straight out of the bag.
But many bagged mixes are heavier and more organic than the name suggests. Once moistened, they can compact down and hold water longer than expected, especially in plastic nursery pots or anything without drainage. If your succulents are sitting in shade or near an air conditioning vent, bagged cactus mix alone may not drain sharply enough.
A simple test before you buy anything new: After watering, lift the pot. Feel how heavy it is. Come back in five or six days and lift it again. If it still feels dense and slightly cool to the touch, your mix is not drying fast enough for where the plant is sitting.
That pot-weight test is your single most reliable diagnostic. It tells you more than pressing your finger into the top inch of soil, because the bottom half of the pot, where roots actually sit, is the last place to dry.
Lookalikes and Confused-With Cases
A lot of indoor soil frustration comes from mixes or setups that sound succulent-friendly but behave very differently in practice.
| Setup people lump together | What it really behaves like | What usually happens indoors |
|---|---|---|
| Bagged cactus mix | A workable base mix that may still be fairly organic | Often fine in terracotta, often too wet in plastic or glazed ceramic |
| Regular potting soil with no mineral amendment | Moisture-retentive houseplant soil | Roots stay wet too long for most succulents |
| Decorative gravel at the bottom | A false drainage fix, not a soil amendment | Creates a wetter lower root zone instead of solving drainage |
| Terrarium or glass-bowl succulent setup | A low-airflow, no-drainage system | Soil stays damp, algae shows up, roots decline slowly |
| Pure mineral grit with very little organic material | Fast-draining specialty mix | Can work, but indoors it may dry so fast that small-rooted plants struggle without closer monitoring |
Ingredient Comparison: What Each Amendment Actually Does
Adding mineral material to a mix is not guesswork. Each ingredient behaves differently, and the choice matters more indoors where drying happens slowly.
| Amendment | What it changes | Indoor use note |
|---|---|---|
| Perlite | Adds air pockets, resists compaction | Widely available; can float to top when watered heavily |
| Pumice | Denser than perlite, long-lasting structure | Does not break down over time; harder to find in some areas |
| Coarse sand | Improves drainage if truly coarse | Must be horticultural or builder’s sand; fine sand makes compaction worse |
| Lava rock (crushed) | Sharp drainage, long-term air space | Good perlite substitute; less common in garden centers |
| Fine gravel (bottom layer) | Adds weight at the base | Does NOT improve drainage; creates a moisture reservoir. Skip it. |
| Standard potting soil | Adds organic matter and nutrients | Use sparingly; holds water; 30 to 40 percent max for indoor succulents |
Penn State Extension recommends a homemade mix built from potting soil, sand, and perlite or lava rock, prioritizing drainage and aeration over nutrient-dense organic content, which is the opposite of how most general-purpose potting mixes are balanced.
A 50/50 mix of perlite and standard potting soil or cactus mix is a reliable indoor starting point for most succulents. If your setup leans toward lower light or ceramic containers, push the mineral content higher, closer to 60 to 70 percent.
Care Cards for Common Indoor Succulent Setups
Small terracotta pot with a drainage hole
- Best for: beginners, high-light windows, rosette succulents that hate staying wet
- Soil direction: bagged cactus mix often works, but extra pumice or perlite still helps indoors
- Watch for: mix shrinking from the pot walls in peak summer, which means watering cadence may need adjusting
Plastic nursery pot with a drainage hole
- Best for: growers who want an easy cachepot setup
- Soil direction: lean more mineral than you would in terracotta because plastic holds moisture longer
- Watch for: a pot that still feels heavy after a week, even when the surface looks dry
Glazed ceramic pot with a drainage hole
- Best for: stable, display-friendly setups where you are willing to water more cautiously
- Soil direction: use a sharper, grittier mix because the pot itself will not wick much moisture away
- Watch for: overpotting, since extra volume stays wet much longer in ceramic
Decorative outer pot or cachepot
- Best for: people who want the look of a sealed planter without planting directly into one
- Soil direction: keep the succulent in a draining inner pot and empty any trapped runoff after watering
- Watch for: hidden water pooling in the outer container after each soak
The Gravel-at-the-Bottom Myth
One of the most persistent pieces of succulent advice is to add a layer of gravel, rocks, or stones at the bottom of the pot before adding soil. The idea is that it improves drainage by giving water somewhere to go.
It does not. Gravel at the base creates a perched water table, a zone where moisture pools before it reaches the drainage hole, because water does not move from a fine medium into a coarse one until the fine material is fully saturated. In practice, gravel layers keep the bottom of the mix wetter than it would be without them.
Iowa State University Extension makes this explicit: a gravel layer is not a substitute for a drainage hole, and it can actually make root-zone conditions worse by concentrating moisture at the level where roots are most vulnerable.
Skip the gravel layer. Use the same mix throughout the pot, and make sure there is a real drainage hole.
The Container Is Part of the System
The best succulent soil in the world is still fighting uphill without a drainage hole. For most home setups, that hole matters more than any ingredient adjustment.
If you love a decorative pot without drainage, and many beautiful ones do not have it, use it as a cachepot: drop the succulent in a plain nursery pot inside the decorative outer one, and lift it out to water. You get the look you want without trapping moisture around the roots.
Glass bowls and closed terrariums are a harder case. Without drainage and with reduced airflow, succulents in these setups are working against their own biology. The same failure pattern keeps appearing: the soil stays damp even when it looks dry at the surface, and the roots slowly decline before the owner notices. Surface algae or moss growth is one early sign. It usually means the medium is staying too damp, not that a new ingredient is needed.
If you are seeing soft leaves, yellowing near the base, or a faint musty smell from the soil surface in one of these setups, the fix is almost always the container, not the soil recipe.
For a deeper look at how pot material changes how fast your mix dries, the terracotta pots guide explains exactly why pot choice makes such a difference for fast-draining plants.
Soil-Choice Decision Path
Before buying new ingredients, run through this sequence:
Step 1 – Does your pot have a drainage hole? No: Change the container or set up a cachepot before touching the mix.
Step 2 – Is your pot the right size for the plant? A 6-inch pot for a 2-inch succulent holds far more moisture than the plant can use. Size down, or repot into something proportional.
Step 3 – Run the pot-weight test. Water fully, then lift the pot. Return in 5 to 7 days. Still feels heavy? The mix needs more mineral content or the pot needs more light.
Step 4 – What mix are you using? Straight potting soil: Replace with cactus mix or add 50 percent perlite. Bagged cactus mix, compact or compacted: Add 30 to 40 percent perlite or pumice. Already mineral-heavy mix, still stays wet: The problem is the container, not the mix.
Step 5 – Check for surface signals. Green film, moss, or algae on the soil surface usually means the medium is staying damp consistently, often in a container without drainage or in low light. That is a container problem, not an ingredient problem.
Common Problems and What They Usually Mean
| Problem | Usual cause | First fix to try |
|---|---|---|
| Soil surface looks dry, but the pot stays heavy | Wet root zone hiding below the top inch | Add mineral grit or move to a smaller pot with a drainage hole |
| Green film, moss, or algae | Mix is staying damp too consistently | Change the container setup before changing the recipe |
| Lower leaves turn soft and yellow | Root zone is holding moisture too long | Stop watering on schedule and re-check dry-down time |
| Mix compacts into a dense cake after a few waterings | Too much fine organic material or fine sand | Rebuild with coarser mineral material |
| Leaves wrinkle even though the mix dries fast | Mix may be too lean or the pot too hot and small | Add a little more organic material or adjust watering cadence |
Dry-Down Scorecard: Is Your Mix Working?
Use this to evaluate your current setup before you buy anything new.
| What you observe | What it means | What to adjust |
|---|---|---|
| Surface looks dry in 1 to 2 days, pot still heavy | Top dries fast, root zone stays wet | More mineral content or smaller pot |
| Pot still heavy after 7 days | Mix draining too slowly for indoor conditions | Add perlite, or check for drainage hole |
| Lower leaves yellowing and softening | Root zone too wet too long | Drainage-first fix: hole, then mix |
| Surface algae or green film | Soil staying consistently damp | Container problem: add drainage or use cachepot |
| Leaves wrinkling, pot light in 3 days | Mix drying too fast | Slightly more organic content, or water more often |
| Pot light after 5 to 7 days | Good dry-down rate | Maintain current setup |
A mix drying fully in 5 to 7 days indoors is the target for most setups. Faster is fine if the plant looks healthy. Slower than 7 to 10 days consistently is a warning sign worth addressing.
Plant ID + Plant Doctor
Not sure what your plant needs?
Snap a photo in KnowYourPlant to identify the plant, check yellow leaves, spots, wilting, or pests, and get a calm next step before the problem spreads.
Seasonal Soil and Watering Adjustments
Your soil does not change with the seasons, but how fast it dries does. That matters for how you water, and whether a mix that works in summer needs adjusting by winter.
Spring (March to May): Light is returning and plants are resuming active growth. Dry-down times shorten as days lengthen. If you were cautious with watering through winter, this is a good time to check that your mix has not compacted. A poke with a chopstick or skewer into the root zone reveals whether the mix still stays loose or has settled into a dense cake.
Summer (June to August): Peak light and warmth mean the fastest dry-down of the year. A mix that barely kept pace in spring will dry reliably now. Watch for pots drying out so quickly that the mix pulls away from the pot edges: that means watering frequency, not mix composition, needs adjusting.
Autumn (September to November): As light drops and temperatures cool, dry-down slows noticeably indoors. The same mix that dried in five days in July may take nine or ten by October. Stretch watering intervals rather than changing the mix. This is also a good time to check that plants are not sitting on wet saucers left over from summer.
Winter (December to February): The hardest season for succulent soil indoors. Heating systems dry the air, but low light and cool windowsills slow root uptake dramatically. Many owners overwater in winter because the leaves look fine while the root zone is still saturated. Rely on the pot-weight test rather than a calendar schedule. Do not amend the mix in winter: wait until spring when you can assess the plant actively growing.
What Your Soil Should Look Like After Watering
After a thorough watering, enough that water runs through and out the drainage hole, the mix should feel uniformly damp but not heavy. Within a day or two in a bright spot, the surface should start to lighten and feel dry to the touch. Within five to seven days in a typical indoor setup, the whole mix down to the roots should be dry.
If you press a finger an inch or two into the soil after a week and it comes out with damp particles clinging to it, that is too long. Either the mix needs more mineral content, the pot is too large, or the plant needs more light.
Start with the simplest variable first: the pot and its drainage. Then look at the mix. Usually one change is enough to bring the drying time in line with what succulents actually need.
For more on recognizing the early signs of overwatering before they become root damage, the guide to overwatered plant signs and fixes covers the soil-related signals that apply directly to succulents.
Common Succulent Soil Mistakes
Using fine sand. It sounds right, but fine-grained playground sand fills in between soil particles and creates a denser, slower-draining mix. Use coarse horticultural or builder’s sand, or skip sand entirely and use perlite.
Watering before checking the root zone. The top inch can look and feel dry while the bottom half of the pot is still damp. The pot-weight test is more reliable than surface feel, especially for containers without drainage holes or in lower-light spots.
Repotting into too large a pot. More soil means more water held, and more time for that water to sit around roots that are not expanding fast enough to use it. When you repot, go up one size, not two.
Skipping the drainage hole. This is the one. A well-composed mix in a sealed pot will still fail eventually, because water has nowhere to exit and will accumulate at the bottom regardless of how carefully you water.
If your succulent’s leaves are already dropping or looking translucent, it is worth reading about succulent leaves falling off alongside this guide. The two problems are often linked to the same root-zone moisture issue.
For a broader look at succulent care that puts soil in context with light, watering, and seasonal needs, the succulent care guide covers the full picture.
Pet Safety Note
Succulent soil choice solves drainage, not chew risk. If the plant itself is not pet-safe, a premium cactus mix does not change that. Treat species identification and pot placement as separate decisions, and keep loose amendments, runoff water, and spilled top dressing out of reach of curious pets.
Real User FAQ
What is the best soil mix for indoor succulents? A mix that drains fast and dries completely between waterings. A 50/50 blend of perlite and potting soil or commercial cactus mix works well for most indoor setups. If your plant is in lower light or a ceramic pot, lean toward 60 to 70 percent mineral content. Iowa State University Extension recommends roughly two-thirds mineral to one-third organic as a baseline for homemade mixes.
Is cactus mix good enough for succulents? Often, yes, but not always straight out of the bag. Many bagged cactus mixes are more organic than they appear and can compact down after watering, especially in plastic pots or lower-light indoor conditions. Test by lifting the pot five to seven days after watering. If it still feels heavy, the mix needs more perlite or pumice added in.
Do succulents need special soil or can I use regular potting soil? Regular potting soil holds too much water for succulents. It is formulated to retain moisture, which is exactly what succulents do not need. You can use regular potting soil as a base ingredient, but it needs to be cut with at least 50 percent perlite, pumice, or coarse sand to drain fast enough for container use indoors.
Does adding gravel to the bottom of the pot help drainage? No. A gravel layer at the base creates a perched water table: moisture pools in the fine soil above before it can move into the coarse gravel below, keeping the root zone wetter than it would be with a uniform mix. The fix is a drainage hole in the pot, not gravel at the bottom.
How do I know if my succulent soil is draining fast enough? Water thoroughly, then lift the pot and note the weight. Return in five to seven days and lift again. If it still feels noticeably heavy or cool to the touch, the mix is retaining moisture longer than succulents prefer. A well-draining indoor mix should feel light and completely dry within that window in a bright spot.
Can I use sand in my succulent mix? Only if it is coarse. Fine-grained sand, the kind used in sandboxes or at the beach, fills in between soil particles and makes the mix more compact and slower-draining, not less. Use horticultural or builder’s sand with a coarse grit, or substitute perlite, which is more consistent and widely available.
What is the best pot for succulent soil to work properly? Terracotta with a drainage hole is the most forgiving combination for indoor succulents. It breathes through the walls, which accelerates dry-down, and the drainage hole eliminates moisture pooling at the base. Glazed ceramic and plastic also work but require closer attention to watering because they hold moisture longer. Any decorative pot without a drainage hole should be used as a cachepot, not a direct planting vessel.
How often should I change succulent soil? Most mixes stay functional for two to three years before they start compacting significantly and losing their drainage structure. If you notice the soil surface pulling away from the pot edges, the mix taking longer to dry than it used to, or the plant showing signs of root stress despite normal care, it is worth refreshing the mix at the next repotting. Pumice and lava rock break down more slowly than perlite, so mixes heavy in those ingredients tend to stay open longer.
Download KnowYourPlant for personalized plant care reminders, including watering cues tailored to your specific succulents and your home’s conditions: https://knowyourplant.app
Research methodology: Soil guidance validated against University of Minnesota Extension, Iowa State University Extension, and Penn State Extension. Pot-drainage and mix-behavior context informed by practitioner discussion in Gardening Stack Exchange threads reviewed June 2026. Social evidence is qualitative signal only, not statistical proof.