By KnowYourPlant editorial team, last updated June 16, 2026.
Rubber plant care gets much easier once you know the few checks that matter: bright indirect light, a pot with drainage, and watering only after the top inch or two of soil dries out. In many homes, that means watering about every 7-10 days in spring and summer, then closer to every two or three weeks in winter.
If you are worried about overdoing it, watch for lower leaves turning yellow, leaves drooping while the soil is still damp, or soil that stays wet for more than a week or two. If leaves curl inward or the tips turn crispy brown, check whether the plant has gone too dry, is sitting in harsh sun, or is near a heater or draft.
A rubber plant is essentially a tree that agreed to live inside. Give it stable conditions, do not overwater it, and it will reward you with dramatic, deep-green leaves and steady upward growth that makes a room feel different. In good conditions, it can put on up to two feet of new growth in a single season. For the long-form tree routine, including shaping and propagation, continue with the rubber tree plant care guide.
Identification Snapshot
Before you change the whole routine, confirm you are looking at a true rubber plant and not a different plant sold under a similar name.
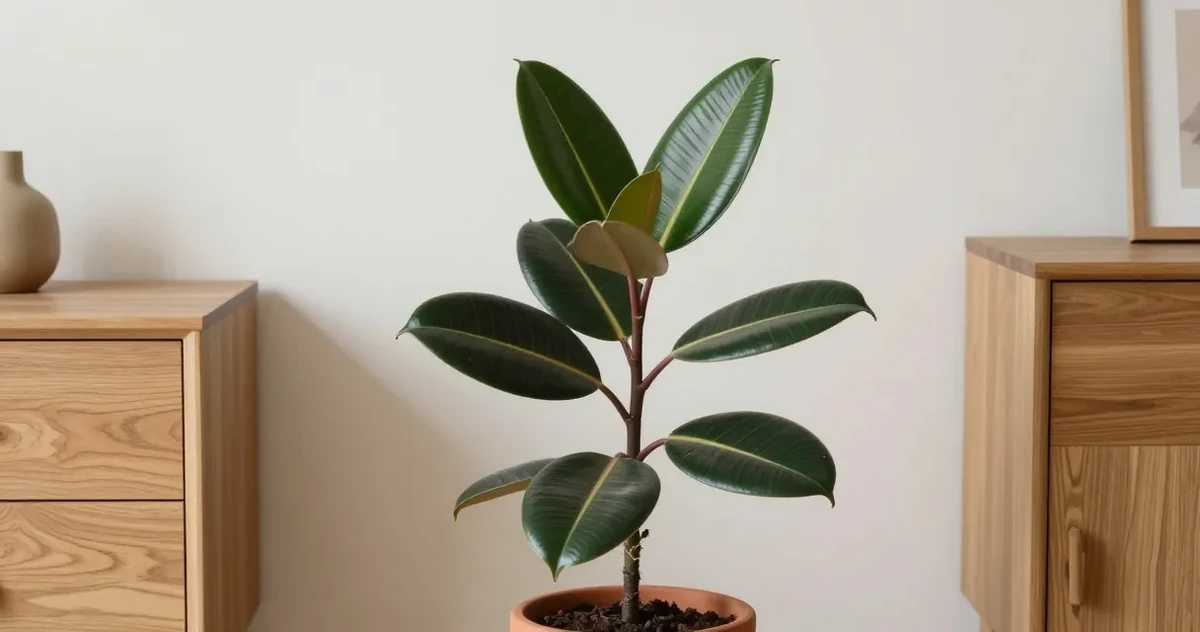
- True rubber plant: Ficus elastica has thick, glossy leaves, a woody stem, and milky sap when cut or damaged.
- Fastest first check: look at which leaves changed first. One oldest lower leaf yellowing can be normal turnover, while several leaves yellowing at once usually points to a care issue.
- Most useful at-home signals: root-zone moisture, pot weight, light level, and any recent change in placement, pot size, or temperature.
- If pets live with you: confirm the species before you relax, because true rubber plant and baby rubber plant are not the same toxicity situation.

Thick, glossy leaves and woody stems make true Ficus elastica recognizable before you interpret leaf changes or adjust its care.
What Most Care Guides Miss
Most guides about rubber plant describe the ideal care routine. Real homes are messier: light changes by season, pots dry at different speeds, and the same symptom can mean different things depending on where it appears.
Before changing care, check the plant in this order:
- Light: is the plant growing toward the window, fading, or scorching?
- Root zone: is the pot drying predictably, or staying wet in the middle?
- Leaf pattern: did the oldest leaves, newest leaves, tips, or stems change first?
- Recent change: new pot, new location, fertilizer, cold draft, heat vent, or pest exposure.
This keeps you from fixing the wrong problem. One clear adjustment is usually safer than a full care reset.

Use this first-check order before changing care: confirm the plant, read the light, check the root zone, then name the most recent change.
What Rubber Plant Owners Keep Misreading
Plant-owner threads keep repeating the same mistakes, and they are useful because they show where generic care guides leave too much room for guessing.
- One or two yellow lower leaves can be normal. Owners often panic and overhaul watering before checking whether it is simply the oldest leaf aging out.
- Stalled growth is often blamed on the pot size too early. In practice, low light, dense soggy mix, or weak drainage usually deserve a closer look before you repot.
- Leaf drop is rarely one-cause-only. Real cases often mix root-zone moisture issues with drafts, heater vents, sudden moves, or winter slowdown; the rubber plant dropping leaves guide walks through that symptom in diagnostic order.
- The name “rubber plant” causes pet-safety confusion. People regularly mix up Ficus elastica with baby rubber plant, which changes the toxicity advice.
Treat those patterns as practical owner signal, not scientific proof, then use extension guidance to narrow the diagnosis.
Quick Fit Check Before You Buy
A rubber plant is a good fit if:
- You have a bright room or a spot a few feet from a sunny window.
- You can check the soil once a week instead of watering on autopilot.
- You want a plant that grows upright and can eventually become a small indoor tree.
- You can keep it away from pets or children who chew on leaves.
Choose a different plant if your only spot is a dark corner, your pot has no drainage, or you know you will water whenever you remember rather than when the soil is ready. Rubber plants are forgiving, but they do not forgive soggy roots for long.
Lookalikes and Pet-Safety Confusion
| Plant | What it looks like | Growth habit | Pet-safety note |
|---|---|---|---|
| True rubber plant (Ficus elastica) | Thick glossy leaves, strong central stem, milky sap if damaged | Upright indoor tree that can become large | Sap is irritating and should be treated as a pet-risk plant |
| Baby rubber plant (Peperomia obtusifolia) | Smaller fleshy leaves, softer stems, compact habit | Small tabletop plant, not a tree | Commonly treated as non-toxic, which is why the name mix-up matters |
If a guide says “rubber plant” without the botanical name, confirm which plant it means before you follow care or toxicity advice.
Light: Where It Feels at Home
The rubber plant wants bright, indirect light, the kind of spot where you’d happily read for a few hours without squinting. A few feet back from a south- or east-facing window is usually ideal.
It can handle some direct morning sun without complaint, but harsh afternoon rays will scorch those beautiful leaves and leave pale, bleached patches that don’t recover. If your windows face west and you’re getting hot afternoon light, a sheer curtain makes a real difference.
On the other end of the spectrum, low light won’t kill it quickly, but you’ll notice the difference. Growth slows, new leaves come in smaller, and variegated varieties like ‘Tineke’ or ‘Ruby’ lose their color contrast almost entirely. If your rubber plant is in a dim corner and looking a bit sorry for itself, moving it closer to a window often fixes more than you’d expect. For rooms with genuinely limited natural light, a dedicated grow light can supplement well, and rubber plants respond to it reliably.
Watering: The Biggest Thing to Get Right
Most rubber plants that struggle are struggling because of water, usually too much of it. According to the University of Florida IFAS Extension, overwatering is the single most common cause of houseplant failure, and the rubber plant is a textbook example of a species that punishes soggy soil.
Check the soil before you reach for the watering can. Press your finger into the potting mix about an inch or two down. If it still feels damp, wait. If it’s dry, water thoroughly until it drains out the bottom of the pot, then leave it alone again.
Darryl Cheng, author of The New Plant Parent, puts it simply: water to support the growth rate the plant is already showing, not to push it toward more. For a rubber plant, that translates directly: water when the soil is ready, not when the calendar says so.

A finger test an inch or two into the mix makes watering follow soil moisture instead of the calendar.
For most homes, use this routine:
- Check the soil every 7 days in spring and summer.
- Check every 10-14 days in autumn and winter.
- Water only when the top inch or two is dry and the pot feels lighter.
- Pour slowly until water runs from the drainage holes.
- Empty the saucer or decorative outer pot after 10 minutes.
One thing to watch: rubber plants are particularly sensitive to cold water. Room-temperature water keeps the roots happier, and if you’re in an area with heavily chlorinated tap water, letting it sit out overnight before watering can make a small but real difference.
Signs You’re Watering Too Much
- Yellowing leaves, especially lower ones
- Leaves that look dull and droopy even after watering
- Soil that stays wet for weeks without drying out
Signs You’re Watering Too Little
- Leaves that curl slightly inward
- Dry, crispy edges on older leaves
- Soil pulling away from the edges of the pot
If you think you overwatered, do this today: stop watering, move the plant into bright indirect light, empty any standing water from the saucer or cachepot, and wait for the soil to dry before watering again. If the soil smells sour or the base of the stem feels soft, unpot the plant and check for black, mushy roots.
Expert Note: Why the Root Zone Comes First
Clemson Extension, NC State Extension, and Missouri Botanical Garden all line up on the same core routine: bright indirect light, a well-drained mix, and thorough watering followed by a slight dry-down before the next drink. That is why the root zone deserves your first check when a rubber plant looks unhappy. Pet Poison Helpline adds the other practical point: the sap is irritating, so broken leaves matter in pet households even when the plant problem itself is minor.
Watering Decision Tree
- Only one oldest lower leaf is yellow and the rest of the plant is firm: likely normal aging. Remove the leaf if you want, then keep conditions steady.
- Several leaves are yellow and the soil is still damp two inches down: wait before watering again, empty any standing water, and check whether the mix is compacted or the pot is oversized.
- Leaves droop or curl and the pot feels unusually light: water thoroughly, let the excess drain, and resume checking by soil feel instead of by schedule.
- Leaf drop started right after a move, draft, or heater kicked on: stabilize temperature and light before you change multiple variables at once.
- The pot stays wet for more than 7 to 10 days: inspect the cachepot, drainage holes, and soil texture before assuming the plant is “just thirsty.”

The root-zone gates keep watering decisions tied to soil depth, pot weight, drainage, and smell instead of a fixed calendar.
Humidity and Temperature
The rubber plant comes from the warm, humid forests of South and Southeast Asia, from the foothills of the Himalayas through Malaysia and Indonesia, so it appreciates a comfortable indoor environment, not unlike what you’d want for yourself. Somewhere between 60-80°F (15-27°C) is where it thrives.
It doesn’t demand high humidity the way some tropical plants do, nothing like the fussiness of a calathea, but it doesn’t love dry, forced-air heating either. If you notice the leaf tips browning in winter, a small humidifier nearby or a tray of pebbles and water under the pot can help. Keep it away from cold drafts, air conditioning vents, and radiators. Temperature fluctuations stress it out and are one of the more common causes of sudden leaf drop.
Soil and Potting
A well-draining potting mix is essential. Standard houseplant potting mix works, but adding a handful of perlite helps prevent the compaction that leads to waterlogging. Rubber plants don’t want their roots sitting in moisture for any length of time.
Make sure whatever pot you use has drainage holes. The NC State Extension is clear on this point: in container growing, drainage holes are non-negotiable. Without them, even careful watering habits become overwatering by default, because there’s nowhere for excess moisture to go. A decorative outer pot (cachepot) is fine as long as you’re emptying out any water that collects in it after you water.
Fertilizing
During the growing season (spring through summer), a balanced liquid fertilizer once a month gives it the nutrients to keep pushing out new leaves. Dilute it to half the recommended strength, as rubber plants don’t need heavy feeding, and salt buildup from over-fertilizing can damage roots over time. If you want a simple product and timing breakdown, our plant fertilizer guide covers the basics without overcomplicating the routine. The University of Missouri Extension notes that excess fertilizer salt accumulation is a common and underappreciated source of stress in container plants.
Stop fertilizing in autumn and skip it entirely through winter. The plant is resting, and feeding it during that period does more harm than good.

Measure and dilute a balanced liquid fertilizer before feeding a rubber plant during active spring and summer growth.
Care Cards: What to Change First
| Symptom pattern | First check | Most likely issue | Calmest next move |
|---|---|---|---|
| One yellow lower leaf, rest of plant healthy | Leaf position and age | Normal old-leaf turnover | Keep care steady and monitor the next week |
| Multiple yellow leaves plus damp soil | Root-zone moisture and drainage speed | Overwatering or overly dense mix | Delay watering, improve drainage, inspect roots if the smell turns sour |
| Curling leaves and very light pot | Soil depth and pot weight | Underwatering or an unevenly dry root ball | Water fully, then let the mix dry slightly before the next check |
| Brown edges near a vent or hot window | Placement and airflow | Draft or heat stress | Move the plant to stable bright indirect light |
| No growth for months | Light level, pot size, and season | Low light or winter slowdown, not always a repotting problem | Increase light first, then repot only if roots truly filled the pot |

Use the care cards to make one calm next move from the first visible pattern instead of changing water, light, soil, and pot size at once.
Seasonal Care Calendar
Rubber plant care isn’t the same in January as it is in June. The plant’s needs shift with the seasons, and once you tune into that rhythm, you’ll stop second-guessing yourself.
Spring (March-May): The Growing Push
This is when you’ll notice the first signs of life: a tight new bud at the growing tip, maybe a blush of red before it unfurls dark green. Start monthly fertilizing as soon as you see that first new growth, not before. There’s no benefit to feeding a plant that isn’t actively using nutrients yet.
Spring is your best window for repotting if the plant needs it, and for taking stem cuttings if you want to propagate. Watering frequency will creep up as temperatures rise and the plant starts drinking more actively. What was once every two weeks in winter may shift toward once a week by late spring. Check the soil rather than watching the calendar.
Summer (June-August): Peak Season
This is when the rubber plant earns its keep. In good conditions, you can almost watch it grow, with new leaves unfurling every few weeks. Keep up with monthly fertilizing, maintain consistent watering, and wipe down the leaves occasionally to keep them working efficiently.
Watch for spider mites in hot, dry periods. They love the conditions that rubber plants find challenging. Check the undersides of leaves if you notice any fine webbing or stippling on the surface.
Autumn (September-November): Winding Down
Growth tapers off as days shorten and temperatures fall. Stop fertilizing by the end of October. Stretch out the intervals between waterings as soil takes longer to dry.
Avoid moving the plant in autumn if you can. Stability matters more as it heads toward its rest period, and a sudden change in position or light level can trigger leaf drop at exactly the wrong time.
Winter (December-February): Rest
The rubber plant doesn’t go dormant, it just slows significantly. Water infrequently (once every two to three weeks is common, depending on your home’s temperature and light), skip fertilizing entirely, and keep it well away from cold drafts and radiators. Both extremes stress the plant in different ways.
Some leaf drop in early winter is normal, especially if the heating came on suddenly or the plant experienced a temperature shift. As long as new growth resumes in spring, that’s routine adjustment, not a crisis.
Pruning and Shaping
One of the more appealing things about the rubber plant is how easy it is to shape. If yours is getting leggy or you want it to branch rather than grow straight up, pruning is straightforward: cut just above a leaf node, and the plant will usually send out new growth below the cut.
A word of warning: the white, milky sap that bleeds from any cut is a latex, and it can irritate skin and is toxic if ingested. Wear gloves when you prune, and keep pets and small children away from the trimmings. Wipe the cut with a damp cloth to stop the sap from dripping, and it will seal on its own within a few minutes.
Darryl Cheng, author of The New Plant Parent and creator of House Plant Journal, puts it well: the goal with pruning isn’t to force a plant into a shape, it’s to work with the direction it already wants to grow. For a rubber plant, that usually means making one deliberate cut and then stepping back to see what it does.

Wear gloves and make one clean cut just above a leaf node, then wipe away any irritating milky sap.
Repotting
Rubber plants are relatively slow growers, so repotting every two to three years is usually enough. Signs it’s ready: roots circling the bottom of the pot, roots growing out of the drainage holes, or growth that has noticeably stalled despite good conditions.
Go up one pot size, no more. A pot that’s too large holds too much moisture around the roots, which brings you right back to the overwatering problem. Spring is the best time to repot, when the plant has the energy to recover and settle into its new home. If you want the full step-by-step method, our guide on how to repot plants walks through timing, root checks, and aftercare. If you can do it on a mild, bright day and set it in its usual spot right afterward, so much the better.
A Note on Toxicity
The rubber plant is toxic to cats and dogs. The ASPCA lists Ficus elastica as harmful to both, with ingestion causing oral irritation, excessive drooling, vomiting, and in larger amounts, more serious symptoms. The milky sap is the main culprit, as it’s irritating to mucous membranes on contact and toxic internally.
If you have pets and want something with a similar bold, leafy presence that’s safer to live with, there are some solid options in our guide to cat-safe indoor plants. And if you’re weighing the rubber plant against other dramatic tropical options, the best tropical plants for indoors guide covers a few comparable alternatives.
If a Cat or Dog Chews a Leaf
- Confirm that the plant is really Ficus elastica and not baby rubber plant.
- Wipe any sap from the pet’s mouth or fur if you can do it safely.
- Watch for drooling, pawing at the mouth, vomiting, or obvious irritation.
- Call your veterinarian or Pet Poison Helpline if symptoms appear or if a large amount was chewed.
Prevention is still the simpler fix: place a true rubber plant where pets cannot mouth new leaves or fallen cuttings.
Keeping the Leaves Clean
Those big, glossy leaves collect dust, and dusty leaves are less efficient at absorbing light. Wipe them down every few weeks with a damp cloth. It takes about two minutes and makes a visible difference in how the plant looks, and in how well it can actually photosynthesize. A little neem oil diluted in water works well for cleaning and adds a light layer of pest deterrence at the same time.
Your Simple Care Plan
Today
- Put the plant in bright indirect light, away from vents, radiators, and cold drafts.
- Check the top inch or two of soil before watering.
- Confirm the pot has drainage and no water is sitting in the outer pot.
- Look under the leaves for webbing, sticky residue, or small bumps.
This Week
- Water only if the soil test says it is dry.
- Wipe dusty leaves with a damp cloth.
- Rotate the pot a quarter turn if growth is leaning hard toward the window.
This Season
- Fertilize monthly in spring and summer, then stop in autumn and winter.
- Repot in spring only if roots are circling, poking out of drainage holes, or growth has stalled.
- Recheck light in winter, because a spot that works in July may be too dim in December.

Spring is the practical window to recheck roots, prepare a one-size-up pot if needed, and reassess the plant’s light.
Common Mistakes Rubber Plant Owners Make
- Watering by calendar instead of by soil feel and pot weight.
- Jumping to a much bigger pot when the real issue is light or drainage.
- Treating every yellow leaf like an emergency instead of checking whether it is the oldest leaf on the plant.
- Moving the plant, changing watering, fertilizing, and repotting all in the same week, which makes the real cause harder to spot.
- Assuming every plant called “rubber plant” has the same care and the same pet-safety profile.
Common Problems
Leaf Drop
Sudden leaf loss is the rubber plant’s way of showing stress. It almost always traces back to a change: a new spot, a cold draft, inconsistent watering, or a sudden temperature drop.
What to do: put it back in stable bright indirect light, keep it away from vents and drafts, and water only when the soil is partly dry. New leaves will confirm it has recovered.
Brown Tips, Brown Edges, or Brown Spots
Crispy brown tips usually point to dry air, missed waterings, harsh sun, or heat from a nearby vent. Brown spots with a yellow halo can signal overwatering or, occasionally, a fungal issue.
What to do: check the soil first. If it is bone dry, water thoroughly and move the plant away from hot sun or forced air. If it is wet and musty, hold water, improve drainage, and remove badly damaged leaves.
Yellowing Leaves
Yellow leaves almost always come back to water, too much most often. Lower leaves turning yellow while the soil stays damp is the classic overwatering pattern. Yellowing with crispy edges can mean the plant got too dry.
What to do: feel the soil before acting. Wet soil means wait and improve drainage. Dry, shrunken soil means water deeply, then return to the normal dry-before-watering routine. If yellowing spreads fast and the soil smells musty, unpot the plant, trim black or mushy roots, and repot into fresh, well-draining mix.
Curling Leaves
Leaves that curl inward usually mean the plant is trying to reduce moisture loss. The common causes are underwatering, very dry air, too much direct sun, or root stress from soggy soil.
What to do: check the soil and location. Dry soil needs a full watering. Wet soil needs time to dry and better airflow. If the plant sits in hot afternoon sun, move it back from the window or add a sheer curtain.
Pests
Rubber plants occasionally attract spider mites, mealybugs, or scale. Check the undersides of leaves if you notice sticky residue, webbing, tiny pale speckles on the leaves, or small bumps on the stems.
What to do: isolate the plant, wipe leaves and stems with a damp cloth, then treat with insecticidal soap or neem oil. Repeat weekly until you can inspect the plant without finding new pests.

Isolate the plant, inspect leaf undersides, then wipe and treat the foliage weekly until no new pests appear.
Methodology Note
This article was refreshed against current search results, plant-owner discussions, and extension guidance on June 13, 2026. The directly verified parts are the care and safety claims grounded in Clemson Extension, NC State Extension, Missouri Botanical Garden, and Pet Poison Helpline. Community threads were used only as qualitative signal to surface recurring confusion around yellow leaves, stalled growth, leaf drop, and pet-safety naming mix-ups.
Freshness Note
Last updated June 16, 2026. Re-check seasonal light, room temperature, and your plant’s potting setup before you make a big care change, because those variables explain more rubber plant problems than generic schedules do.
Real User FAQ
These questions reflect recurring owner confusion seen in current plant forums and search results, then checked against the extension guidance above.
How often should I water my rubber plant?
There is no fixed schedule because the right timing changes with light, temperature, humidity, and pot size. In spring and summer, you’ll likely water every 7-10 days. In winter, once every two to three weeks is common. The reliable method is to check the soil: stick your finger an inch or two down. If it’s dry, water thoroughly. If it’s still damp, wait another day or two.
Why are my rubber plant’s leaves turning yellow?
Yellow leaves are almost always a watering signal. Overwatering is the more common cause, especially if the yellowing starts on lower leaves and the soil stays wet for extended periods. Underwatering can also cause yellowing, but usually paired with crispy edges or curling. Less commonly, low light or a nutrient deficiency can contribute. If your plant hasn’t been fertilized in a year and is in low light, both are worth addressing.
Why is my rubber plant dropping leaves?
Leaf drop is a stress response. The most common triggers are: a sudden move to a new location, exposure to cold drafts or a temperature drop, inconsistent watering (especially going from very dry to very wet), or a root system that’s been sitting in waterlogged soil. Identify which change happened most recently and stabilize from there.
Can a rubber plant grow in low light?
It can survive in lower light, but it won’t thrive. Growth slows significantly, new leaves come in smaller and paler, and variegated varieties tend to revert toward plain green as the plant tries to maximize chlorophyll. If you’re working with a genuinely dim space, a grow light makes a real difference.
Is the rubber plant safe for cats and dogs?
No. The ASPCA lists Ficus elastica as toxic to both cats and dogs. The milky latex sap is the irritant, causing oral irritation, drooling, and vomiting if ingested. If you have pets that chew on plants, it’s worth either placing the rubber plant somewhere inaccessible or choosing a pet-safe alternative.
How do I make my rubber plant bushier?
Prune it. Cutting just above a leaf node encourages the plant to send out lateral growth rather than continuing upward in a single stem. Do this in spring when the plant has the energy to respond. Wear gloves, as the sap irritates skin. After one or two cuts, give the plant a few weeks to show you where it wants to branch before making more decisions.
How do I know when to repot my rubber plant?
Look for roots circling the bottom of the pot or emerging from the drainage holes, growth that has slowed despite good light and regular watering, or soil that dries out unusually fast. When you see two or more of these, it’s time. Spring is best. Move up only one pot size, as too much extra soil holds too much moisture.
Can I propagate my rubber plant?
Yes. Stem cuttings work well. Take a cutting with at least two leaves and a node, let the cut end dry for an hour or two to let the sap seal, then place it in water or moist soil. Warmth and bright indirect light help it root. It’s slower than something like a pothos, but it does work reliably.
The rubber plant is a steadfast presence in a home. It doesn’t demand constant attention, it asks for consistency. Steady light, water when it’s ready, a warm spot away from drafts, and it will keep growing upward for years. For a beginner looking to graduate from easier plants, it’s a natural next step, and our beginner indoor plant care guide covers the fundamentals that apply here just as much as anywhere.
If you want personalized reminders for watering, fertilizing, and seasonal care so you’re never guessing, download KnowYourPlant for personalized plant care reminders that track your specific plant’s needs and check in with you at the right moments.